How to Use Props in Photography: Create Better Images and Tell a Story
By Joe Lenton
Props can completely change the meaning, mood and visual impact of a photograph.
Used well, a prop can help tell a story, establish a sense of place, communicate a lifestyle or simply make an image more visually interesting. Used badly, however, props can compete with the subject and leave an image feeling cluttered and confused.
The key is understanding why you are using a prop and what you want it to contribute to the photograph.
From product photography and commercial images to portraits, fine art and newborn photography, the same principle applies: the prop should support the photograph rather than overpower it.
What is the purpose of a prop in photography?
There are two broad reasons for introducing a prop into an image.
The first is artistic enhancement. A prop might introduce an interesting shape, colour, texture or line that makes the composition more attractive.
The second is communication. A prop can help tell the viewer something about the subject, its intended audience, its environment or the story behind the image.
Sometimes it does both.
A carefully chosen object can add visual interest while simultaneously communicating something about the person or product being photographed.
Before adding anything to your set, ask yourself:
What does this prop add to the photograph?
If you cannot answer that question, you may not need it.
Think of every element as part of the message
Photography is a form of visual communication. Everything inside the frame tells the viewer something.
That includes the subject, background, lighting, colour, clothing, location and props.
This is particularly important in commercial photography, where the image may need to communicate the identity of a product or brand in a fraction of a second.
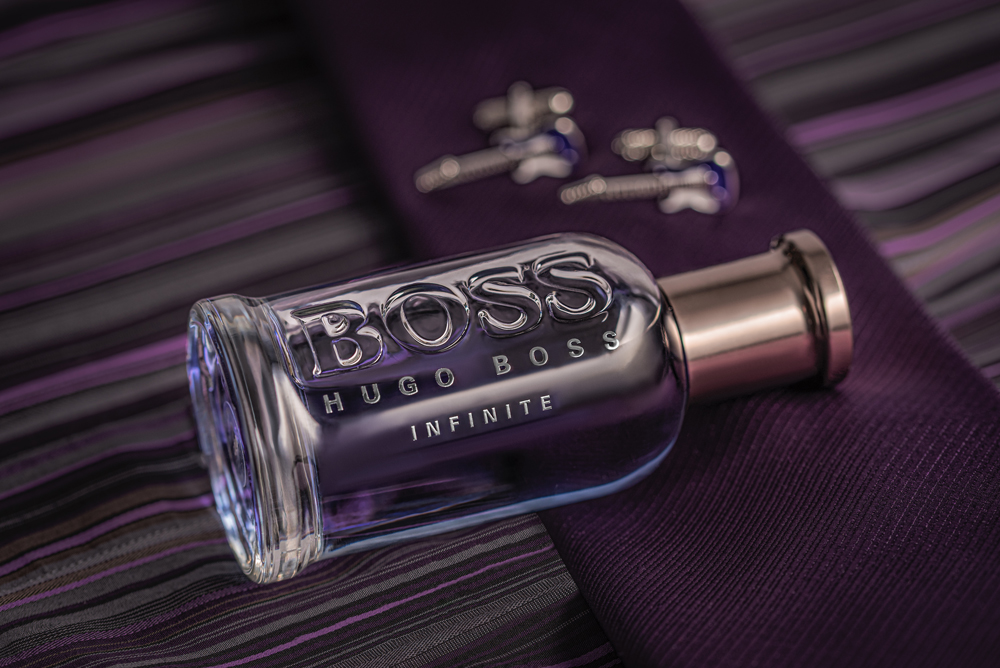
For example, imagine photographing a bottle of aftershave.
The bottle alone may communicate what the product is, but placing it alongside a shirt, tie and cufflinks immediately suggests a particular lifestyle and audience.
The props don’t need to explain that message literally. The viewer makes the connection themselves.
This is one of the most powerful uses of props: creating associations.
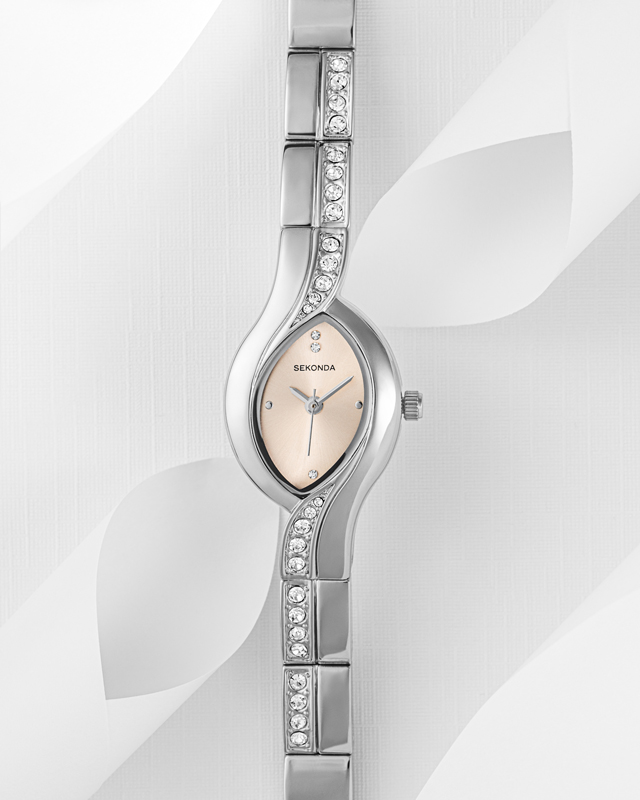
Use props to suggest a lifestyle
Lifestyle associations can help a viewer imagine themselves using a product.
A product photographed in isolation may tell us what it is. A product photographed within an appropriate environment can suggest who it is for and how it fits into someone’s life.
Consider the difference between photographing:
- A watch on a plain background
- A watch surrounded by carefully selected stationery and architectural shapes
- A watch alongside clothing and accessories suggesting a particular lifestyle
- A watch incorporated into a luxury travel or business setting
The product remains the hero, but the surrounding elements influence how we perceive it.
The same approach works with food, fashion, interiors, cosmetics, technology and many other forms of commercial photography.
Choose props that complement your subject
One of the simplest ways to make props work is to look for relationships between their:
- Colour
- Shape
- Texture
- Scale
- Direction
- Position
- Lighting
- Meaning
Colour is particularly effective.
Complementary or analogous colours can create harmony, while contrasting colours can deliberately draw attention to particular elements.
Shapes can also be repeated throughout an image.
For example, a curved object might be positioned alongside a product with a similarly curved form. Repeating that shape can create a visual relationship between otherwise unrelated objects.
The viewer may not consciously identify why the composition works, but they can still feel that the elements belong together.
Props can create visual leading lines
Props are also useful compositional tools.
Lines can guide the viewer’s eye towards the main subject. They can be:
- Horizontal
- Vertical
- Diagonal
- Curved
- Repeated
- Implied
Imagine a portrait where several objects or pieces of fabric create diagonal lines leading towards the person.
The props aren’t necessarily important in themselves. Their purpose is to control how the viewer moves through the photograph.
This is particularly useful when creating elaborate still-life, fine art or conceptual images.
Don’t let your props steal the photograph
One of the biggest mistakes photographers make is adding too much.
A prop might be visually interesting but still be wrong for the image.
In commercial photography, this is especially important. If the photograph is being made to sell a handbag, for example, the handbag needs to remain the dominant element.
Everything else should support it.
This doesn’t mean every prop has to be small, blurred or barely visible. It means that the visual hierarchy of the photograph needs to be intentional.
Ask yourself:
What should the viewer notice first?
Then:
What should they notice second?
If the answer isn’t clear, simplify the composition.
Think about visual hierarchy
Good composition creates a hierarchy between the elements in the frame.
You might have:
- The primary subject
- A secondary prop
- Supporting objects
- Background elements
The further an element is from the primary purpose of the photograph, the less attention it should generally demand.
This is why depth of field, lighting, colour and scale can be so useful.
A foreground prop might be deliberately out of focus. A background object might be partially obscured. Another might be illuminated more subtly than the main subject.
The aim isn’t necessarily realism.
The aim is clarity.
Props don’t have to be realistic
Creative photography doesn’t always require everything in the frame to make literal sense.
A prop can suggest an idea without completely explaining it.
This is particularly powerful in fine art and conceptual photography.
A photograph might include an object representing freedom, confinement, knowledge, danger, protection, time or transformation.
The object doesn’t necessarily need to be immediately understandable.
Leaving some interpretation to the viewer can make an image more intriguing.
Use symbolism to add depth
Props have been used to communicate symbolism in art for centuries.
Historical paintings often contain objects that appear incidental but have a specific meaning within the story.
Photographers can use the same approach.
A candle might represent knowledge or mortality. A book might suggest education. A key could represent access or escape. A particular plant might suggest growth, danger or decay.
The possibilities are almost unlimited.
The important thing is that the symbolism should contribute to the concept rather than simply being decoration.
Direct symbolism
Sometimes the meaning is deliberate and specific.
A conceptual portrait might use several carefully selected objects, each representing a different part of the subject’s story.
Open symbolism
Alternatively, you can deliberately leave the meaning open to interpretation.
An image might contain objects that could represent either safety or imprisonment, freedom or restriction, growth or decay.
This can encourage the viewer to spend longer looking at the photograph.
Props can tell a story
Perhaps the most powerful use of props is storytelling.
Instead of simply asking:
“What looks good?”
ask:
“What story am I trying to tell?”
Once you know the story, choosing the props becomes considerably easier.
Imagine a portrait of a historical character.
Rather than simply dressing the subject in period clothing, you could build an environment containing books, tools, maps, letters and other objects connected with their life.
Each object becomes another piece of information.
The viewer can explore the photograph and gradually discover the story.
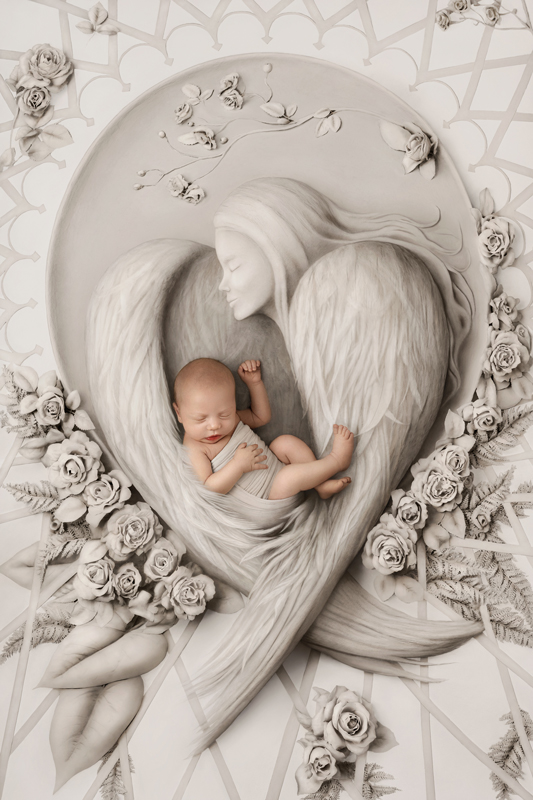
Use props to create a character
Props can also transform the person being photographed.
This is particularly effective when creating elaborate conceptual portraits.
The moment a model puts on a costume, holds an object or enters a carefully constructed environment, their behaviour and posture can change.
They are no longer simply being photographed.
They are becoming a character.
For photographers creating conceptual or narrative work, this can be enormously powerful.
A detailed backstory can help too.
Before photographing a model, explain who their character is, what they have experienced and what they are trying to achieve.
That information can influence the way they stand, look and interact with the environment.
The prop becomes part of the performance.
Create props for your own photography
You don’t have to buy every prop.
Some photographers make their own.
Creating props yourself gives you much greater control over:
- Shape
- Size
- Colour
- Texture
- Materials
- Period
- Style
- Meaning
Even relatively simple materials can be transformed into convincing photographic props.
Foam, foamboard, fabric, paper, cardboard, wire, wood and other inexpensive materials can all be used to construct sets, costumes and accessories.
The process can also become part of your creative development.
Learning to make something forces you to think about its structure and appearance in a different way.
Look beyond specialist photography suppliers
Some of the best photography props don’t come from photography shops.
Try looking in:
- Antique shops
- Charity shops
- Second-hand stores
- Flea markets
- Craft shops
- Hardware stores
- Florists
- Furniture suppliers
- Costume shops
- Your own home
You can also work with craftspeople such as woodworkers, weavers, florists, sculptors and costume makers.
The objective isn’t to accumulate hundreds of objects.
It is to find useful, versatile pieces that can be photographed in different ways.
An old bowl, for example, could be used in a newborn session, still life, food photograph or conceptual portrait depending on how it is styled.
Build a versatile prop collection
Photographers can easily become tempted by every new prop trend.
But a large collection isn’t necessarily a useful collection.
Instead, look for pieces that can be reused in multiple ways.
When buying a prop, consider:
- Can I use it in several types of image?
- Does it fit my photographic style?
- Can I change its appearance through lighting or styling?
- Is it easy to store?
- Is it durable?
- Will it still look good in photographs in several years?
Timeless pieces are often a better investment than props that are fashionable for a few months.
Use your surroundings to develop your style
Your own environment can provide clues about your photographic style.
Look around your home or studio.
What colours dominate?
What textures attract you?
Do you prefer:
- Light and airy spaces?
- Dark and dramatic environments?
- Natural materials?
- Strong geometric shapes?
- Vintage objects?
- Minimalist compositions?
- Rich colours?
These preferences can be translated into your photography.
Instead of trying to copy somebody else’s styling, use the things that already appeal to you as a starting point for developing your own visual identity.
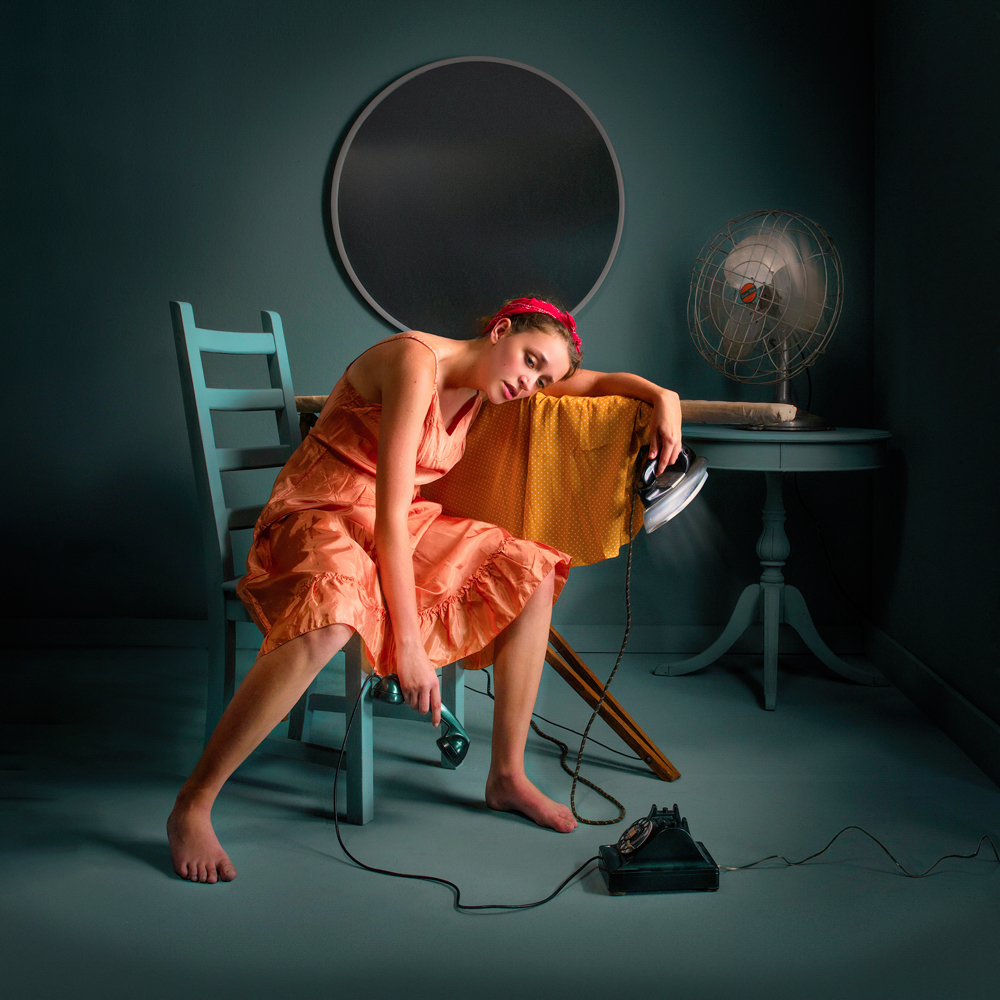
Personal projects are a great place to experiment
There is no need to wait for a client to ask you to create something unusual.
Personal projects give you the freedom to experiment.
You can build a set, make a costume, create an unusual prop or develop a complete visual story simply because you want to see whether it works.
These projects can also improve your commercial photography.
Planning, pre-visualisation, lighting, styling, directing, shooting and post-production are all transferable skills.
A personal project can therefore become both a creative outlet and a form of professional development.
Props in newborn photography
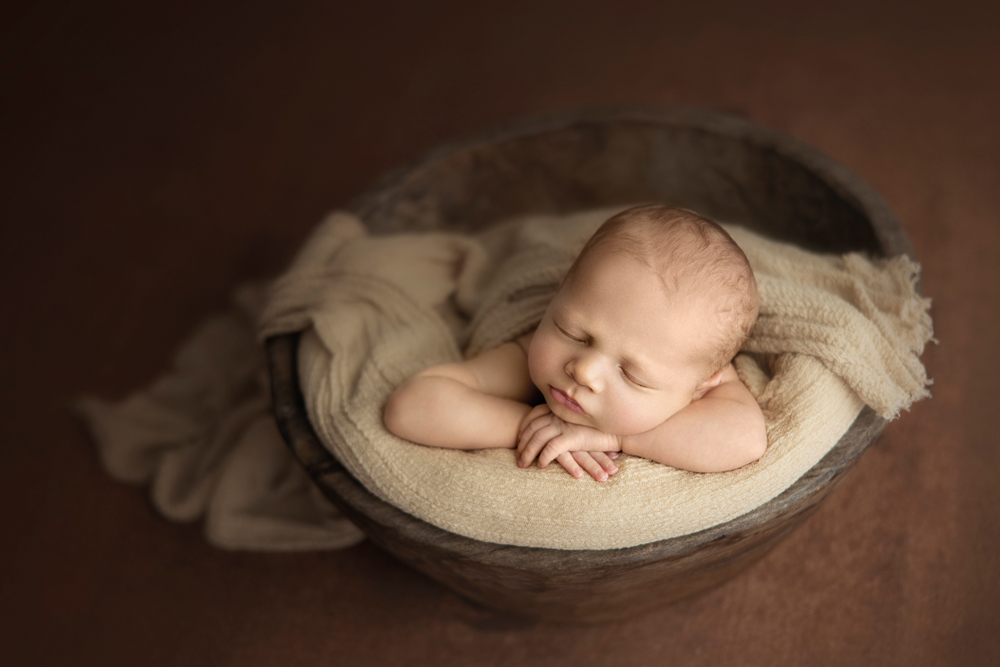
Newborn photography requires a different approach.
Here, props can help create beautiful compositions and personalised images, but the baby’s safety and comfort must always take priority over the photograph.
A prop should never be chosen simply because it looks good.
Choose props carefully
Look for versatile pieces that can be used in different ways rather than buying something new for every session.
Antique bowls, baskets, fabrics and other objects can create distinctive images when styled carefully.
However, every item needs to be assessed for suitability before it is used with a newborn.
Check for:
- Sharp edges
- Splinters
- Cracks
- Loose components
- Unstable construction
- Rough surfaces
- Potential choking hazards
- Unsuitable materials
- Allergens
Props should be clean, stable and appropriate for the baby’s size and position.
Never compromise comfort
A beautiful photograph is never more important than the baby’s wellbeing.
The baby should be supported securely and positioned so that their airway is not compromised.
A responsible adult should remain present and attentive whenever a newborn is positioned on or around a prop.
Some apparently elaborate newborn photographs are created as composites, with several separate images combined in post-production. Where this technique is used, each individual photograph must still be made safely.
If there is any doubt about a prop or pose, don’t use it.
Keep the baby as the focal point
Props should enhance the newborn rather than overwhelm them.
Consider:
- Scale
- Colour
- Texture
- Shape
- Leading lines
- Symmetry
- Negative space
A prop can frame the baby beautifully, while strong lines can guide the viewer’s eye towards the subject.
The simplest compositions can often be the most effective.
Personalise props around the client
Props can also become part of the client experience.
Before a session, ask questions about the client’s interests, family, background and important milestones.
This can provide ideas for personalised styling.
A custom prop might incorporate a hobby, cultural reference, family tradition or meaningful object.
The result is more than a visually attractive photograph.
It becomes a photograph with a personal connection.
Consider the number of layers in your image
Props can be used across different planes of an image:
- Foreground
- Middle ground
- Background
Adding objects across multiple planes can create depth and complexity.
But complexity needs to be controlled.
A photograph with several layers may benefit from more carefully considered props, while a simpler composition may require only one or two elements.
As with seasoning food, add props to taste.
Too much can overwhelm the photograph.
Start with the story, not the prop
A useful way to approach any prop-based photograph is to work backwards.
Start with the idea.
What do you want the viewer to feel?
What do you want them to understand?
Who is the photograph aimed at?
What is the subject?
Then decide what needs to be included in the frame.
Only after that should you start selecting props.
This prevents the common mistake of finding an interesting object and trying to build an entire photograph around it simply because it happens to look good.
A simple checklist for choosing photography props
Before you press the shutter, ask yourself:
1. What is the main subject?
Make sure it remains clear.
2. What does the prop contribute?
It should have a purpose.
3. Does it support the story?
If not, reconsider it.
4. Does it complement the subject?
Look at colour, shape, texture and scale.
5. Is it competing for attention?
If so, reduce its visual impact.
6. Does it fit the intended audience?
Especially important in commercial photography.
7. Can the composition be simplified?
Try removing one element and see whether the photograph improves.
8. Is it safe?
This is particularly important for newborn and child photography.
The right prop can transform an image
A prop doesn’t have to be spectacular to be effective.
Sometimes the most successful prop is the simplest one: a carefully positioned object that creates a visual relationship, communicates a lifestyle or adds another layer to the story.
The important thing is to think beyond decoration.
Every element in your photograph should earn its place.
Whether you’re creating a commercial product photograph, a portrait, a conceptual fine-art image or a newborn portrait, the strongest results come when the props, lighting, composition and subject all work towards the same visual idea.
Choose your props with purpose, use them sparingly when necessary, and always keep the story — and your main subject — at the heart of the photograph.
About the contributors
This feature brought together photographers and creatives with very different approaches to the use of props, from commercial product photography and newborn portraiture to fine-art storytelling, costume creation and elaborate photographic sets.
Their work demonstrates that props don’t have a single purpose. They can communicate lifestyle, establish a period, create symbolism, guide composition, transform a character or simply provide another visual layer within the frame.
The common thread is intentionality: the best props are the ones that help the photograph say something.