How to Read Light for Portrait Photography: Quality, Quantity, Colour and Direction
By Alison Carlino
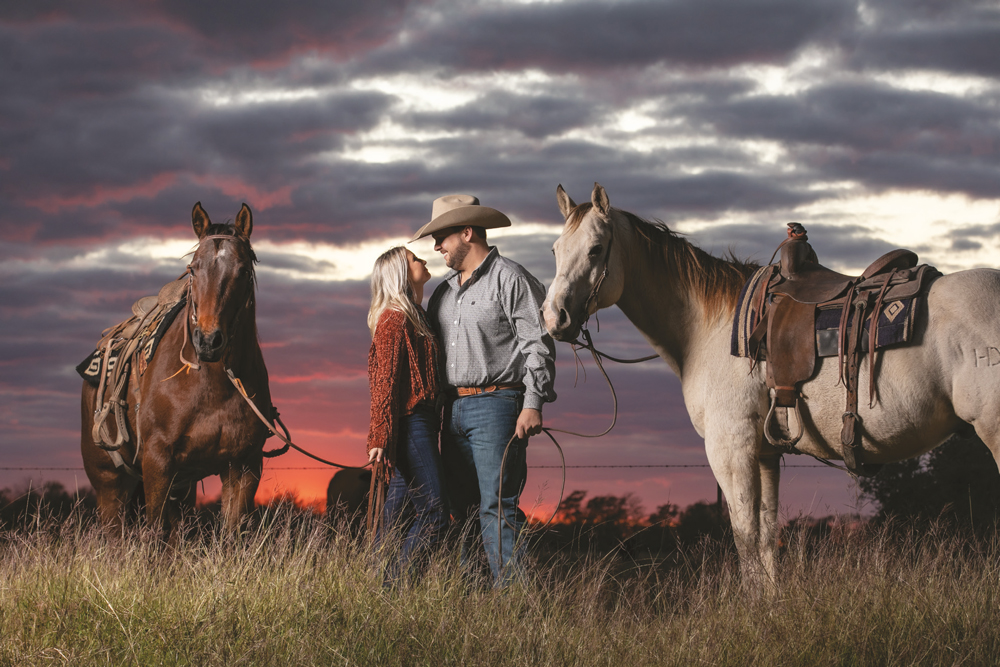
Good portrait photography starts with understanding the light.
You can have the perfect location, a great subject and an excellent camera, but if you don’t understand what the light is doing, you’re often left hoping that everything comes together.
The good news is that reading light doesn’t have to be complicated. When you arrive at a location, take a moment to assess four things:
Quality. Quantity. Colour. Direction.
Once you get into the habit of looking for these four characteristics, you can quickly work out what the light is going to do to your subject and whether you need to change it, work with it or replace it altogether.
The same approach works whether you’re photographing a wedding, a family, an engagement session, a portrait or a fashion shoot.
1. Look at the quality of the light
The first question is simple: is the light hard or soft?
Hard light creates strong shadows and defined edges. Direct sunlight on a clear day is an obvious example, as is a concentrated artificial light source such as a spotlight.
Soft light produces gentler shadows and smoother transitions between light and shade. Overcast skies, large windows and large softboxes can all produce soft light.
Neither is necessarily better. The important thing is understanding what each will do to your subject.
On a bright sunny day, for example, placing someone in the middle of an open field can produce strong shadows beneath the eyes and nose and may cause them to squint. Moving them into open shade can immediately produce a much softer portrait.
Alternatively, you might decide that the hard sunlight is exactly what you want. Fashion, sport and more dramatic portraits can all benefit from strong directional light.
The trick is not to fight the light simply because it is difficult. Ask what the light is offering you and whether it fits the image you want to make.
2. Consider the quantity of light
Next, work out how much light you actually have.
A beautifully lit church interior might have very little available light. A sports hall may appear bright to your eyes but still be relatively dark to your camera, particularly when you’re trying to use a fast shutter speed.
An outdoor portrait in bright sunshine presents the opposite problem.
The quantity of available light affects your exposure settings and also determines whether you need to introduce additional lighting.
Before reaching for a flash, take a moment to consider what you are trying to achieve.
Do you want to record the existing atmosphere? If so, you may want to work with the available light.
Do you want to make your subject stand out from a distracting background? Adding controlled flash can give you much more separation.
Do you want the environment to become almost invisible? You can deliberately reduce the exposure given to the ambient light and then build your portrait using your own lighting.
This last technique can be particularly effective when the location itself isn’t especially attractive.
3. Learn to read the colour of light
Light isn’t always neutral.
The colour of natural light changes throughout the day. Sunrise and sunset can produce warm, golden tones, while an overcast sky can introduce a cooler appearance.
Artificial light can be even more complicated.
Different types of lighting may produce different colour temperatures, and a venue can contain several light sources at once. Add coloured walls, wooden floors, grass or other nearby surfaces and your subject can pick up unwanted colour reflected from the environment.
This is particularly noticeable with white clothing.
A white shirt or wedding dress can take on the colour of the surface or light surrounding it, which may be difficult to correct later.
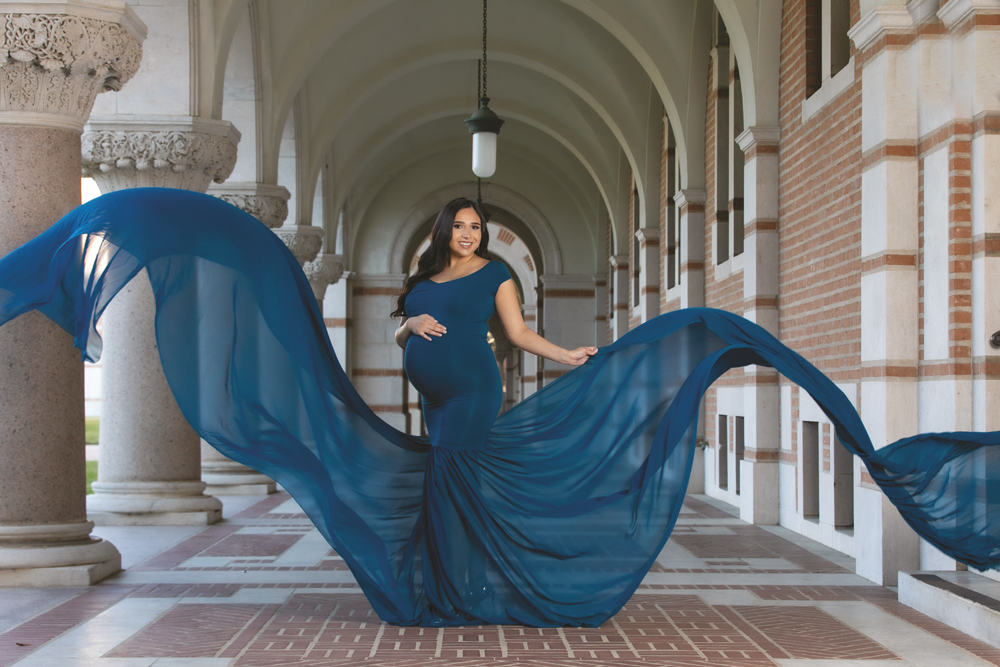
Correcting mixed or unwanted colour
Your camera’s white balance gives you one way of controlling the overall colour of the image, but mixed lighting can be more complicated.
For example, if you’re photographing in a venue with very warm artificial lighting, you might choose a cooler white balance to counter some of that warmth.
If you’re adding flash to an environment with strongly coloured ambient light, you can also use a colour-correcting gel on the flash so that the additional light works more naturally with the existing light.
This becomes particularly important when you are deliberately balancing flash with ambient light rather than trying to overpower it completely.
And colour doesn’t always need correcting.
Sometimes the warm glow of a reception venue, the colour from a shop sign or the blue light of dusk is an important part of the photograph.
As with everything else, first decide what you want the final image to look like.
4. Look at the direction of the light
Finally, ask yourself:
Where is the light coming from?
Look around your subject rather than simply looking at the subject themselves.
Is the light directly overhead?
Is it coming from the side?
Is your subject backlit?
Is there light bouncing off a nearby wall?
Could a doorway or window provide a better direction?
Direction has a huge influence on the shape of a portrait.
Side lighting can emphasise texture and create stronger modelling across the face. Front lighting can produce a flatter, more evenly lit portrait. Backlighting can separate the subject from the background and create a rim of light around them.
You can also use the existing environment as part of the composition.
A brightly lit shop window, street sign or neon display might become an important element in the background. Instead of trying to eliminate these sources, expose for them and then use your own lighting to control the subject.
When the location isn’t working
Sometimes you arrive somewhere and immediately realise that the available light isn’t going to give you the photograph you had in mind.
The light may be inconsistent, the background may be distracting or the venue may simply have very little character.
This is where controlled lighting becomes particularly useful.
One approach is to deliberately reduce the influence of the ambient light and then build the image yourself.
The principle is straightforward:
Make the ambient exposure darker, then add your own light.
You might reduce your ISO, stop down your aperture or increase your shutter speed within the limits of your camera and flash system. The aim is to bring the unwanted environment down to a level where you can decide how much of it remains visible.
You can then introduce your main light, followed by additional lights if required.
A rim light might separate the subject from the background. A second light could illuminate part of the environment. A small amount of fill might bring back detail in the shadows.
Modifiers and grids can also help control where the light goes. If you’re photographing in an unattractive room, the last thing you necessarily want is for your softbox to illuminate every wall and surface around your subject.
The important thing isn’t a particular combination of ISO, aperture and shutter speed.
It’s understanding the relationship between ambient exposure and flash.
Once you understand that relationship, you can use it in almost any location.
Light and posing need to work together
Lighting is only part of a successful portrait.
When you’re photographing people, the pose, expression and relationship between your subjects all need to work with the light.
Sometimes the location will suggest the pose.
At other times, the people themselves will suggest what works.
A family with young children, for example, might start with a few more traditional portraits while everyone is fresh. Once the formal photographs are done, you can introduce movement and interaction.
Walking, playing, swinging, running, reading, riding a bike or doing something the family genuinely enjoys can produce much more natural expressions.
It also gives people something to do.
That’s particularly useful when someone feels uncomfortable simply standing in front of a camera.
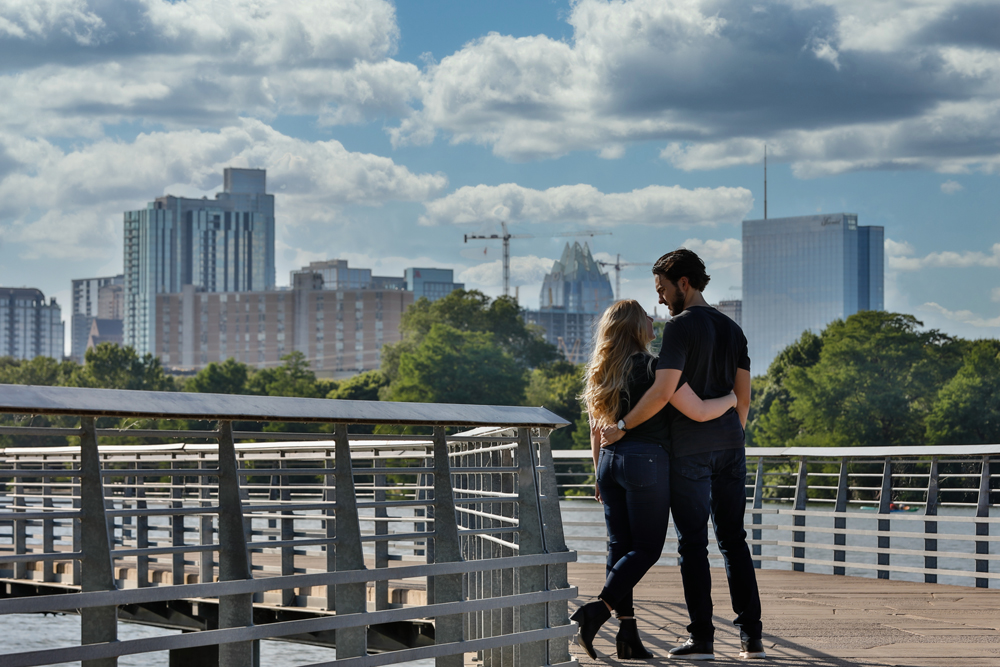
Helping couples relax
Couples can have exactly the same problem.
Many people aren’t used to being photographed together and can become self-conscious as soon as the camera comes out.
One way to make things easier is to give them something to do rather than continually asking them to pose.
Ask them to walk together.
Talk to each other.
Look at one another rather than the camera.
Hold hands.
Dance.
Interact with a pet.
Move towards each other and then apart.
These simple actions can create opportunities for genuine expressions and interactions while giving you something to photograph.
It can also help to start with a few straightforward photographs before moving into more adventurous poses.
Once the couple realises that you’re confident about what you’re doing, their nerves often start to disappear.
Give people direction without making them feel posed
Being a confident photographer doesn’t mean barking instructions at people.
Your job is to guide them.
Think about your voice as another lighting tool: it can change the mood of the session.
An energetic voice can encourage movement and enthusiasm. A quieter, calmer approach can help create a more intimate mood.
Tell people what you like.
If something works, let them know.
If you want them to change position, give them a clear reason or a simple instruction rather than leaving them wondering what they’re supposed to do.
Most importantly, don’t expect your clients to know how to pose like professional models.
That’s your job.
They have hired you because you understand photography and can guide them towards the finished image.
Use the location to tell their story
The best location isn’t necessarily the most spectacular one.
For couples and engagement sessions, a meaningful place can be much more valuable than an impressive backdrop.
It might be where they met, where they studied, a favourite walk, a place connected to a hobby or somewhere they simply enjoy spending time together.
These details give the photographs context.
A couple’s story is more interesting than a generic collection of attractive poses.
The same principle applies to family photography. Ask what the children enjoy doing and incorporate those interests into the session.
The result can become a record of what family life actually looked like at that particular point in time.
Think about the finished photograph
One of the most useful habits you can develop is to start imagining the finished photograph before you start taking it.
Rather than arriving at a location and immediately looking for somewhere to stand, ask yourself:
- What mood do I want?
- Where should the subject be?
- What is the light doing?
- Can I work with the existing light?
- Do I need to change it?
- What should be visible in the background?
- Where should the shadows fall?
- What pose fits the location?
- How can I make the subject feel comfortable?
Then work backwards.
If you want a dramatic portrait with a dark background, the lighting decisions become easier.
If you want a bright, natural family photograph, your approach will be different.
If you want a romantic couple’s portrait at dusk, you might deliberately include the changing colour of the sky and use flash to keep the couple separated from the background.
The final image should drive the technical decisions.
Make reading light instinctive
The more you practise this, the quicker it becomes.
Eventually, you should be able to walk into a room and immediately start assessing the light without having to consciously work through every question.
Look at the windows.
Look at the shadows.
Look at the colour of the walls.
Look at the direction of the light.
Look at how your subject’s face changes as they move.
Then decide whether you want to use the light, modify the light or replace it.
There is no single correct way to light a portrait.
Natural light can be beautiful. Flash can be dramatic. Hard light can be exciting. Soft light can be flattering. Mixed colour can be a problem or it can become part of the image.
The skill is being able to recognise what the light is doing and then make a deliberate choice.
So when you arrive at your next location, don’t immediately reach for the camera.
Stop. Read the light. Decide what you want to create. Then make the light work for you.