Food Photography Tips: How to Create Better Food Photos
By Emma Dunham
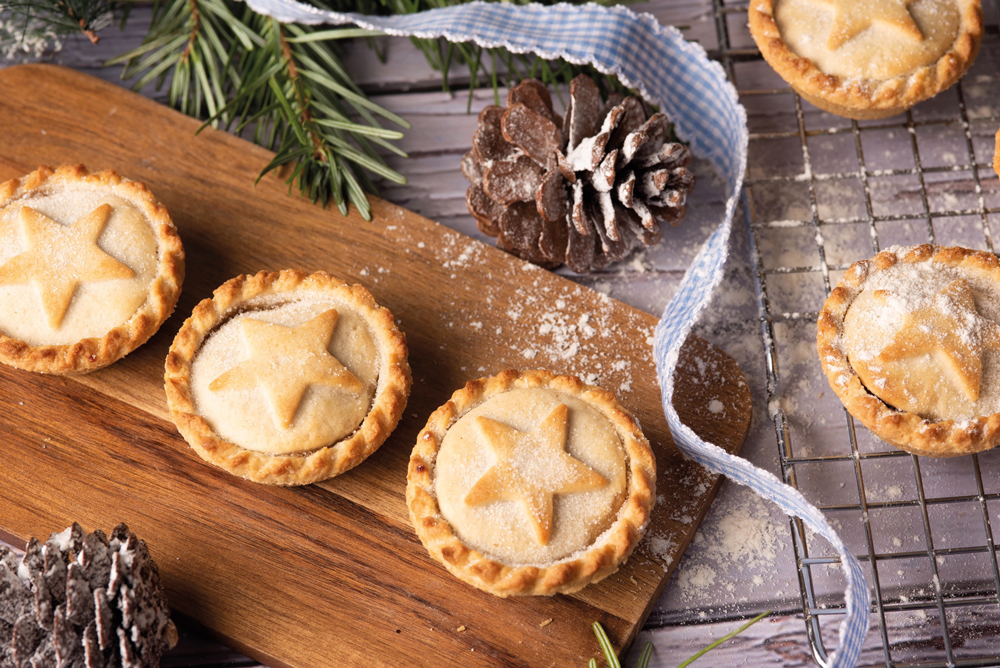
Food photography can look deceptively simple. Put a plate on a table, find some good light and take the photograph.
In reality, creating a compelling food photograph involves many of the same decisions as any other form of photography: what do you want the viewer to notice, how should they feel when they see the image, and how can lighting, composition, colour and styling help you achieve that?
Multi-award-winning food photographer Emma Dunham takes a very deliberate approach to her images. Her work ranges from commercial food and drink photography to highly creative conceptual photographs.
One of her most ambitious images was Medusa (see below), which earned her second place in the Fujifilm category for Innovation in the Pink Lady Food Photographer of the Year competition. The image is a useful example of how an idea can develop from a concept into a finished photograph.
But you don’t need a complicated concept or a professional studio to start improving your own food photography. The same principles can be applied to everything from a simple cake at home to commercial food photography.
Start with the idea, not the camera
Before you think about camera settings, ask yourself a simple question:
How do you want people to feel when they look at the food?
Food doesn’t automatically have an emotion attached to it. You have to create one.
Is the image supposed to feel:
- comforting?
- natural?
- elegant?
- rustic?
- luxurious?
- colourful?
- dramatic?
- playful?
- creative?
Once you know the feeling you want to create, decisions about backgrounds, props, lighting and composition become much easier.
This was particularly important for Emma’s Medusa image. The idea had been in her head for some time before the photograph was made. The vegetables, model, make-up and final composition all had to work together to create the intended character.
That is an important lesson for any type of photography: don’t let the camera dictate the photograph. Decide what you want to create first.
Choose your background and backdrop
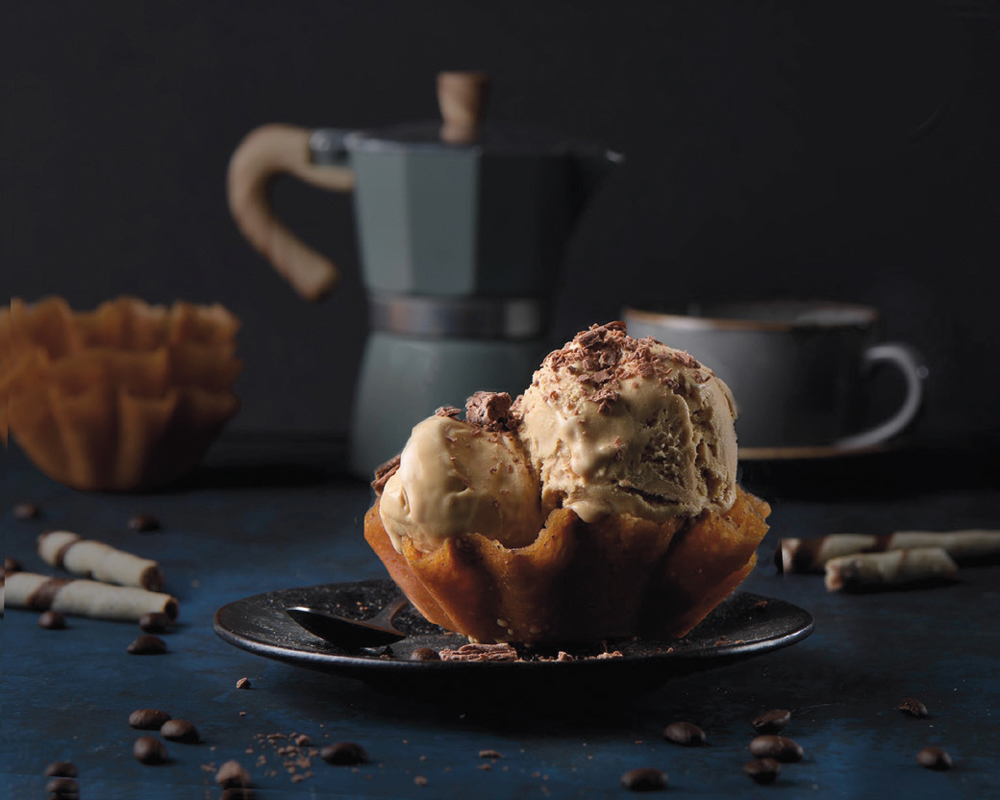
Your food doesn’t necessarily have to sit directly on the same surface as the background behind it.
You might place a plate on a wooden table while using a separate backdrop behind it. This gives you much greater control over the overall look.
Start by looking at the colours in the food.
If you’re unsure which background colour to choose, a colour wheel can help. Complementary colours can create contrast and make the food stand out, while closely related colours can produce a quieter and more harmonious image.
Think about the mood, too.
A dark background can help create a moody, dramatic photograph, while lighter surfaces can produce a fresh and airy feel.
You don’t need an expensive collection of specialist backgrounds. Old wood, worn boards, card, painted surfaces and other everyday materials can all work extremely well.
In fact, imperfections can be useful. A slightly scratched or weathered surface can often look more authentic than something that is perfectly new.
Use props to support the food
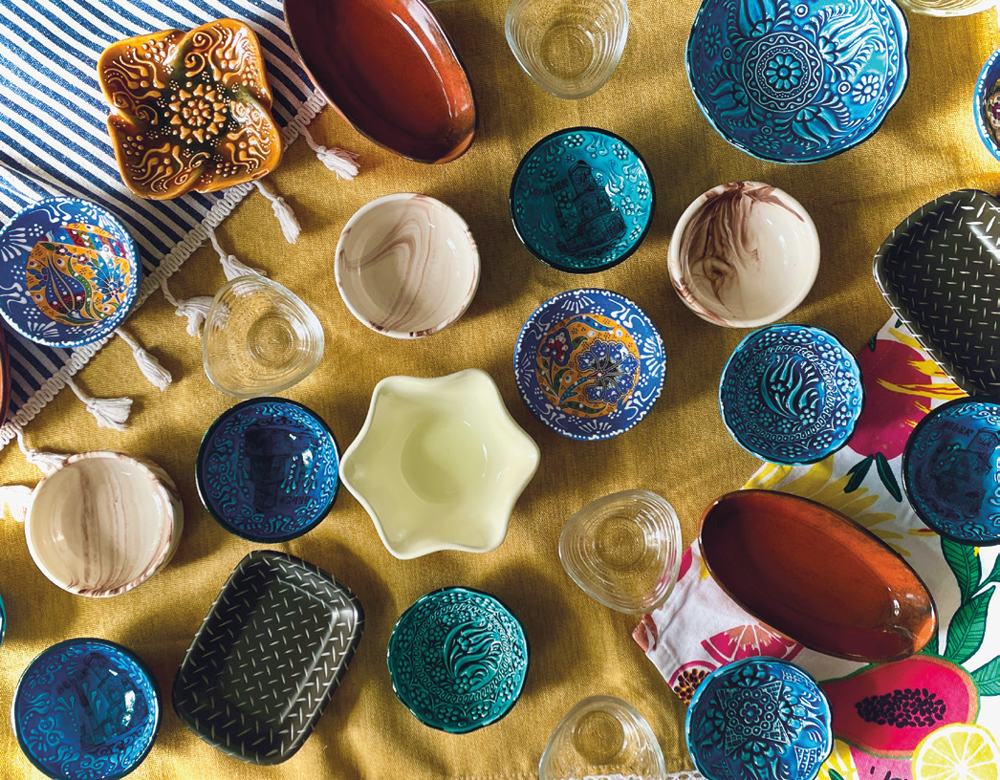
Props should have a purpose.
Plates, bowls, cutlery, napkins and ingredients can all help establish the mood of the photograph and tell the viewer something about the food.
Look for objects that complement rather than compete with your main subject.
Small plates and bowls are often more useful than large dinner plates because they allow the food to remain the dominant element of the photograph.
You don’t need to spend a fortune building a collection. Charity shops, car-boot sales, antiques fairs and even friends’ kitchen cupboards can provide interesting pieces.
Older cutlery and crockery can work particularly well because worn surfaces tend to produce less distracting reflections than highly polished new items.
The important thing is to choose props after considering the food and the story, rather than simply adding objects because there is empty space in the frame.
Give your food a hero
Think of your food photograph like a film set.
There should be a hero.
The main dish or ingredient needs to attract the viewer’s attention, while everything around it should support that subject.
You can make the hero stand out through:
- size
- position
- lighting
- sharpness
- colour
- contrast
- depth of field
The supporting elements shouldn’t be fighting for attention.
If every object in the photograph is equally bright, colourful and prominent, the viewer won’t know where to look.
Before pressing the shutter, ask yourself:
What should the viewer notice first?
Then arrange the photograph accordingly.
Don’t be afraid to break the rules
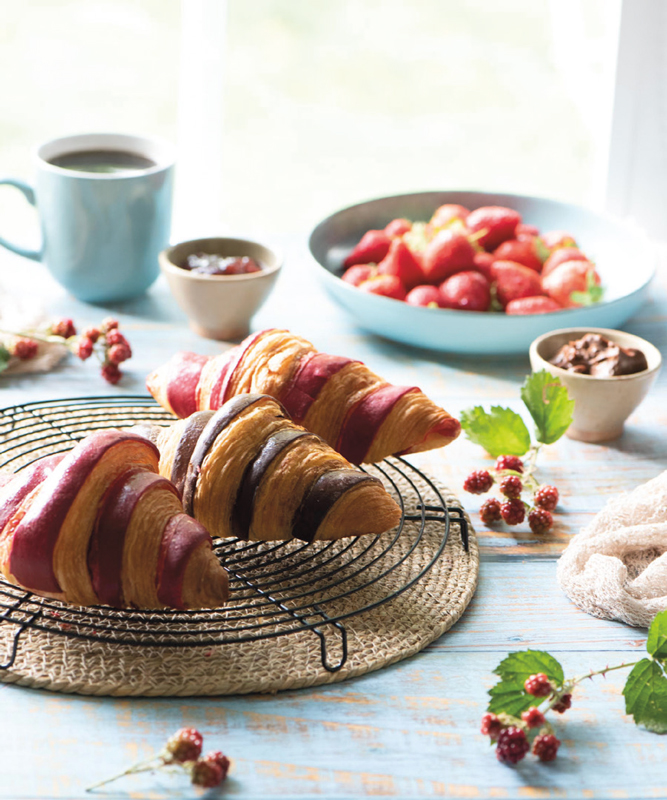
Composition guidelines such as the rule of thirds can be useful starting points, but they aren’t laws.
Moving the food away from the centre can create space and visual movement, while a central composition can sometimes be much more effective.
The same applies to the rule of odds.
Groups of three or five objects can often create an attractive arrangement, but an even number can work perfectly well when the objects are arranged naturally.
Use these ideas as tools rather than restrictions.
Use leading lines
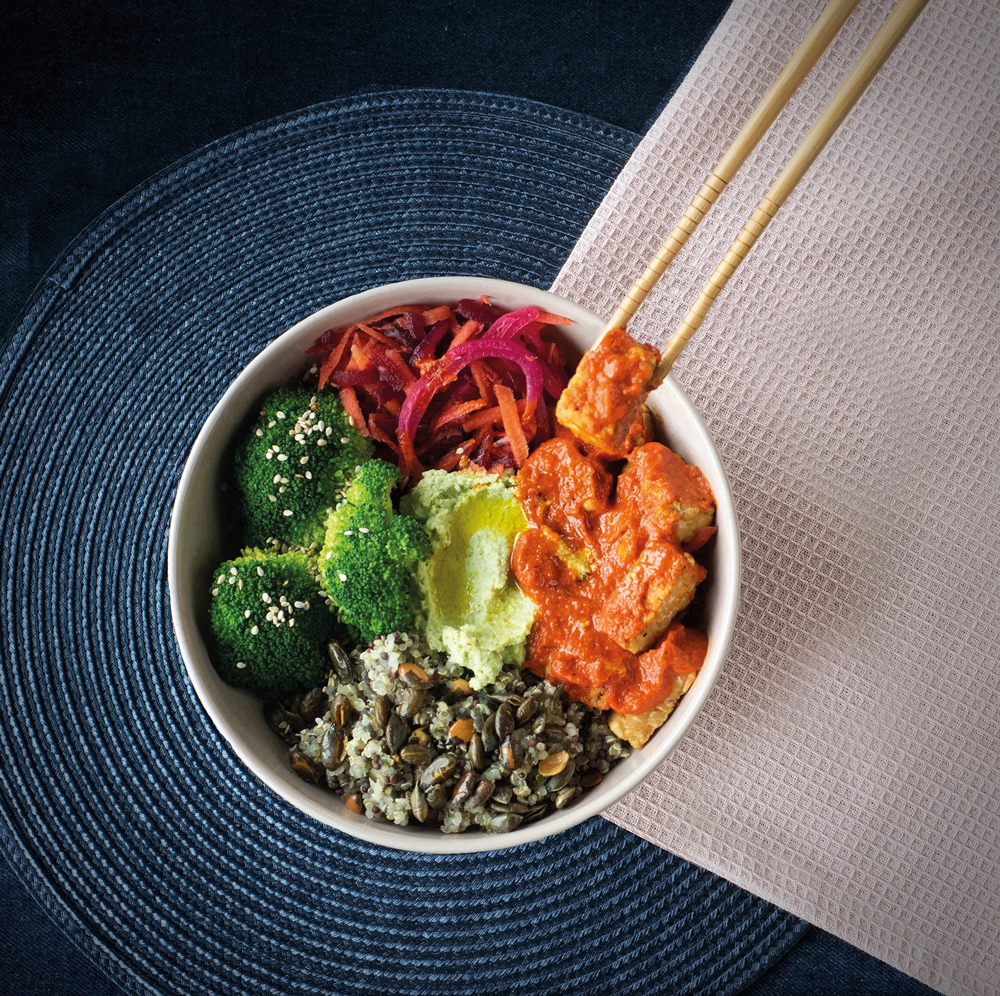
Food photography gives you plenty of opportunities to guide the viewer’s eye.
Cutlery, chopsticks, knives, drizzles, sprinkles and even the grain of a wooden surface can become leading lines.
Arrange them so that they help direct attention back towards the main subject.
For example, a spoon placed diagonally towards the main dish can subtly lead the eye into the photograph.
The trick is to make the composition feel natural. You don’t want the viewer to notice the technique; you want them to simply follow the visual path.
Tell a story with the ingredients
A food photograph can show much more than the finished dish.
Think about the story behind it.
Could you include some of the ingredients? What about the baking tray, cooking utensils or accompaniments? Perhaps the finished cake is paired with coffee, or a meal is shown alongside the ingredients used to make it.
These elements give the viewer additional information and can make the photograph feel more authentic.
Rather than simply photographing what the food looks like, think about photographing the story of the food.
Choose the right camera angle
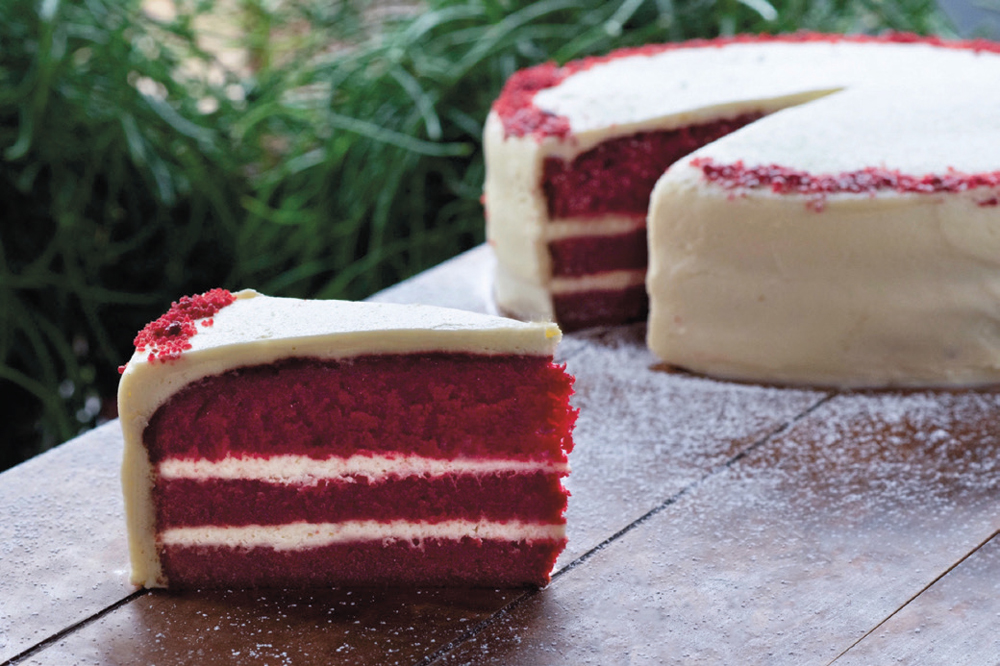
There are three useful starting points for food photography.
Straight on
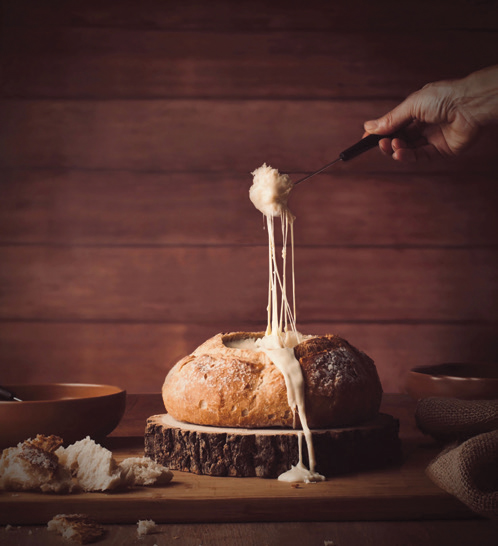
An eye-level or relatively low angle works particularly well when the food has height or multiple layers.
Think about:
- burgers
- sandwiches
- lasagne
- trifles
- layered desserts
This viewpoint allows you to show the different layers and textures.
Around 45 degrees
A 45-degree angle is a versatile option for many dishes.
It’s particularly useful when you want to see both the top of the food and some of its sides.
It works well for bowls, plates and dishes where the detail is spread across the surface but you still want to show depth.
Flat lay
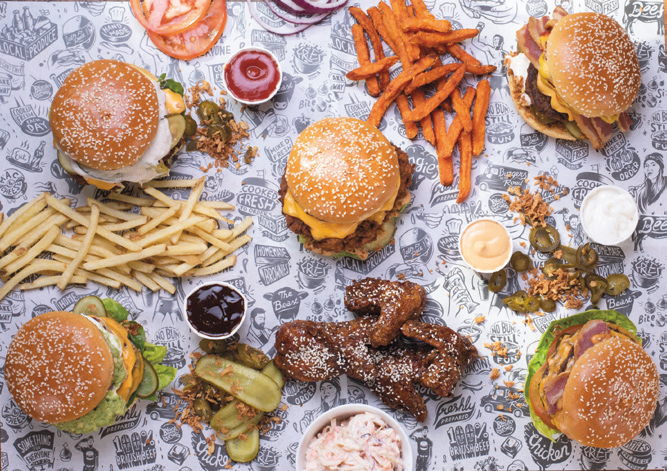
A flat lay is ideal when the most important details are visible from above.
Pizzas, quiches, cakes and tartlets can all work well from this viewpoint.
And don’t assume a flat lay has to be photographed on a table.
If you have a suitable floor surface, use it. The priority is finding the right surface and composition, not finding increasingly elaborate ways of getting a camera directly above a table.
Use lighting to create shape
Whether you use natural light or artificial light, the direction of the light is critical.
Two particularly useful starting points are side lighting and backlighting.
Side lighting
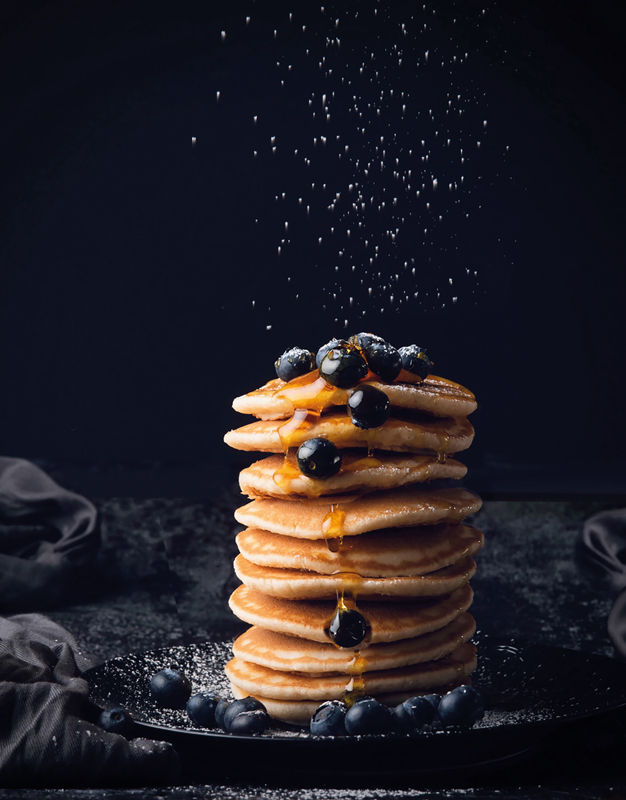
Place your light source to one side of the food.
This can create attractive shadows and reveal the shape and texture of the food.
Shadows can also help anchor the food to the surface and prevent it from appearing to float in the frame.
Side lighting is particularly useful when texture is important.
Backlighting
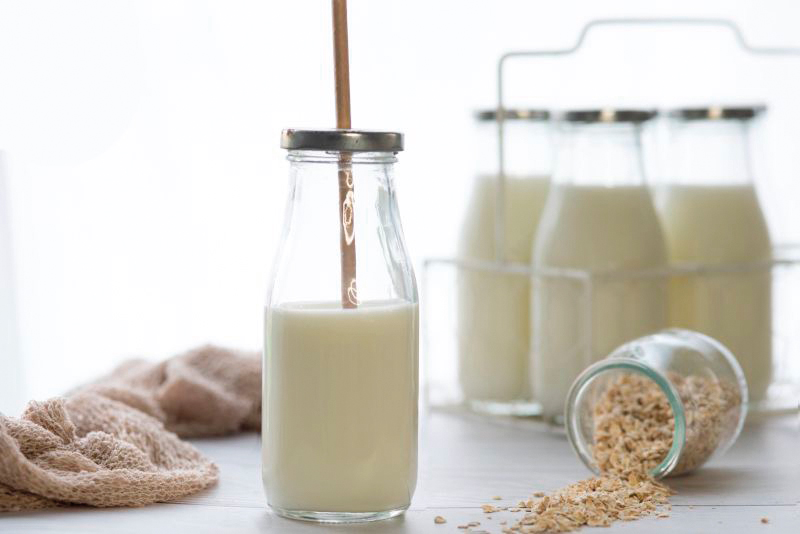
Position the food between the camera and the light source.
Backlighting can produce a lighter, brighter look and can be particularly effective with translucent ingredients, drinks and foods where you want to emphasise colour and texture.
It can also create attractive highlights around the edges of the food.
Don’t be afraid of shadows
One of the common mistakes in food photography is trying to eliminate every shadow.
Shadows can give food shape and depth.
If the shadows are too dark, you don’t necessarily need another light. Try bouncing some of the existing light back towards the subject using a reflector, white card or another suitable surface.
This gives you control over the contrast while retaining the direction and character of the main light.
Get your camera settings working for the food
There isn’t one correct set of camera settings for food photography.
Your settings will depend on the light, subject, movement and amount of depth of field you need.
A good starting point is to think about the three main exposure controls.
Aperture
A wider aperture can give you a shallower depth of field, which can work well for close-up photographs where you want the background to become soft and unobtrusive.
A narrower aperture gives you more depth of field, which can be useful when photographing several objects or a row of products that all need to remain sharp.
The important question is not simply “What aperture should I use?”
Ask:
How much of the photograph needs to be sharp?
Shutter speed
For a completely static subject on a tripod, you can often use a relatively slow shutter speed if necessary.
But food photography isn’t always static.
Pouring, sprinkling, dripping and other actions introduce movement, so you’ll need to consider shutter speed if you want to freeze that action or deliberately introduce motion blur.
A tripod can also help you keep the composition consistent while you adjust your settings.
ISO
Use the lowest practical ISO for the lighting conditions and the amount of shutter speed and aperture flexibility you need.
Good light will generally allow you to keep ISO lower, but don’t be afraid to increase it when the situation requires it.
The key is balancing ISO, aperture and shutter speed rather than treating one particular combination as a rule.
White balance
White balance affects the colour and mood of the photograph.
Food can quickly look unappetising if its colour is badly rendered, so keep an eye on the colour of your light and make sure the camera is interpreting it correctly.
If you’re working under consistent artificial lighting, setting a specific white balance can provide greater consistency. With mixed or changing light, you may need to adjust your approach.
Always judge the result against the food itself rather than relying on a particular Kelvin value as a universal setting.
Consider the practical side of food photography
Food changes.
Ice cream melts. Sauces move. Fresh ingredients lose their freshness. Steam disappears. Cakes can dry out.
This means preparation is often just as important as photography.
For complicated photographs, it can be useful to build the scene before introducing the most delicate elements.
You can also use a stand-in object while setting up your composition and lighting, replacing it with the actual food when everything is ready.
This is particularly valuable when you’re working against the clock.
For a beginner, relatively stable foods such as cakes and biscuits can be useful subjects because they give you more time to experiment.
The making of Medusa
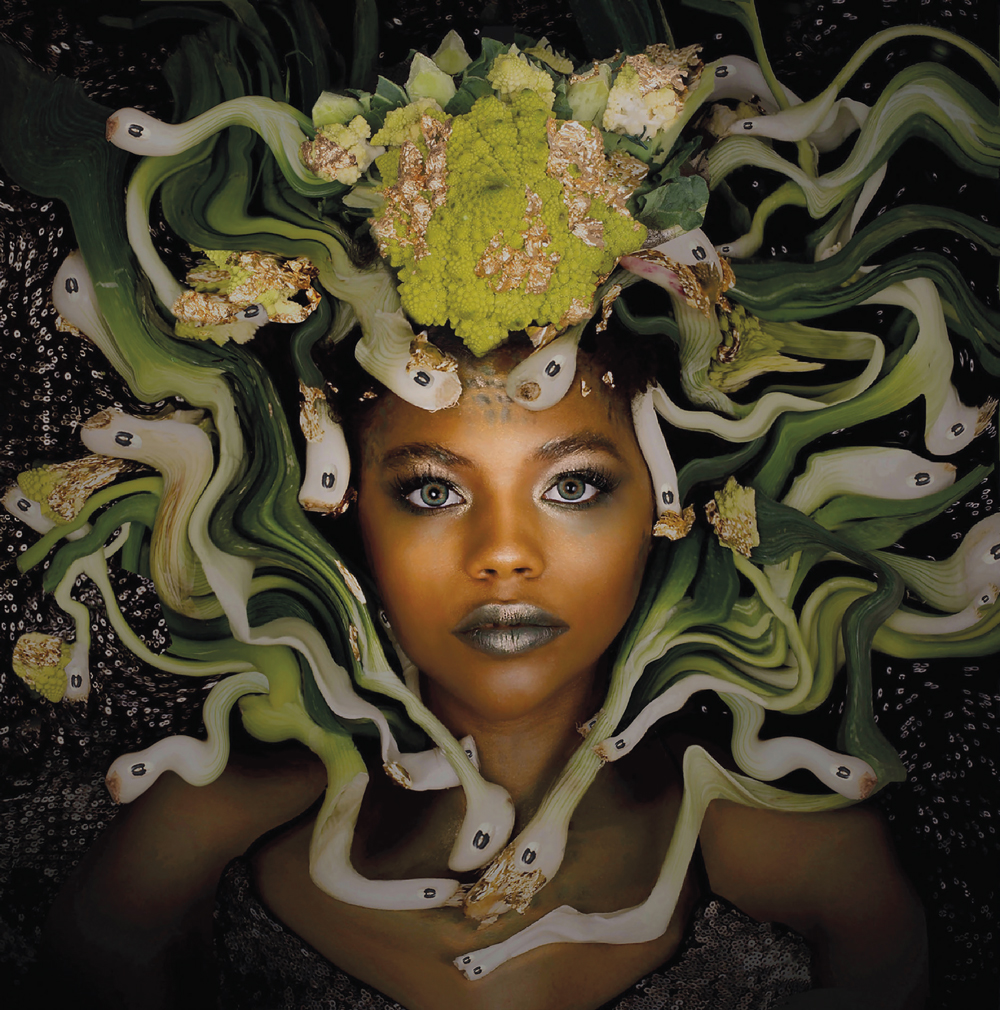
Emma’s Medusa photograph demonstrates just how much planning can sit behind a single finished image.
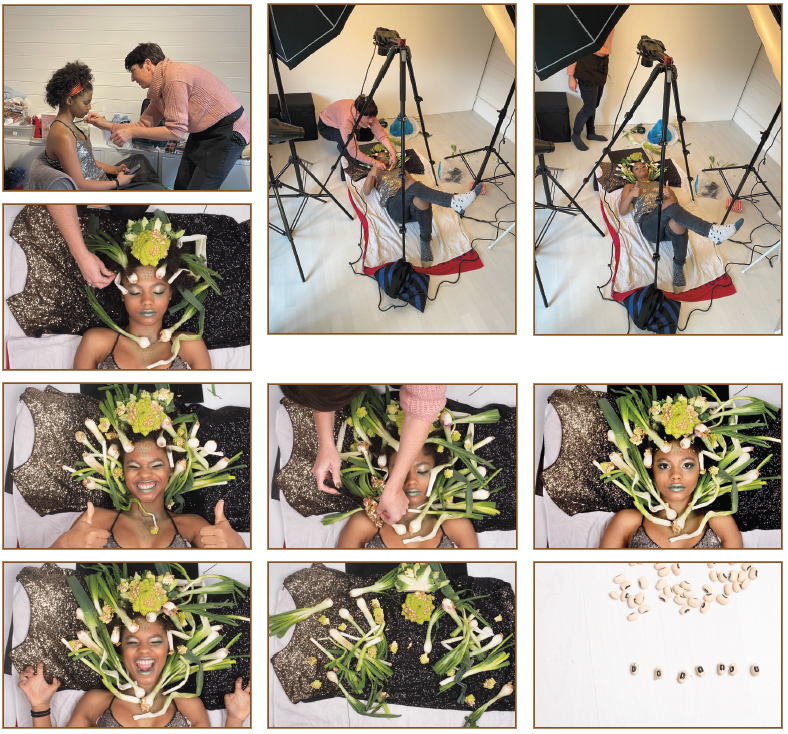
The concept called for Medusa’s snake-like hair to be created from vegetables. Emma knew she wanted to use spring onions and leeks, while theatrical make-up artist Zoe suggested using Romanesco to cover the front of the model’s hair.
Because of the way the vegetables needed to be arranged, the photograph was created as a flat lay.
The model was positioned on the floor while the vegetables were pinned into her hair and arranged to create the snake-like shapes.
Some of the twisting was then refined in Photoshop using Liquify.
Emma also photographed black-eyed peas separately and added them later as the eyes of the snakes.
The final image therefore wasn’t simply a case of placing food on a plate and taking a photograph. It involved:
- developing the concept
- selecting the right model
- working with a make-up artist
- choosing appropriate ingredients
- designing the composition
- solving the practical problems of the set
- lighting the scene
- photographing additional elements
- and completing the image in post-production
That is an important lesson for creative food photography.
The photograph starts long before you pick up the camera.
Don’t be afraid to experiment
Once you understand the basic principles, start deliberately breaking away from them.
Try an unusual angle.
Use an unexpected background.
Create a photograph around an idea rather than simply documenting a dish.
Introduce movement.
Photograph ingredients separately and combine them later when the concept requires it.
Food photography gives you enormous scope for creativity because the subject can be both the object you’re photographing and part of the visual storytelling.
The most memorable images often come from asking:
“What if I did this differently?”
A simple checklist for better food photography
Before you take the photograph, run through this checklist:
1. What is the hero?
Know exactly what you want the viewer to notice first.
2. How should the photograph feel?
Decide whether you’re aiming for something elegant, rustic, dramatic, fresh, playful or something else.
3. Do the background and props support that feeling?
Remove anything that doesn’t contribute to the image.
4. Is the composition working?
Consider the rule of thirds, central composition, leading lines and the arrangement of objects.
5. Is the camera angle right for the food?
Try straight on, around 45 degrees or a flat lay.
6. Where is the light coming from?
Try side lighting or backlighting and use a reflector to control deep shadows.
7. What needs to be sharp?
Choose your aperture and focus point accordingly.
8. Is anything moving?
Adjust your shutter speed if you’re photographing pouring, sprinkling or other action.
9. Does the colour look right?
Check your white balance and the colour of the light.
10. Does the photograph tell a story?
If appropriate, use ingredients, props and surroundings to show more than just the finished dish.
Think before you shoot
Good food photography isn’t simply about having the right camera, lens or lighting equipment.
It’s about making decisions.
Decide how you want the photograph to feel. Choose the food that will be your hero. Build the background and props around it. Consider the composition and camera angle, then use light to give the food shape, texture and atmosphere.
The more deliberately you make those decisions, the less you’ll rely on luck when you press the shutter.
And if you have a creative idea in your head, don’t dismiss it because it seems complicated.
Plan it.
Break it down into individual elements.
Solve each problem one at a time.
That is how an idea like Medusa can eventually become a finished photograph.