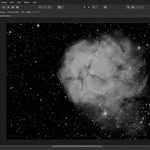
Astrophotography for Beginners: How to Photograph the Night Sky
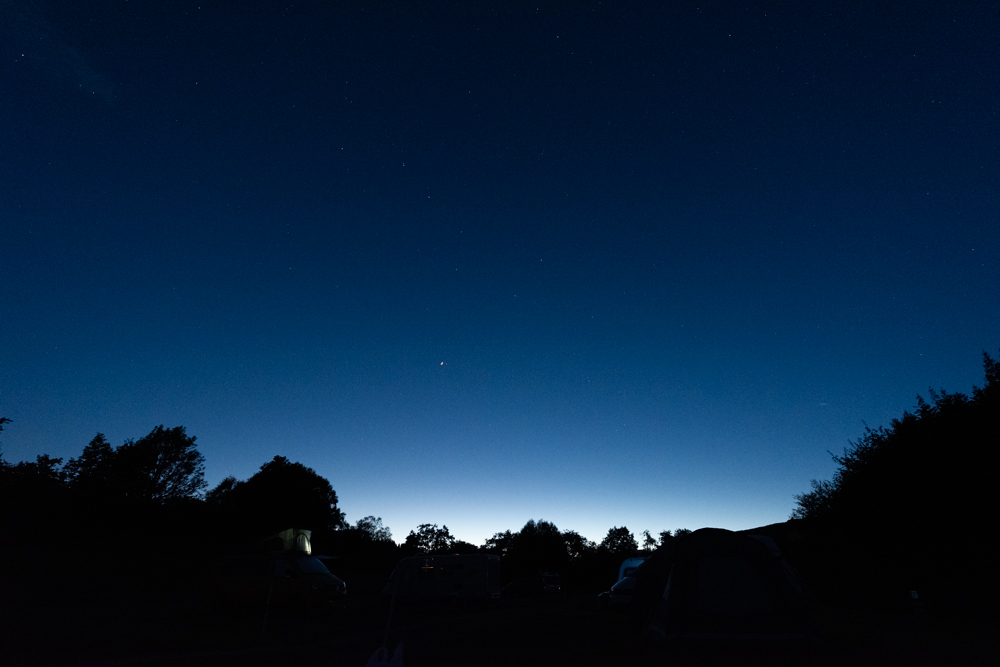
Astrophotography can look like an expensive and technically complicated branch of photography, but you can make surprisingly good images of the night sky with a conventional digital camera, a wide-angle lens and a sturdy tripod.
The real challenge is learning how to balance shutter speed, aperture and ISO while keeping the stars sharp and avoiding excessive noise or star trails.
A visit to the Northumberland Dark Sky Park provided an opportunity to put some of these techniques into practice and explore what can be achieved with relatively modest equipment.
Why dark skies make such a difference
The darker the location, the more stars your camera can record.
Light pollution from towns and cities creates a bright background that reduces contrast and hides the fainter stars. Away from major sources of artificial light, a camera can reveal stars and areas of the Milky Way that may be difficult to see with the naked eye.
This is one reason recognised Dark Sky locations are so popular with astrophotographers.
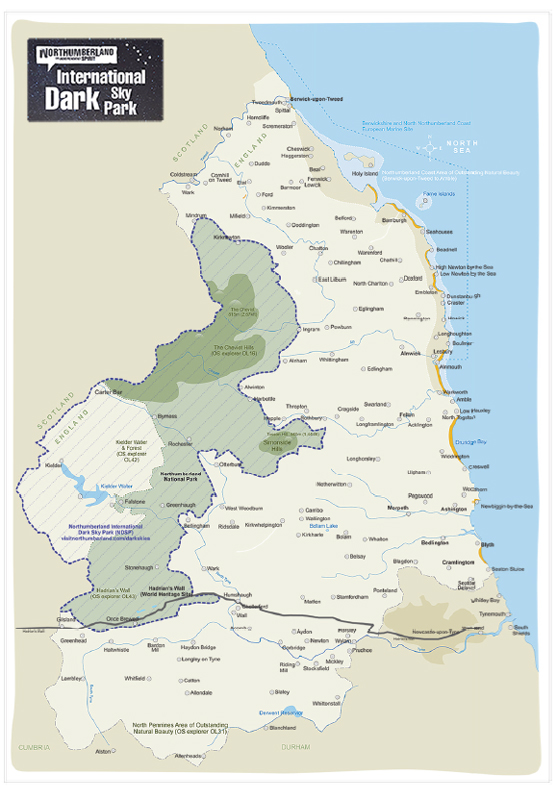
The Northumberland International Dark Sky Park, around Kielder and the Cheviot Hills, is one such location. The area is relatively remote and restrictions on artificial lighting help preserve the darkness of the night sky.
However, you don’t necessarily need to travel to a designated Dark Sky Park to begin. Finding the darkest accessible location you can is a good starting point.
What camera equipment do you need?
You don’t need a dedicated astronomical camera to photograph the night sky.
A modern mirrorless or DSLR camera can be an excellent starting point, particularly when combined with:
- A wide-angle lens
- A sturdy tripod
- A reliable remote or cable release
- A fully charged battery
- Spare memory cards
- A low-level red-light head torch
A wide-angle lens is particularly useful for landscape astrophotography because it allows you to include a large area of sky while incorporating an interesting foreground.
A focal length around 14–24mm can produce dramatic compositions, although there is no reason not to experiment with longer lenses.
The important thing is to think of astrophotography as a form of composition as well as a technical exercise. A photograph containing nothing but stars can be impressive, but combining the sky with a building, tree, mountain or other foreground subject can create a much stronger image.
Choosing the right lens
The quality of the lens matters more in astrophotography than you might initially expect.
Stars are extremely unforgiving of optical aberrations. Problems such as coma can turn points of light near the edges of the frame into distorted shapes.
A fast lens with a wide maximum aperture is useful because it allows more light to reach the sensor. However, shooting wide open isn’t always the best solution.
If your lens produces significant coma or other aberrations at its maximum aperture, try stopping it down by one or two stops and compensate with your other exposure settings.
Chromatic aberration can also be visible around bright stars, although this can usually be reduced during RAW processing.
Astrophotography camera settings
There is no single set of camera settings that works for every night sky photograph.
Your starting point will depend on the camera, lens, focal length, sky brightness and the result you want to achieve.
For a conventional static-star photograph, the basic approach is:
- Mount the camera securely on a tripod.
- Select manual exposure.
- Open the aperture as far as practical while maintaining acceptable lens quality.
- Set the focus manually.
- Choose an appropriate shutter speed.
- Increase ISO until you achieve a useful exposure.
- Review the image and adjust the settings as necessary.
The relationship between shutter speed and ISO is particularly important.
A longer exposure records more light, but the Earth is rotating. Eventually the stars will begin to move across the sensor and appear as trails rather than points.
How long should the shutter speed be?
A traditional starting point is the Rule of 400.
This suggests dividing 400 by the focal length of the lens to estimate the longest shutter speed before noticeable star trailing becomes apparent.
For example, with a 20mm lens:
400 ÷ 20 = 20 seconds
So around 20 seconds would provide a starting point.
However, this is only a guide. Modern high-resolution cameras can reveal movement more readily, and the acceptable amount of trailing depends on how large the final photograph will be displayed.
Take a test photograph and zoom in on the stars. If they are no longer appearing as reasonably sharp points, reduce the shutter speed.
The wider the lens, the longer the exposure you can generally use before movement becomes obvious.
ISO and exposure
Once you have chosen an aperture and shutter speed, ISO becomes the main control for adjusting exposure.
Increasing ISO makes the camera more sensitive to the available light, allowing you to record more stars and a brighter sky. However, higher ISO settings can also increase visible noise and reduce image quality.
The ideal balance depends on your camera.
Rather than automatically choosing the highest ISO available, take several test exposures. Examine both the histogram and the actual image at high magnification.
You may also find that a slightly darker exposure produces a better final result once the RAW file is processed.
Don’t forget to focus
Focusing is one of the biggest challenges when photographing stars.
Autofocus usually struggles in very dark conditions, so manual focusing is generally the better approach.
Before beginning, switch the lens to manual focus and use Live View to locate a bright star or distant light.
Magnify the Live View display and carefully adjust the focus until the star becomes as small and sharp as possible.
Do not automatically assume that moving the focus ring all the way to the infinity symbol will produce perfect focus. Some lenses can focus beyond infinity, while zoom lenses may also change their focus position when the focal length changes.
Temperature can affect focusing too, particularly during long sessions in cold conditions.
Once you have achieved accurate focus, avoid touching the focus ring.
Use a red light at night
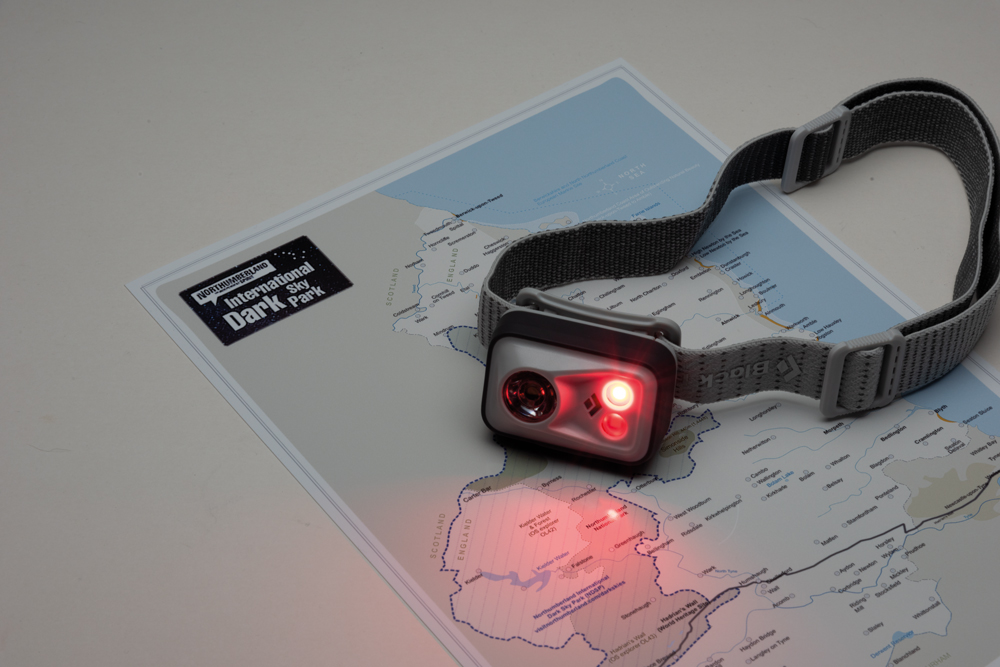
A red-light head torch is extremely useful for astrophotography.
Your eyes become progressively adapted to the darkness, but a bright white torch or phone screen can destroy that night vision almost instantly.
A dim red light provides enough illumination to operate your equipment while helping to preserve your dark adaptation.
Before starting a session, make sure you know how your head torch operates. Some models have several modes, and accidentally activating a powerful white beam can be surprisingly disruptive when everyone around you is trying to preserve their night vision.
Photographing star trails
Not every astrophotograph needs sharp, stationary stars.
Long exposures can deliberately record the apparent movement of the stars as the Earth rotates.
With a sufficiently long exposure, stars form arcs across the sky. Over several hours, these arcs can become almost complete circles.
The composition becomes particularly interesting when a foreground object is included.
A building, tree or landscape can provide a strong static element against the moving sky.
Star-trail photography therefore requires a different approach from conventional Milky Way photography. Instead of trying to minimise movement, you are deliberately recording it.
Photographing the Milky Way
The Milky Way is one of the most popular subjects for landscape astrophotography.
A wide-angle lens can capture a large section of the sky while still including enough foreground to create context.
The best results require careful planning. The position of the Milky Way changes throughout the year and during the night, so it is useful to know where it will appear before setting up your camera.
A free astronomy application such as Stellarium can be extremely useful for this.
Planning your night-sky photographs with Stellarium
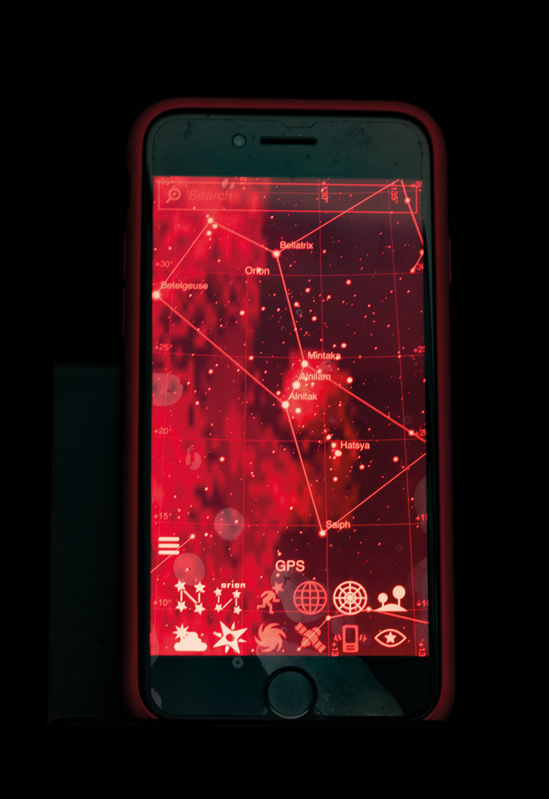
Beginners often find the night sky difficult to navigate because there are so many stars and constellations.
Stellarium provides a visual map of the sky and can be used to identify stars, constellations and other objects.
The mobile version can use the phone’s location and orientation sensors to show which part of the sky you are looking at.
More importantly for photographers, astronomy software can be used to plan a shoot. You can investigate where particular celestial objects will appear and determine how the sky will look from a particular location and at a particular time.
This can turn astrophotography from a matter of luck into a planned photographic exercise.
Reducing noise by stacking multiple exposures
One of the most useful techniques for astrophotography is image stacking.
Instead of making one very long exposure, you can capture a series of shorter exposures and combine them during post-processing.
The individual photographs contain similar star information but different patterns of random sensor noise.
When the images are combined using an appropriate stacking method, random noise can be significantly reduced while the common detail in the photographs is retained.
Photoshop can perform a simple version of this process using layers and a Median stack mode.
A simple Photoshop stacking workflow
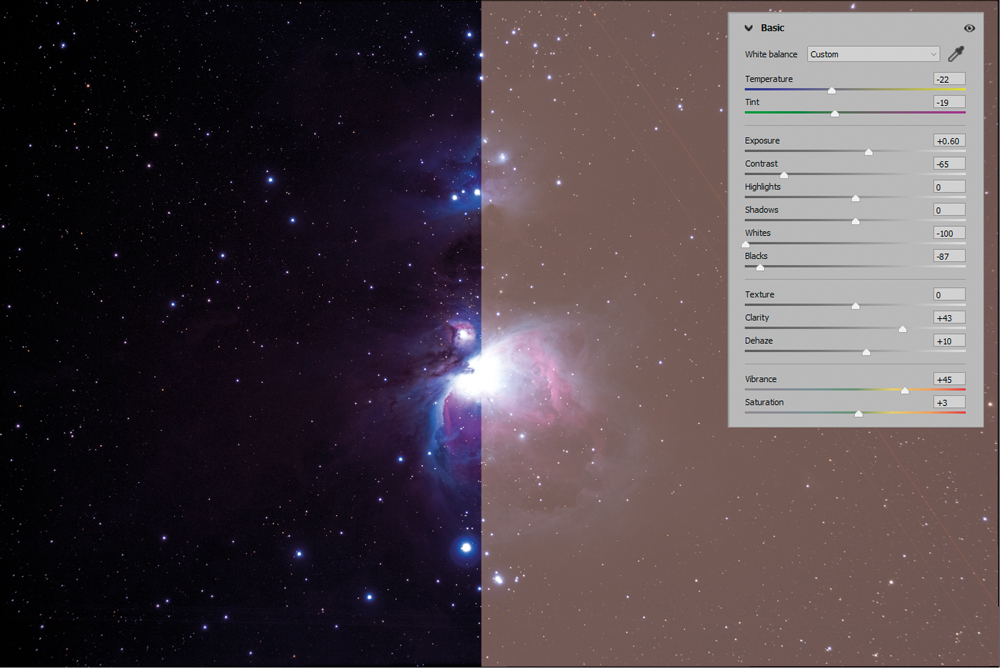
A basic workflow is:
- Capture a series of photographs without changing the composition.
- Open Adobe Bridge and select the images you want to combine.
- Choose Tools > Photoshop > Load Files into Photoshop Layers.
- Select all the resulting layers in Photoshop.
- Choose Edit > Auto-Align Layers and use the Automatic option.
- Convert the selected layers into a Smart Object.
- Choose Layer > Smart Objects > Stack Mode > Median.
- Apply further adjustments using the Camera Raw Filter.
The alignment stage is important because the stars may have shifted slightly between exposures.
Once the layers have been aligned, the Median stacking method can help suppress random noise.
This is only one possible stacking workflow. Dedicated astrophotography software can provide considerably more control for advanced work.
When Photoshop isn’t enough
As you progress into more serious astrophotography, specialised software becomes increasingly useful.
Programs such as DeepSkyStacker are designed specifically for astronomical image processing and can be particularly useful when individual exposures contain very faint stars or deep-sky objects.
Dedicated astrophotography workflows can involve much more than simply reducing noise. Calibration frames, alignment, stacking and specialised tonal processing can all be used to extract detail that is difficult to see in an individual exposure.
For someone just starting out, however, Photoshop provides a useful way to understand the basic principles.
Photographing deep-sky objects
There is a significant difference between photographing a star-filled landscape and photographing individual deep-sky objects.
A wide-angle lens is ideal for capturing the night sky as part of a landscape, but a longer focal length or telescope is required when you want to record detailed images of objects such as nebulae and galaxies.
As focal length increases, tracking the apparent movement of the sky becomes increasingly important.
This is where astrophotography moves from a conventional camera-on-a-tripod exercise into a much more specialised discipline involving astronomical mounts, guide scopes and dedicated cameras.
That equipment can become expensive, but it isn’t necessary for learning the fundamentals.
Narrowband astrophotography
Advanced astrophotographers sometimes photograph nebulae using narrowband filters.
Three particularly important wavelengths are associated with:
- Hydrogen-alpha (Hα) – around 656 nm
- Sulfur II (S II) – around 672 nm
- Oxygen III (O III) – around 496 nm
These filters isolate relatively narrow parts of the spectrum emitted by ionised gases within astronomical objects.
The resulting images are often captured using monochrome astronomical cameras and then combined into colour images during processing.
The familiar Hubble Palette is one interpretation in which these narrowband channels are assigned to different colour channels to create a false-colour representation.
The colours do not necessarily represent what the object would look like to the human eye. Instead, they allow different areas of emission to be distinguished and can reveal structure that would otherwise be difficult to see.
This is one of the areas where astrophotography becomes very different from conventional terrestrial photography.
Processing astrophotographs
RAW processing is particularly important for astrophotography.
The initial image may look surprisingly unimpressive when it is first opened. Faint structures that are obvious in the finished photograph can be almost invisible in the original file.
Adjustments commonly used during processing include:
- Exposure
- Contrast
- Highlights
- Shadows
- Blacks
- White balance
- Vibrance
- Saturation
- Clarity
- Dehaze
- Curves
Curves can be particularly powerful.
Astrophotographers routinely use much more aggressive curve adjustments than would normally be considered appropriate for many conventional photographs.
The objective is to reveal extremely faint variations in brightness while controlling the background sky.
Because these adjustments can be severe, maintaining as much useful tonal information as possible during processing is important.
Don’t compare your work with space telescopes
It is easy to look at spectacular photographs from the Hubble Space Telescope or James Webb Space Telescope and wonder why your own images don’t look remotely similar.
The reason is simple: you are not competing with them.
Professional observatories have enormous mirrors, sophisticated tracking systems, specialised cameras and access to extremely dark skies. Space telescopes also operate above the Earth’s atmosphere.
Amateur astrophotography is about seeing what you can achieve with the equipment available to you.
There is considerable satisfaction in extracting a recognisable nebula, Milky Way structure or field of stars from a camera and lens that you already own.
The equipment can become expensive – but it doesn’t have to
Advanced astrophotography can involve telescopes, tracking mounts, guide cameras, specialist astronomical cameras and computer-controlled systems.
A serious setup can therefore cost several thousand pounds.
But none of this should discourage a beginner.
A conventional interchangeable-lens camera, wide-angle lens and tripod are enough to start learning.
Before buying specialist equipment, learn how to:
- Find a genuinely dark location
- Focus accurately
- Choose an appropriate shutter speed
- Control ISO
- Compose with the foreground
- Plan the position of the Milky Way
- Capture a sequence of exposures
- Stack images
- Process RAW files effectively
Those skills remain useful even after you move to much more advanced equipment.
A simple astrophotography workflow
For your first night-sky photography session, try this approach:
1. Find a dark location
Get away from strong sources of artificial light if possible.
2. Check the weather
Cloud, mist and humidity can seriously affect visibility.
3. Plan the sky
Use an astronomy application such as Stellarium to identify the Milky Way and other subjects.
4. Set up your tripod
Make sure the camera is stable and unlikely to be disturbed.
5. Compose the image
Look for an interesting foreground rather than photographing the sky in isolation.
6. Focus manually
Use Live View magnification and a bright star or distant light.
7. Start with a wide aperture
Then stop down slightly if lens aberrations become troublesome.
8. Choose a shutter speed
Use the Rule of 400 as a starting point, then inspect the stars at high magnification and adjust.
9. Adjust ISO
Raise ISO until you achieve a useful exposure without unnecessarily introducing excessive noise.
10. Capture several frames
A sequence of images gives you the option of stacking them later.
11. Process the RAW files
Start with sensible exposure and tonal adjustments before experimenting with more dramatic processing.
12. Try stacking
Once you are comfortable with individual images, experiment with Photoshop or dedicated astrophotography software.
The biggest lesson: experiment
Astrophotography involves compromises.
A longer shutter speed gathers more light but increases the possibility of star trails. A higher ISO can reveal faint stars but also increases noise. A wider aperture gathers more light but may reveal lens aberrations.
There is therefore no universal combination of settings.
The best approach is to understand what each control is doing and experiment with your own camera and lens.
And remember that the conditions matter just as much as the equipment. A modest camera under a genuinely dark sky can produce a much more rewarding photograph than expensive equipment used under heavy light pollution.
For photographers used to working in daylight, astrophotography also provides an entirely different way of thinking about exposure, focusing and composition.
Once you have experienced a genuinely dark sky, it is difficult not to become fascinated by what your camera can reveal.