How to Create Realistic Digital Pet Portraits in Photoshop
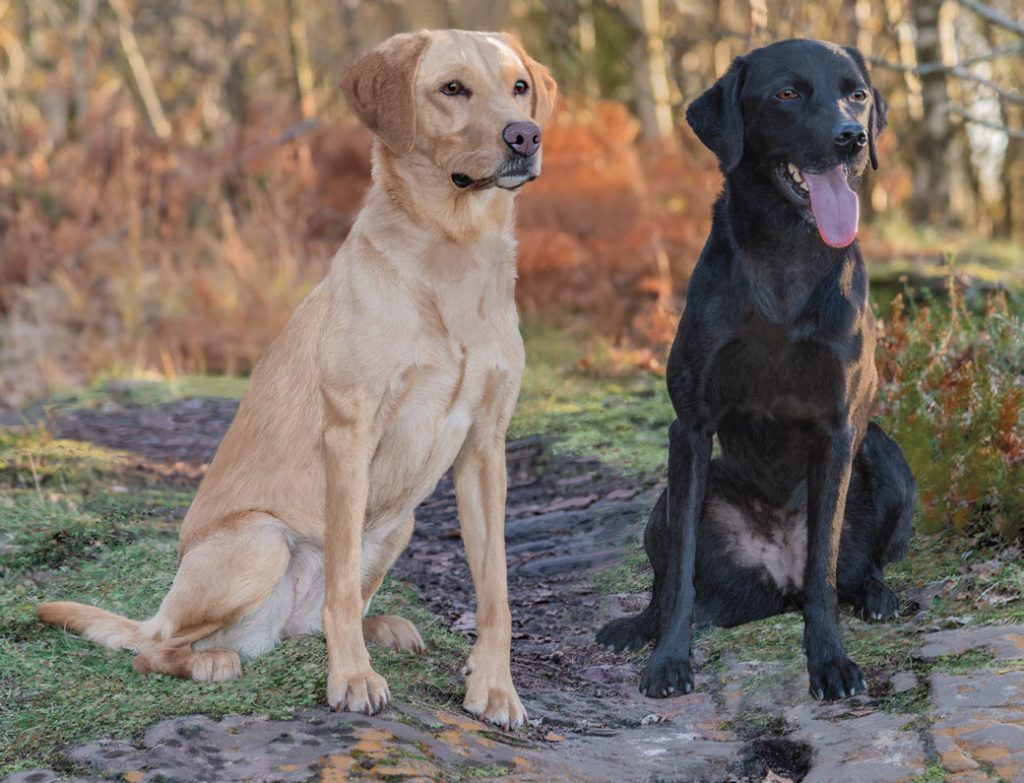
For photographers looking for a way to add another creative service to their business, digital pet portraiture offers an interesting possibility.
Instead of simply supplying a photographic print, a photographer can transform a carefully captured pet photograph into a hand-painted digital artwork.
With the right brushes, a graphics tablet and plenty of practice, it is possible to create remarkably realistic paintings of dogs and other animals while retaining the character and likeness of the original photograph.
The technique can also be applied to other subjects, particularly human hair and other textured surfaces.
What makes digital pet portraits different?
A digital painting doesn’t have to look like a traditional painting.
One of the most interesting approaches is hyper-realism: creating artwork that retains so much photographic detail that, at first glance, it can be mistaken for a photograph.
For animal portraits, fur is particularly important.
Individual hairs vary in length, direction, colour and brightness, while the overall pattern changes according to the shape of the animal’s body. Trying to paint every hair individually would be an enormous task.
Digital brushes can make that process considerably faster.
A suitably configured brush can produce multiple strands of fur with variations in direction, size, colour and opacity, allowing the artist to build realistic textures much more efficiently than painting every strand separately.
You don’t need hundreds of brushes
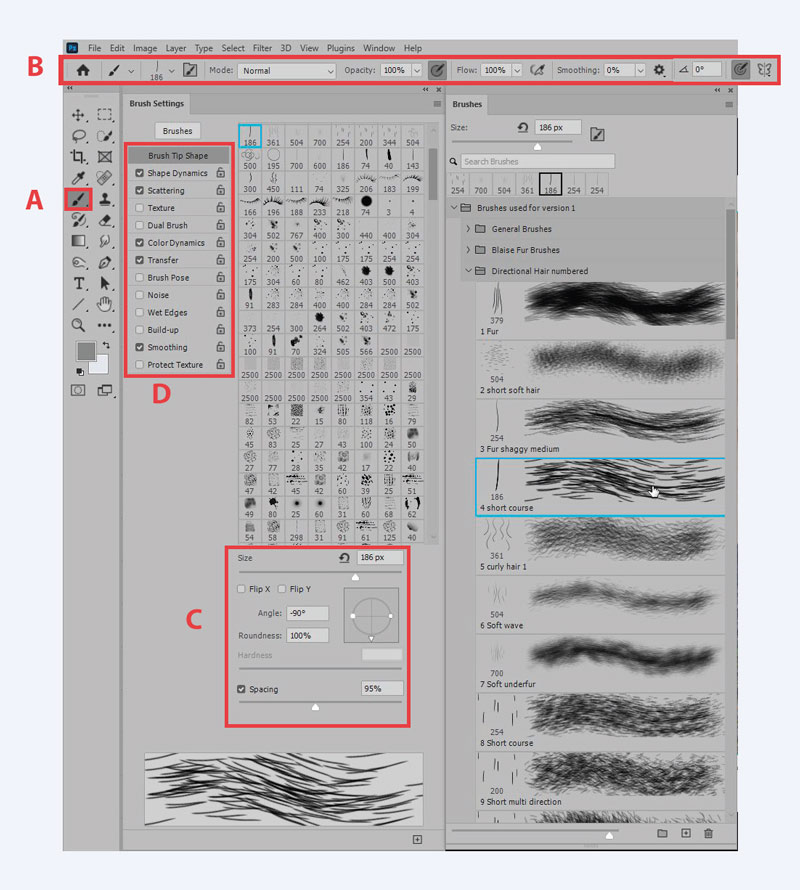
One of the easiest traps to fall into with digital painting is collecting brushes.
There are enormous libraries of Photoshop brushes available, covering everything from watercolour and oil paint to smoke, foliage, clouds and fur.
More brushes don’t necessarily make you a better artist.
In fact, having too many options can make it harder to work because you spend more time looking for the perfect brush than actually painting.
A small collection of brushes for specific purposes is often much more useful.
For realistic animal painting, you might need little more than:
- A basic round brush
- A textured brush for sketching
- One or two fur brushes
- A soft brush for blending and tonal adjustments
- An eraser or masking technique
The skill is in learning how those brushes respond to pressure, movement and direction.
A graphics tablet makes a big difference
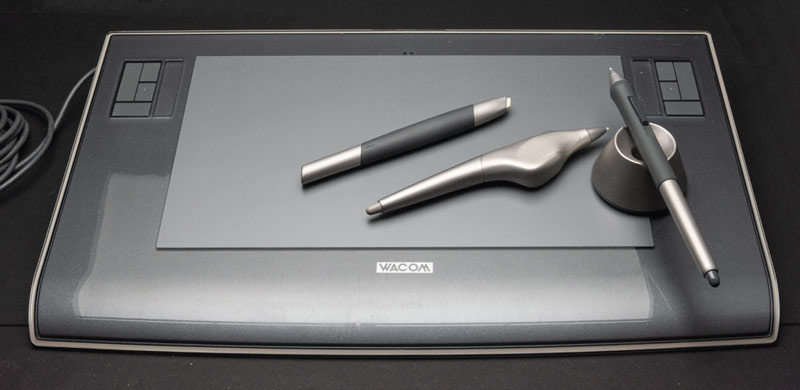
Although digital painting can technically be attempted with a mouse, a pressure-sensitive graphics tablet and pen make the process much more natural.
Pen pressure can control characteristics such as brush size and opacity, allowing you to create fine, delicate strokes without repeatedly changing settings manually.
The direction of the pen stroke is also important when painting fur.
Fur does not simply form a random collection of lines. It follows the underlying structure of the animal.
The fur around a Labrador’s muzzle, ears, chest and body will all behave differently.
Learning to follow those natural directions is more important than simply finding a brush labelled “fur”.
A simple workflow for painting a dog
A structured approach makes the process much easier.
1. Start with the outline
Create a rough outline of the animal on its own layer.
At this stage, don’t worry about painting individual hairs.
Concentrate on the overall shape, proportions and position of the eyes, nose, ears and other important features.
Getting the structure right at the beginning will save a huge amount of time later.
2. Refine the important features
Once the basic outline is established, refine the edges and add the features that define the animal’s character.
Eyes, nose, ears and distinctive markings deserve particular attention.
You can begin adding a small amount of fur detail around these areas, but resist the temptation to work on everything at once.
3. Block in the local colour
Before worrying about shadows and highlights, establish the basic colours of the animal.
Think of this as the colour the fur would have under relatively neutral lighting.
A black Labrador, for example, isn’t actually made up of nothing but black.
Depending on the lighting and surroundings, individual hairs may contain subtle blue, grey, brown or other tones.
These small variations are important when creating a realistic result.
4. Build the fur gradually
Now begin adding the fur.
Work with the underlying shape of the animal and follow the direction in which the fur naturally grows.
Don’t cover the entire image with thousands of equally detailed strokes.
The most convincing paintings usually contain a mixture of highly detailed areas and simpler areas.
Pay particular attention to areas around the eyes, muzzle and ears, where the direction and texture of the fur help establish the animal’s character.
5. Add shadows and highlights
Once the basic painting is established, create separate layers for shadows and highlights.
Using separate layers means you can experiment without permanently altering the underlying painting.
Blend modes such as Multiply can be useful for shadows, while Overlay can be used for highlights and additional tonal effects.
Subtle colour shifts can also help.
Shadows may pick up cooler tones from the sky or surroundings, while highlights can contain warmer colours.
The objective isn’t to make every area brighter or darker. It is to create the impression of three-dimensional form.
6. Finish the details
The final stage is about the details that make the portrait come alive.
These might include:
- Eye catchlights
- Whiskers
- Individual hairs around the ears
- Fine fur around the muzzle
- Nose texture
- Small highlights
- Distinctive markings
Keep these elements on separate layers where possible.
That makes it much easier to make changes later.
7. Don’t forget the background
The background is part of the artwork.
It doesn’t necessarily need to contain a detailed landscape. A simple, atmospheric background can sometimes make the animal stand out more effectively.
It can also be useful to introduce the background before making final adjustments to shadows and highlights, because the surrounding tones affect how we perceive the subject.
Work from a photograph, but don’t simply paint over it
A good reference photograph is essential.
For photographers, this is one of the major advantages of digital pet portraiture: you already understand how to create a strong reference image.
However, there is a difference between painting an image and simply tracing over a photograph.
Using the photograph as a reference encourages you to observe the shape, colour and texture of the subject rather than mechanically following every pixel.
Displaying the reference image on a second monitor can be particularly useful.
You can then study it while working on the painting without constantly switching between the photograph and your artwork.
Photographing for a digital painting
The process actually starts before you open Photoshop.
The better the reference photograph, the easier the painting will be.
Try to capture:
- Sharp detail in the important areas
- Good focus across the face
- Clear separation between the animal and its background
- Useful directional lighting
- Enough detail in the fur to understand its natural pattern
If you’re photographing specifically for a digital portrait, consider the final composition before taking the photograph.
A clean background can save considerable time later.
Collars, harnesses, leads and other accessories can also create additional work during the painting process, although they should only be removed where it is safe and appropriate to do so.
Use layers to work faster
Layers aren’t just useful for correcting mistakes. They can make the entire painting process more efficient.
For example, imagine you’re painting a Labrador with floppy ears.
Putting the ear on a separate layer means you can paint the fur underneath it without having to worry about accidentally painting over the ear.
Similarly, keeping eyes, whiskers, highlights and other fine details separate allows you to make adjustments without damaging the rest of the artwork.
This becomes increasingly important as the complexity of the portrait increases.
Don’t try to make everything hyper-realistic
One of the biggest lessons from realistic digital painting is that more detail doesn’t necessarily mean a better image.
Photographers can be particularly susceptible to this because we’re accustomed to looking at photographs and trying to preserve every detail.
But a painting doesn’t need to reproduce every hair.
In fact, spending hours adding microscopic detail to an area that will be viewed from several feet away may have very little commercial value.
The objective is to create the impression of realism.
Sometimes a handful of carefully placed strokes can communicate something that hundreds of individual hairs cannot.
Turning digital pet portraits into a business
This is where the technique becomes particularly interesting for photographers.
A digital painting could be offered as an additional product following a pet photography session.
Instead of selling only photographic prints, you could offer a choice of:
Traditional photographic print
or
Digital painted portrait
or potentially a package containing both.
The advantage of digital artwork is that the finished file can be reproduced at different sizes without having to repaint the original.
That opens up possibilities for wall art, smaller prints and other products.
Work out your production time
Before deciding how much to charge, record how long each portrait takes.
This is particularly important when you’re learning.
Your first portrait might take many hours. After completing several, you may become considerably faster.
Keep a record of:
- Photography time
- Preparation
- Painting time
- Editing
- Client revisions
- Printing
- Framing
- Packaging
- Administration
Only once you understand the total time involved can you work out whether the product is commercially viable.
Don’t base your pricing simply on what another artist charges.
A portrait that takes you eight hours to produce cannot be priced in the same way as one that you can complete in two.
Start with one portrait
The best way to discover whether digital pet painting suits you is simply to try it.
Choose a good reference photograph and work through the process without worrying about producing a masterpiece immediately.
Your first attempt may look nothing like the work of an experienced digital artist.
That’s normal.
Digital painting is a skill, and the speed and quality of the work will improve as you become familiar with your brushes, tablet, layers and colour choices.
The important thing is to learn how the different elements work together.
From photographer to digital artist
The real opportunity isn’t necessarily to become a full-time digital painter.
For a photographer, digital painting can simply become another creative option.
A pet photographer already has many of the skills required: understanding light, composition, colour, anatomy and the importance of capturing personality.
Digital painting adds another layer to those skills.
The result could be a distinctive product that sits somewhere between photography and traditional artwork.
And that may be the most interesting part of the process.
The technology can make the mechanics faster, but the final result still depends on the photographer’s ability to observe the subject, understand light and make artistic decisions.
A good brush can help you paint fur.
It can’t teach you how to see it.