Photography Lighting: How to Control the Quality, Direction and Amount of Light
By Tony Corbell
Good lighting isn’t simply about having enough light.
It’s about understanding what the light is doing and deciding whether it is helping you create the photograph you want.
One of the most useful ways to approach lighting is to think about three things:
quality, quantity and direction.
Is the light hard or soft? How much light is reaching the subject? And where is that light coming from?
Once you start thinking about those three elements, lighting becomes much more predictable.
Instead of simply reacting to whatever light happens to be available, you can start controlling it.
Start by looking at the light
Before reaching for a flash or changing a camera setting, look carefully at the light that’s already there.
Where is it coming from?
Is it coming from above, from the side or from behind?
Is it direct sunlight or diffused by cloud?
Are there reflective surfaces nearby?
Are there dark areas that are absorbing light?
What happens if your subject moves a few feet?
These observations can often tell you more about how to approach a photograph than your equipment can.
A good photographer learns to see light before deciding how to photograph it.
Quality of light
The quality of light describes how it behaves on the subject.
Hard light creates strong shadows and defined edges. Direct sunlight on a clear day is an obvious example.
Soft light produces gentler shadows and smoother transitions between light and dark. An overcast sky or a large light source close to the subject can create this effect.
Neither is automatically better.
Hard light can create drama, texture and definition.
Soft light can be flattering and forgiving, particularly for portraits.
The important thing is to understand what each type of light is doing and choose appropriately.
Quantity of light
The amount of light reaching your subject is another part of the equation.
Sometimes there simply isn’t enough light and you need to add some.
At other times, there may be too much.
This is where photographers often think immediately about camera exposure, but exposure isn’t the only solution.
You can change the position of your subject.
Move the light.
Use a reflector.
Block some of the light.
Change the background.
Move into shade.
Or add another light source.
The more options you understand, the less dependent you become on simply changing your camera settings.
Direction of light
The direction of light can completely change the appearance of a subject.
Light from the front tends to produce relatively even illumination.
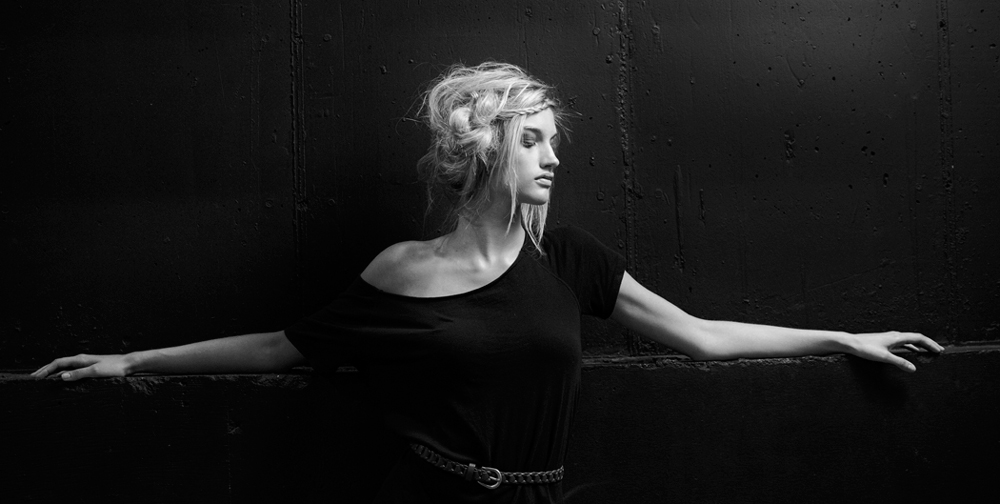
Side lighting can reveal texture and create stronger modelling.
Light from behind can create separation, silhouettes or highlights around the subject.
Light from above can produce strong shadows beneath facial features, while moving the source lower or closer to the subject can dramatically change the result.
When you’re unhappy with a photograph, don’t automatically ask whether you need a different exposure.
Ask whether the light is coming from the right direction.
Add light when you need it
The most obvious form of lighting control is adding light.
Flash and studio lighting allow you to introduce another source into the scene and use it to shape the photograph.
That might mean using a small amount of fill flash to lift shadows outdoors.
It could mean using an off-camera flash to create direction.
Or it could involve several lights in a studio to control the subject and background separately.
The important point is that additional light doesn’t have to overpower the existing light.
Often the most effective lighting is subtle.
Subtract light when you need to
Controlling light isn’t always about adding more.
Sometimes you need less.
A photographer working outdoors might move a subject into open shade to remove harsh sunlight.
In a studio, a flag or black surface can prevent unwanted light from reaching part of the subject.
A reflector can also be used creatively in reverse: instead of bouncing light back onto the subject, a dark surface can absorb light and deepen shadows.
This is particularly useful for shaping faces and creating more contrast.
Think of it as sculpting the light rather than simply illuminating the subject.
Reflect light
You don’t always need another light source.
You can redirect existing light using a reflective surface.
A reflector can bounce sunlight back onto a subject.
A white wall can act as a surprisingly effective source of fill.
A pale floor or ceiling can influence the colour and direction of the light in a room.
This is one reason it’s useful to look around the environment before setting up your equipment.
The surroundings are often part of your lighting setup whether you planned them to be or not.
Use transmitted light creatively
Light can also pass through materials.
A window can transform daylight into a large light source.
Curtains can soften it.
Coloured glass or fabric can alter its appearance.
Leaves, translucent materials and other objects can create interesting patterns or changes in colour.
Rather than seeing everything between your light source and your subject as an obstruction, consider whether it can become part of the photograph.
Combine different types of light
Some of the most interesting photographs come from combining light sources.
You might use daylight as the main source and add flash to control the shadows.
You could use a window for soft light while adding a reflector on the opposite side.
In a studio, you might combine a key light with a weaker fill light and another source to separate the subject from the background.
The possibilities are extensive, but the principle remains simple:
Know what each light is doing.
If you can’t explain why you’ve added a light, moved it or changed its position, there’s a good chance the setup has become more complicated than it needs to be.
Control the light before you edit
Modern editing software gives photographers enormous control after the photograph has been taken.
But post-processing shouldn’t become a substitute for understanding light.
If the subject is poorly lit, you may be able to improve the image afterwards, but there are limits.
Getting the lighting right at capture can save considerable editing time and often produces a more natural result.
This is particularly important when photographing large numbers of images.
A small improvement made before pressing the shutter can be repeated across an entire shoot.
That is far more efficient than trying to correct the same problem individually in hundreds of files.
Think about the background too
Photographers naturally concentrate on the subject, but the background is affected by the same lighting decisions.
A change in the position of your light can alter the brightness of the background.
Moving the subject further away can change how much light reaches it.
Changing the angle can prevent unwanted highlights or shadows.
You can also deliberately light the background separately from the subject.
This gives you much more control over the final image.
When setting up a photograph, don’t just ask:
How do I light my subject?
Also ask:
What do I want the background to do?
Portable lighting can give you more freedom
You don’t need a large studio to take control of light.
Portable flash and battery-powered lighting can be used on location, outdoors or in spaces where you have limited control over the environment.
That makes it possible to combine the existing light with your own lighting rather than simply accepting whatever conditions you find.
The equipment doesn’t need to be complicated.
A single light, used well, can often achieve more than several poorly understood lights.
Learn what one source can do before adding another.
Learn to see before you light
Good lighting isn’t primarily about owning more equipment.
It’s about seeing what the light is doing.
Look at the shadows.
Look at the highlights.
Watch how the light changes when your subject moves.
Notice reflections.
Look for areas where light is being blocked or absorbed.
Then decide what needs to change.
You might need to add light.
You might need to remove it.
You might need to reflect it.
You might simply need to move your subject.
The better you become at recognising these possibilities, the more control you gain over your photography.
Take control, but keep it simple
Lighting can become incredibly complicated, but it doesn’t have to.
Start with one light source and understand it.
Learn how distance affects the light.
Experiment with its direction.
Try different modifiers.
Use natural light alongside it.
Then introduce another light when you have a clear reason to do so.
The goal isn’t to create the most complicated lighting setup.
It’s to create the light that the photograph needs.
When you understand quality, quantity and direction, you have the foundations for controlling almost any lighting situation.
And the more control you have at the point of capture, the more freedom you have to concentrate on the thing that matters most: making the photograph.