How to Plan a Composite Photo Shoot: Use Prototypes, Mock-Ups and Test Shots
Some photographs are straightforward. You find the subject, compose the image, press the shutter and work on the result afterwards.
Others are much more complicated.
If you’re creating a composite, conceptual or narrative photograph involving several elements, people, locations, lighting setups or layers of post-production, discovering a problem at the end of the shoot can be frustrating — and expensive.
One technique that can make these projects much easier is prototyping.
The idea comes from software development, where a quick prototype is used to explore a difficult problem before committing time and resources to the finished product. The prototype isn’t supposed to be perfect. In fact, you’re expecting to throw it away.
The same principle works remarkably well for photography.
A rough sketch, mock-up or test photograph can help you discover problems while there’s still plenty of time to fix them.
What is a photography prototype?
A prototype is simply an early, rough version of an image.
It might be:
- A hand-drawn sketch
- A digital mock-up
- A rough composite using existing photographs
- A test photograph
- A lighting test
- Or a combination of several of these
The important thing is that it doesn’t need to look good.
Its purpose is to answer questions before you make the final photograph.
Where should the subjects go? Does the perspective work? Will the lighting make sense? Are there too many competing elements? Can the planned composite actually be created in post-production?
Finding those problems in a rough prototype is much easier than discovering them after the final shoot.
Start with a sketch
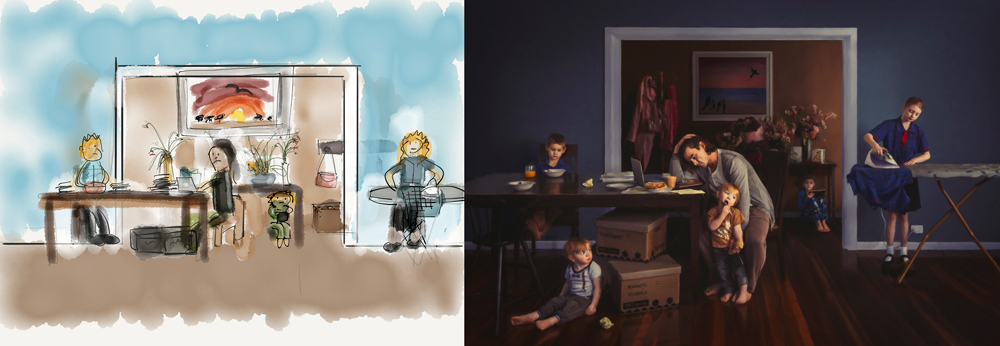
You don’t need to be an artist to sketch a photograph.
A simple drawing can be enough to establish the important elements of the composition: where the subject will be, the position of other objects, the approximate camera angle and the relationship between different parts of the scene.
Paper and a pen work perfectly well.
A tablet can be useful too, particularly if you want to annotate the sketch with notes about lighting, colour or camera position.
The important thing is speed.
Don’t spend an hour creating a beautiful illustration when a five-minute scribble will answer the same question.
The prototype is there to help you think.
Try a rough digital mock-up
If you’re working on a composite, a quick digital mock-up can take the idea a stage further.
You can combine photographs, rough shapes or existing images to create an approximate version of the final composition.
Don’t worry about finding the perfect photographs or making the edges seamless. This isn’t the finished image.
Instead, ask questions such as:
- Is the composition balanced?
- Does the perspective make sense?
- Is there enough space for each element?
- Where does the viewer’s eye go first?
- Are any important elements being obscured?
- Does the proposed camera angle work?
- Is there enough separation between subjects?
A rough mock-up can reveal problems that aren’t obvious when you’re simply imagining the finished photograph.
Use test shots to discover problems
A test shot is more involved than a sketch or mock-up, but it can tell you things that neither of those methods can.
You can test the actual location, camera position and lighting while using a stand-in rather than the final subject.
This gives you the opportunity to experiment without the pressure of a full production.
You might discover that the lighting is too hard, a practical light is in the wrong position, the camera needs to move or the pose doesn’t work with the composition.
Those discoveries are useful.
It’s much better to find them during a test than when your subject is standing in front of the camera and everyone is waiting for the final shot.
Use prototypes to solve composition problems
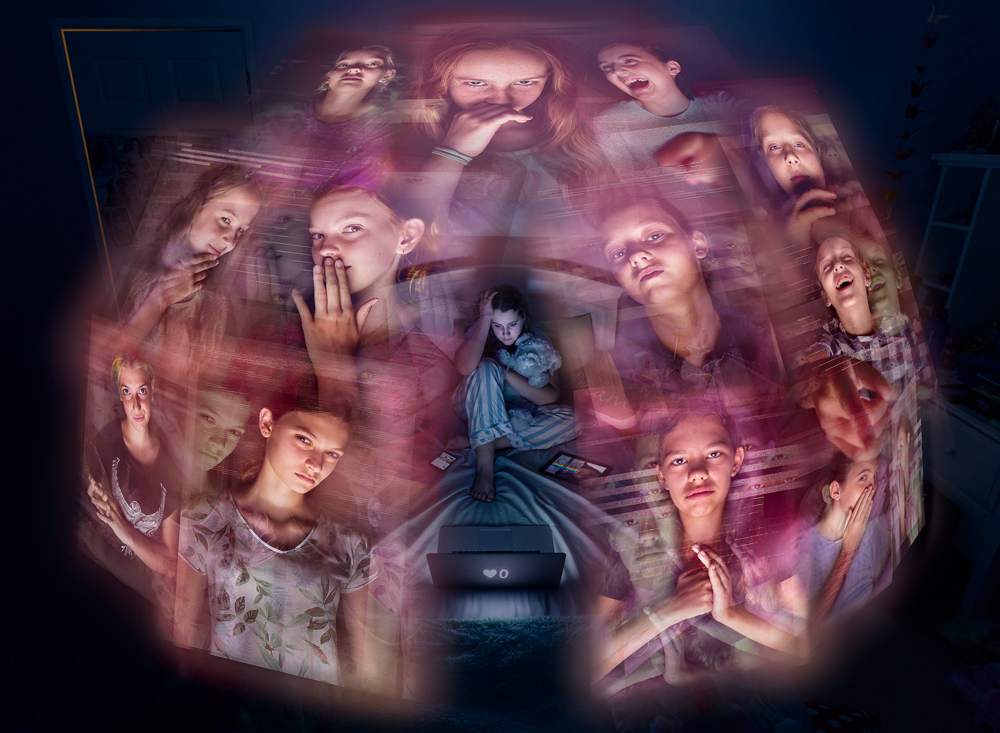
Composition is one of the biggest reasons to prototype a complex image.
When an image exists only in your imagination, it can be difficult to understand how all the elements will interact in the real world.
A sketch can help establish the basic geometry. A mock-up can take that further, while a test shot allows you to see how the composition actually behaves from the camera’s viewpoint.
Kris Anderson discovered this while developing Relentless, an image exploring cyberbullying.
The original idea placed a child on one side of the frame, with floating representations of online bullies on the other.
The initial sketches and mock-up helped establish the concept, but a test shot revealed a problem. The floating screens either overlapped one another or became too narrow to read when viewed from the proposed camera position.
Changing the viewpoint produced a much stronger composition.
The test shot also produced an unexpected bonus. The subject pulled her feet towards her body, creating wrinkles in the bedding that naturally drew attention towards her.
That small detail was then incorporated into the final photograph.
This is another advantage of prototyping: it doesn’t just identify problems. It can also reveal opportunities.
Practise difficult post-production techniques
A prototype doesn’t have to stop at the photography.
If your final image relies on a post-production technique you’ve never tried before, a rough test can help you work out whether the idea is practical.
For one of his images, Restless, Anderson wanted to incorporate a glitch effect into floating screens.
The technique involved converting images into sound files, processing them using audio software and then converting them back into images.
Rather than discovering during the final edit that the technique wasn’t going to work, he experimented with it on a test image first.
The result was valuable even if the test photograph itself was never going to be used.
It answered an important question: can I actually achieve the effect I have in my head?
That kind of experimentation can save a considerable amount of time later.
Plan your lighting before the shoot
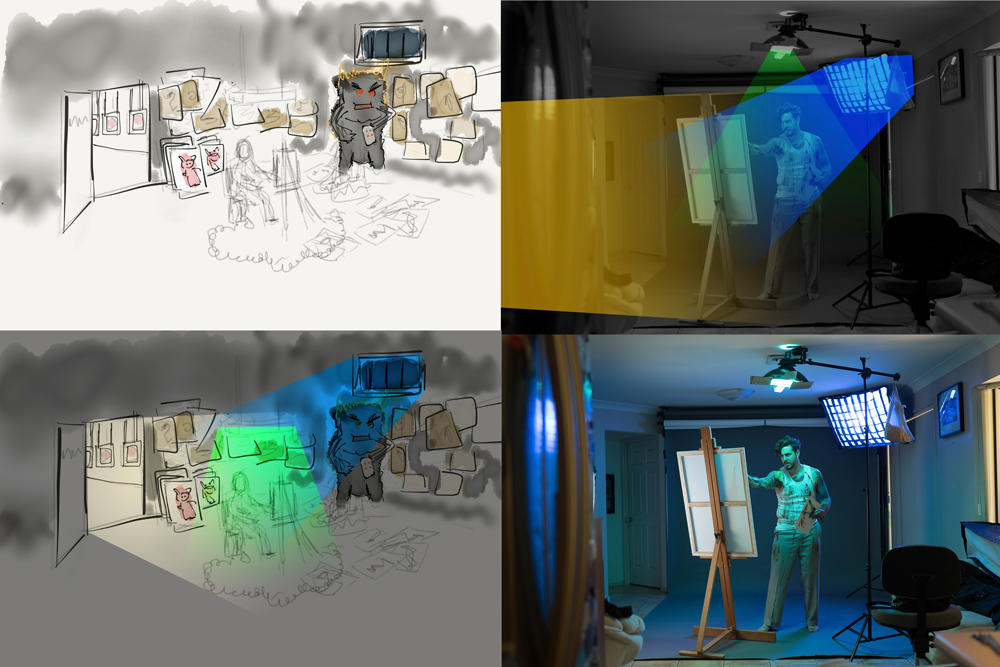
Lighting can be particularly difficult to judge when creating a composite.
A sketch gives you an opportunity to think about the direction, colour and quality of the light before you set up the camera.
This becomes even more useful when a light source is part of the composition.
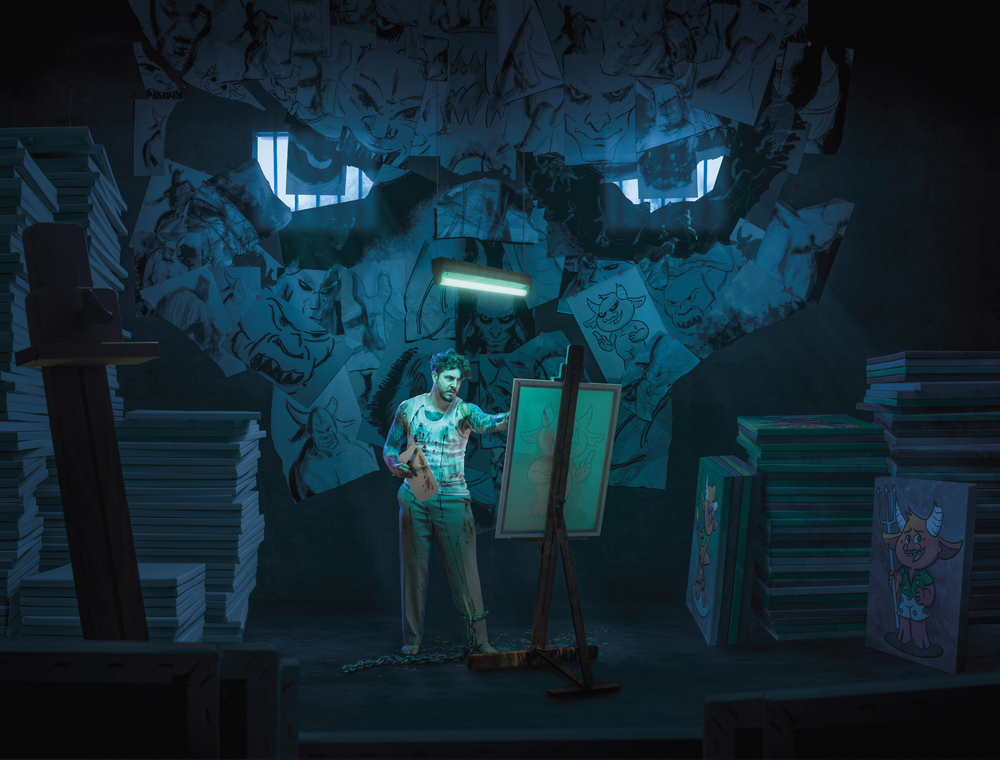
For The Muse, Anderson created a complex scene involving an artist and several different sources of light.
The final image required the subject to be photographed separately before being integrated into the composite, so the lighting on that subject needed to match the environment being created.
The planned scene included:
- A green-tinted fluorescent light above the artist
- Warm light coming through an open door
- Cooler light entering through a window behind the subject
Annotating the sketch with these lighting decisions helped establish what needed to happen during the actual shoot.
The result is a good example of how a simple drawing can become a practical lighting plan rather than merely an illustration of an idea.
Prototypes can improve collaboration
A prototype is also an excellent communication tool.
If you’re working with another photographer, a model, stylist, assistant or creative team, describing a complicated image verbally can be difficult.
A rough visual reference immediately gives everyone something to work from.
It can explain:
- The intended composition
- Where people should stand
- The position of props
- The lighting direction
- The mood of the photograph
- Which elements will be added later
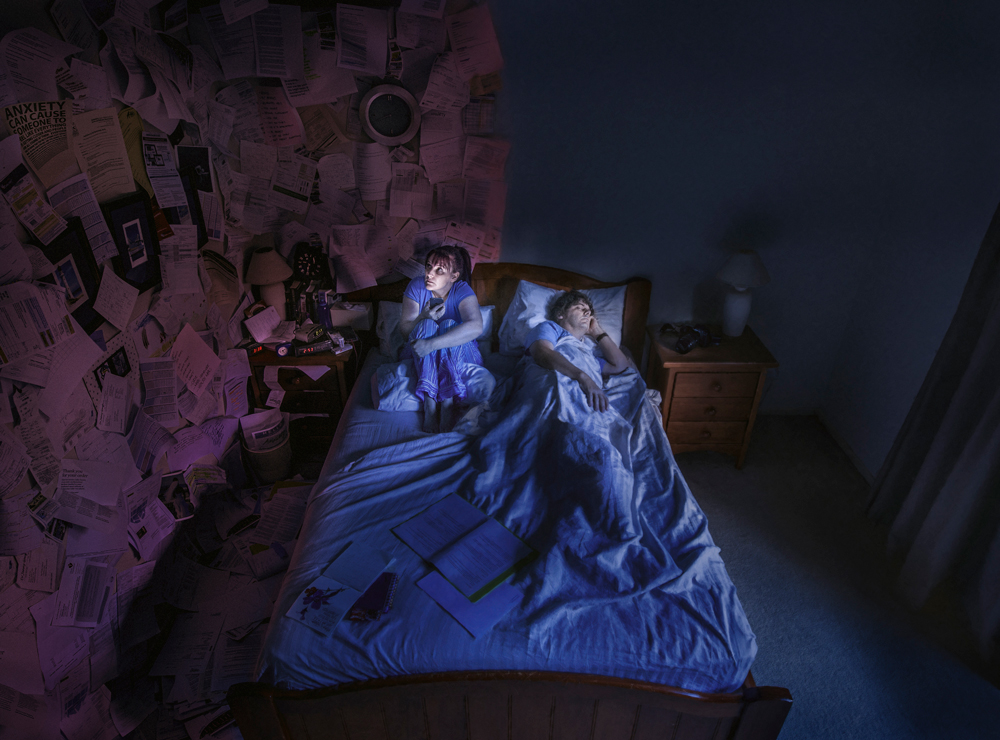
For Sleepless, Anderson created a sketch based on his wife’s description of experiencing anxiety during the night.
The concept involved being surrounded by thoughts, facts, tasks and responsibilities while someone else slept beside you.
The sketch became a practical guide for the scene. At one point, Anderson returned home to find that his wife had already covered the walls and ceiling with pieces of paper based on the idea.
The sketch had communicated enough of the concept for the scene to be constructed without him needing to direct every detail.
That’s the real value of a visual prototype: it allows an idea to be shared rather than existing only in the photographer’s head.
You can combine different prototyping techniques
There isn’t a rule that says you have to choose between a sketch, mock-up or test shot.
They can work together.
You might begin with a rough sketch, turn that into a digital mock-up and then create a test photograph based on what you’ve learned.
You can even photograph part of the scene and then draw over the photograph to explore what needs to happen next.
The process can be completely flexible.
The aim isn’t to follow a particular workflow. It’s to find the cheapest and quickest way of answering the difficult questions before committing to the final image.
Know when you don’t need a prototype
Prototyping isn’t necessary for every photograph.
A landscape photographer heading out to photograph a beautiful tree probably doesn’t need to draw a detailed plan of the tree first.
Likewise, some of the most successful photographs happen because the photographer responds to what they find rather than following a predetermined plan.
There’s nothing wrong with allowing an image to develop organically.
Even with extensive planning, a photographer can discover a problem after the shoot or decide that the original idea needs to change.
The purpose of prototyping isn’t to remove creativity or spontaneity.
It’s to reduce unnecessary risk when you’re working on an image where there are a lot of things that need to come together.
Build one to throw away
The most useful mindset is to think of your prototype as disposable.
Don’t become attached to it.
It isn’t the photograph.
It’s an experiment designed to help you make the photograph.
A rough sketch that exposes a composition problem has done its job. A test shot that demonstrates the lighting isn’t working has been successful. A mock-up that shows your original idea needs to change has saved you time.
You can throw all of them away.
What you keep is the knowledge gained from making them.
For complex composite and conceptual photography, that can make the difference between arriving at the final shoot hoping everything will work and arriving knowing that you’ve already tested the difficult parts.
Build one to throw away — then use what you’ve learned to build the real thing.
Kris Anderson

Brisbane theatre and performance photographer Kris Anderson leverages his experience as a performer and musician, focusing his commercial work on branding for performing arts companies, actor headshots, dance photography and live theatre production photography. Kris’ illustrative work is instantly recognisable, exploring narratives concerned with modern life, mental health, and the impact of technology on people and relationships.
A Master of Photography with the AIPP, NZIPP and WPPI, Kris was recognised in 2017 as the AIPP Australian Illustrative Professional Photographer of the Year.