Street Art vs Graffiti: What’s the Difference and How Can Photographers Capture It?
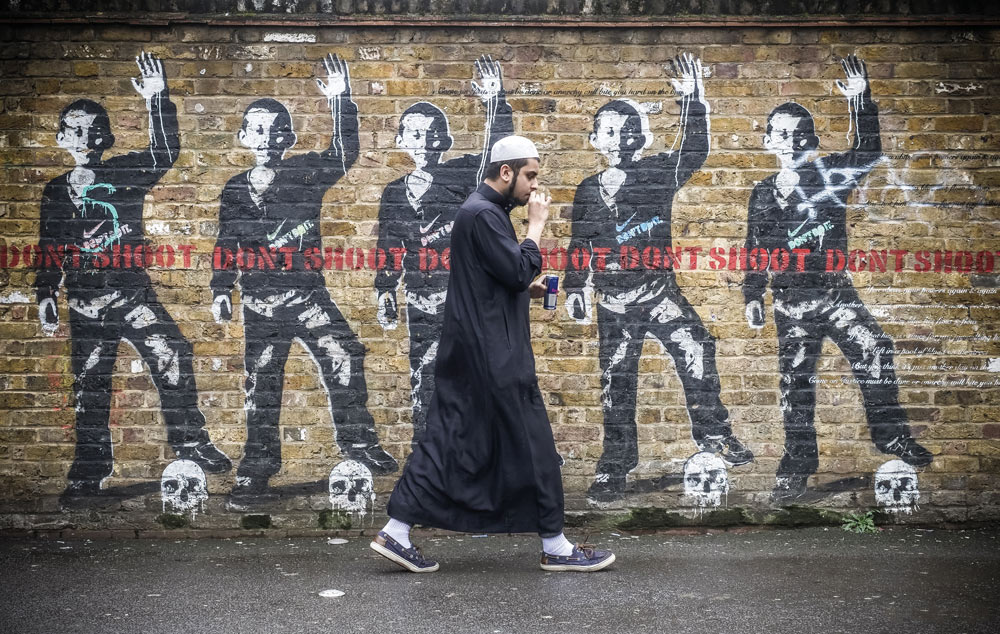
Street art and graffiti are often used interchangeably, but are they really the same thing?
Walk through almost any major city and you’ll find walls covered with everything from intricate murals and photorealistic portraits to colourful lettering, tags and political statements. Some are commissioned by property owners and celebrated as public art. Others are created without permission and may be regarded as vandalism.
For photographers, however, both can provide fascinating subjects.
Street art can transform an otherwise ordinary building into a striking photographic backdrop, while murals can become the starting point for an entire urban photography project. But photographing them well isn’t always as straightforward as pointing a camera at a wall.
So, what is the difference between street art and graffiti, and what should photographers consider when photographing urban art?
What is the difference between street art and graffiti?
There isn’t a universally accepted dividing line between street art and graffiti.
Traditionally, graffiti has often been associated with lettering, tags, names and stylised writing, while street art tends to encompass a broader range of visual work, including murals, stencils, paste-ups, illustrations and large-scale public artworks.
However, the two have developed alongside one another and regularly overlap. Some artists deliberately combine graffiti techniques with figurative or illustrative street art, making a strict definition difficult.
Legality is another distinction that is often made.
A commissioned mural created with the permission of a property owner is clearly different from someone painting a wall without permission. But legality alone doesn’t define the artwork itself, and some of the most famous street artists have deliberately worked outside official channels.
Banksy is perhaps the most obvious example of how blurred the distinction can become. His work combines imagery, political commentary and techniques associated with street art, while many of his installations have appeared without the permission of property owners.
Ultimately, whether something is described as graffiti, street art, a mural or urban art can depend on the artist, the viewer and the context.
Why street art makes an interesting photographic subject
For photographers, the terminology matters less than what is in front of the camera.
Urban art can provide an enormous variety of photographic opportunities.
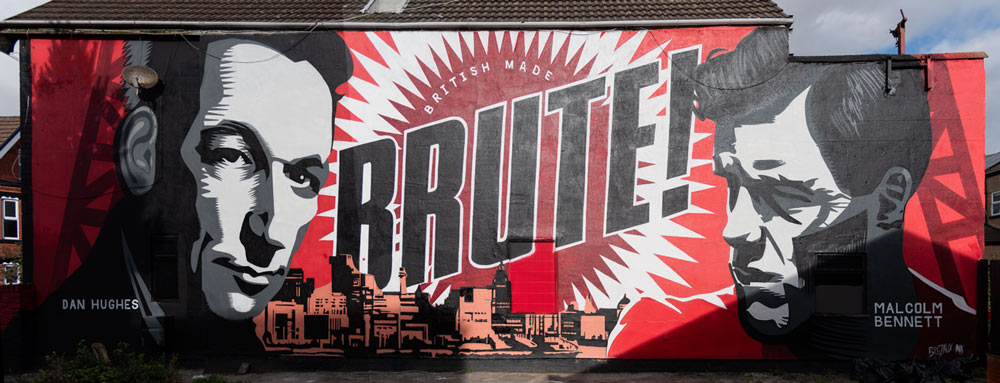
A large mural can be photographed as a piece of artwork in its own right, carefully reproduced so that the colours, geometry and detail are accurate. Alternatively, it can become part of a wider street photograph.
The surrounding environment can completely change the image.
A person walking past a mural can introduce scale. Someone wearing clothing that contrasts with the colours in the artwork can create an unexpected visual connection. A cyclist, vehicle or passer-by can add movement and context.
This is where photographing street art becomes more interesting than simply making a record of a wall.
Instead of asking only:
“How can I photograph this mural?”
try asking:
“What can I photograph around this mural?”
How to photograph street art and murals
Photographing a mural accurately can be surprisingly difficult.
The biggest problems are often not the camera or lens, but the location.
You may find yourself dealing with parked cars, wheelie bins, street signs, lampposts, pedestrians, litter, shadows and restricted viewpoints. A mural that looks impressive when you’re standing in front of it can be considerably harder to photograph once you start looking through the viewfinder.
1. Look for the best viewpoint
If you’re photographing a mural as a record of the artwork, aim to get the camera as square to the wall as possible.
Keeping the camera level and parallel to the surface helps minimise perspective distortion.
This isn’t always easy. Buildings may be positioned directly beside roads or pavements, leaving very little room to work.
A wide-angle lens can allow you to fit more of the mural into the frame, but be careful. Shooting from too close can introduce significant perspective distortion, particularly towards the edges of the image.
Sometimes moving further away and using a longer focal length will produce a much cleaner result.
2. Don’t automatically remove everything from the photograph
Not every distraction is actually a distraction.
A straight reproduction of a mural might require the wall to be photographed without people, cars or other objects in front of it. But if you’re creating an artistic photograph rather than a record of the artwork, those elements can become part of the composition.
A person looking at a mural can provide scale and a sense of interaction.
Someone walking past at exactly the right moment might create a much more compelling street photograph than an empty wall.
Look for relationships between the artwork and the surrounding environment.
3. Watch the light
The time of day can make a huge difference.
Direct sunlight can create strong shadows across a mural, while low winter sun can produce long shadows from nearby buildings, street furniture and vehicles.
If you’re photographing a mural professionally, consider visiting the location beforehand and working out when the light will be most suitable.
For a purely documentary record, even lighting is generally preferable.
For creative street photography, however, shadows can become part of the image.
4. Deal with lampposts and other objects
Urban murals have an unfortunate tendency to attract lampposts.
Street furniture is often positioned directly in front of, or immediately beside, a mural, making a clean photograph difficult.
Before reaching for Photoshop, consider whether you can solve the problem at the shooting stage.
Moving sideways can change the relationship between the camera and the obstruction. In some situations, taking several frames from slightly different positions can give you enough clean image area to remove the obstruction later.
Always make sure that moving objects such as bins is permitted and return anything you move to its original position.
5. Consider creating a composite image
Large murals can extend far beyond the field of view of your lens.
Rather than using an extremely wide-angle lens and accepting heavy distortion, consider photographing the mural in several overlapping sections.
The individual photographs can then be aligned and combined in Photoshop or another image-editing application.
This can produce a considerably more natural-looking result.
Make sure there is plenty of overlap between frames and keep the camera as stable and level as possible.
For architectural or documentary reproduction, pay particular attention to maintaining consistent exposure and focus throughout the sequence.
Removing unwanted objects with multiple exposures
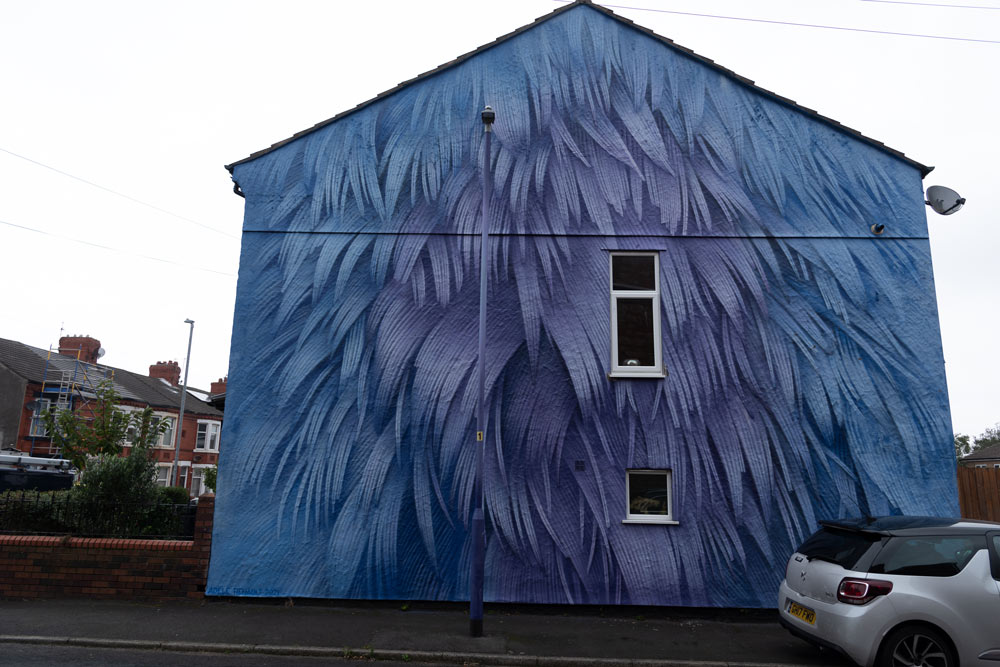
There are situations where taking several photographs from slightly different positions can make post-processing much easier.
For example, imagine a lamppost is obscuring part of a mural.
Take one photograph with the lamppost in one position, then move sideways while keeping the camera parallel to the wall and take another.
The second frame may contain a clean section of wall that can be used to replace the area obscured in the first photograph.
The photographs can be loaded into Photoshop as layers and automatically aligned before using masks or cloning to combine the clean sections.
This is essentially a photographic version of move and mask.
It is particularly useful when you want to retain the natural appearance of the original artwork rather than reconstructing a large area manually.
Using a median stack
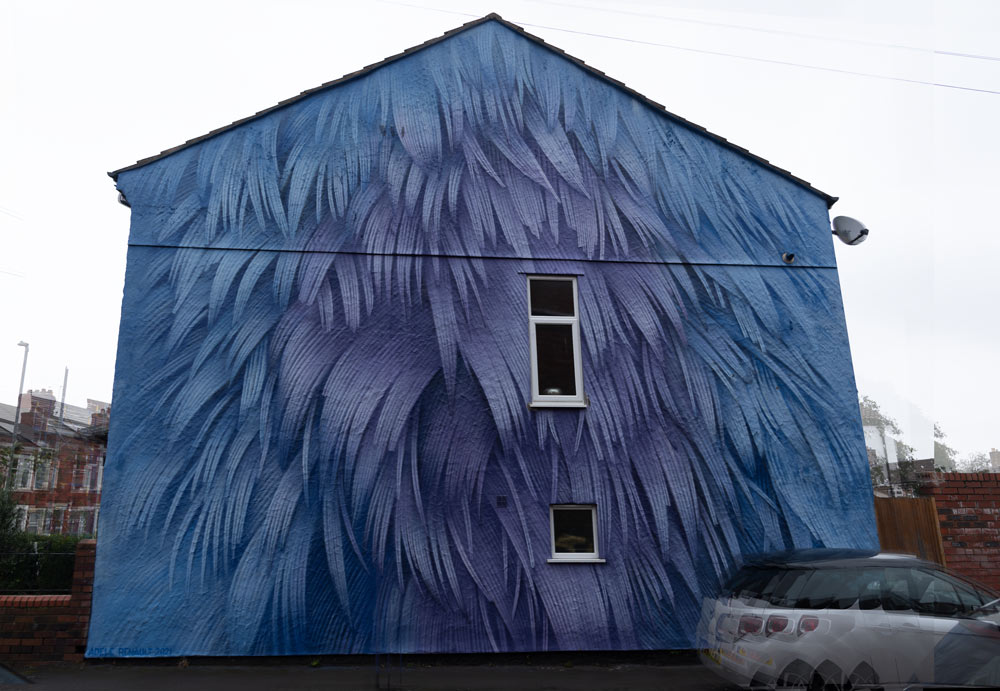
Another option is to photograph the scene several times from slightly different positions and combine the images as a stack.
Photoshop’s Median stack mode can identify pixels that change between frames and, in suitable situations, remove people or other moving objects.
The technique isn’t guaranteed to work with every scene, and some photographs will still require masks or cloning afterwards, but it can be extremely useful.
The more frames you have, the greater the chance of obtaining clean areas from which to build the final image.
Correcting perspective distortion
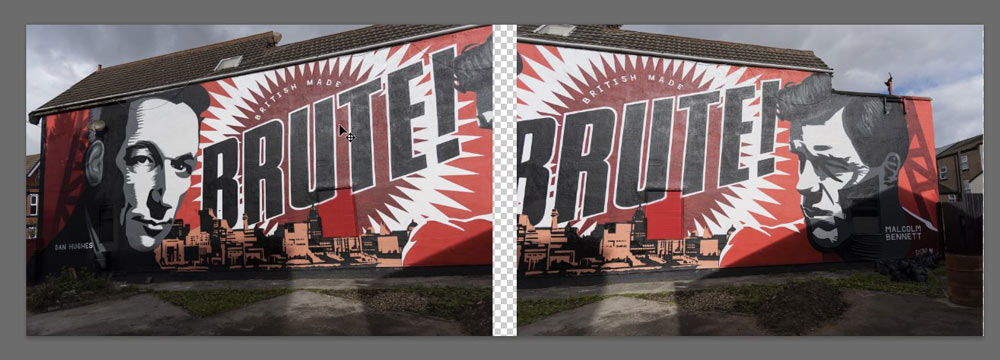
Perspective is one of the biggest challenges when photographing murals.
If you cannot stand directly opposite the artwork, the vertical and horizontal lines of the building can converge. The result can make a rectangular mural look increasingly distorted towards one side.
Modern editing software makes correcting this considerably easier.
Adobe Camera Raw includes geometry and perspective correction tools, while specialist applications such as DxO ViewPoint provide additional control over perspective and architectural distortion.
The key, however, is to capture as much useful information as possible in the original photograph.
Shoot Raw where possible, leave some space around the artwork and avoid cropping too tightly in camera.
That gives you considerably more flexibility when correcting the image later.
Photographing street art as street photography
There is another way to approach urban art.
Instead of treating the mural as the subject, treat it as part of the environment.
This can lead to some fascinating street photography opportunities.
Look for:
- People interacting with the artwork
- Contrasting colours between people and murals
- Interesting shadows
- Reflections
- Architecture framing the artwork
- Vehicles passing in front of the mural
- Unexpected visual connections
- Repeated shapes or colours
- People photographing the artwork themselves
The mural becomes part of a larger story rather than simply a flat image on a wall.
This approach can also help prevent your street art photography becoming repetitive when you’re photographing several murals in the same location.
Street art can become a photographic project
One of the biggest attractions of photographing urban art is that it can become an ongoing project.
Street art is constantly changing.
New murals appear. Old ones disappear. Buildings are demolished, repainted or redeveloped. Temporary works may survive for only a few days or weeks.
That makes urban art an interesting subject for photographers who enjoy documentary projects.
You could choose a particular town or city and build a photographic archive of its murals.
Alternatively, you might concentrate on a particular type of work, such as large-scale portraits, political murals, stencil art or works by a particular group of artists.
Research can become part of the project.
Finding where murals are located, discovering who created them and learning about the stories behind them can turn a simple photographic walk into a much more rewarding experience.
Photographing temporary street art
Not all urban art is designed to last.
Some works are painted on temporary surfaces or are exposed to weather and environmental damage. Others may be removed or painted over when a building changes ownership or redevelopment takes place.
This gives photography an important documentary role.
A mural that exists today may be gone next year.
By photographing it carefully, you’re not simply creating a picture for your portfolio; you’re creating a record of a particular place at a particular moment.
That can become particularly valuable when building a long-term personal project.
Research before you go
One of the best ways to improve a street art photography project is to research before leaving home.
Look for local street art guides, artist websites, social media accounts, walking maps and community projects.
Some cities have dedicated mural trails or annual street art festivals, making it possible to plan an entire photographic walk around a particular area.
Research can also help you avoid turning up at a location only to discover that the artwork has been removed, painted over or is inaccessible.
And don’t forget to check local restrictions.
If you need access to private property, a cherry picker, drone or other equipment, obtain the necessary permission before starting.
Is street art a good subject for photographers?
Absolutely.
Whether you photograph murals as accurate reproductions, use them as backgrounds for street photography or develop an entire urban photography project around them, street art offers an enormous range of possibilities.
The most successful images won’t necessarily be the ones showing the largest or most colourful mural.
Sometimes the best photograph is the one where the artwork interacts with its surroundings.
A passer-by may provide the scale. A shadow may transform the composition. A nearby building might frame the mural perfectly. Or an apparently unwanted lamppost may become an unexpected part of the image.
The important thing is to look beyond the wall.
Street art and graffiti may be difficult to define and the distinction between them remains debated. For photographers, however, that uncertainty is almost beside the point.
The urban environment is full of potential subjects.
You just need to start looking for them.