sRGB vs Adobe RGB vs ProPhoto RGB: Which Colour Space Should Photographers Use?
sRGB, Adobe RGB and ProPhoto RGB are three of the most commonly discussed colour spaces in photography. But which one should you use?
Colour management is one of those subjects that can quickly become confusing.
Open Photoshop, Lightroom or another editing application and you’ll find references to colour profiles, colour spaces, ICC profiles, gamuts, rendering intents and bit depth. Then you start looking at printing and suddenly there seems to be an entirely different set of rules.
The good news is that choosing a colour space doesn’t have to be complicated.
For most photographers, the decision comes down to three questions:
Are you photographing for the web, sending files to a lab, or printing your own work?
Understanding the difference between sRGB, Adobe RGB (1998) and ProPhoto RGB will help you choose the right workflow and avoid unnecessary colour problems.
What is a colour space?
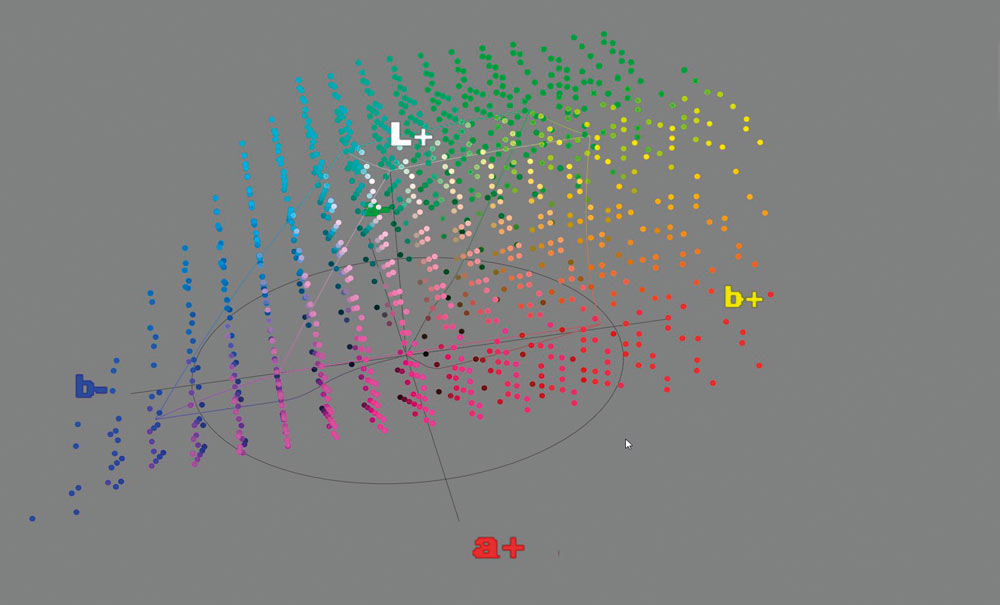
A colour space defines the range of colours that can be represented within a particular RGB system.
The three colour spaces we’re concentrating on here all use red, green and blue channels, but they don’t contain exactly the same range of colours.
That range is known as the gamut.
A colour space with a larger gamut can describe more colours, while a smaller gamut contains fewer.
However, bigger isn’t automatically better.
A wider colour space can preserve colours that a smaller space cannot represent, but it can also make colour management more important. If a file is created in a wide-gamut colour space and then opened by software or hardware that doesn’t correctly interpret its profile, the colours can look wrong.
That’s why the best colour space depends on what you’re trying to do with the photograph.
sRGB: the safest choice for the web
sRGB is the most widely supported RGB colour space and has been around since the 1990s.
It was designed around the characteristics of typical computer displays and has become the standard colour space for much of the internet.
If you’re preparing photographs for:
- websites
- social media
- online galleries
- many client-facing digital applications
- general screen viewing
sRGB remains an extremely safe choice.
Its relatively small gamut isn’t usually a problem for these applications because the devices and platforms displaying the images are commonly designed around sRGB.
The advantage of sRGB
The biggest advantage isn’t necessarily image quality.
It’s compatibility.
An sRGB file is far less likely to produce unexpected colours when it is opened, uploaded or displayed by software that isn’t fully colour-managed.
That makes it particularly useful when you don’t know exactly what device or application your photograph will eventually be viewed on.
When should you use sRGB?
If your primary destination is the internet, sRGB is generally the sensible choice.
For example, if you’re exporting photographs for Instagram, Facebook, your website or an online client gallery, sRGB is normally the appropriate destination colour space.
Adobe RGB (1998): a wider option for photographers
Adobe RGB (1998) has a larger gamut than sRGB, particularly in areas such as cyan and green.
It was developed with professional imaging and printing workflows in mind and has long been popular among photographers who produce their own prints or work with professional printing processes.
The wider gamut gives you more room to work with certain colours before they fall outside the available colour space.
This can be particularly useful with photographs containing highly saturated colours.
Is Adobe RGB better than sRGB?
Not automatically.
That’s an important distinction.
Adobe RGB can contain colours that sRGB cannot, but that doesn’t mean every photograph will benefit from being stored in Adobe RGB.
If your photograph contains relatively ordinary colours, you may see little or no practical difference in the final image.
The benefit becomes more apparent when the image contains colours towards the edge of the sRGB gamut and you’re using an output device capable of reproducing them.
When should photographers use Adobe RGB?
Adobe RGB can be a good choice when:
- you’re producing your own inkjet prints
- you’re working with a professional colour-managed printing workflow
- your printer and paper combination can take advantage of the wider gamut
- you’re exchanging files with a print provider that specifically requests Adobe RGB
- you’re working with images containing highly saturated colours
But always check the requirements of the person or company receiving your files.
ProPhoto RGB: the huge colour space
ProPhoto RGB is considerably larger than both sRGB and Adobe RGB.
In fact, its gamut extends beyond the range of colours that the human eye can see.
That sounds impressive – and for certain professional workflows it can be useful – but it also comes with a warning.
A larger gamut doesn’t automatically produce a better photograph.
ProPhoto RGB is best thought of as a working space designed to retain as much colour information as possible during editing.
It can be particularly useful when you’re starting with a Raw file and carrying out extensive adjustments.
Adobe Lightroom, for example, uses a very wide-gamut internal working space for its Develop processing.
Why can ProPhoto RGB be risky?
Because it gives you a very large range of possible colours, you need a properly colour-managed workflow to take advantage of it.
If a ProPhoto RGB image is opened or exported without the correct profile being interpreted, the result can be dramatically different from the original.
Colours can appear:
- desaturated
- darker
- lighter
- shifted in hue
This is why ProPhoto RGB isn’t generally the best choice for files that are simply going to be uploaded to the web.
sRGB vs Adobe RGB vs ProPhoto RGB
Here’s the simplest way to think about the three:
| Colour space | Gamut | Best suited to |
|---|---|---|
| sRGB | Smaller | Web, social media and general compatibility |
| Adobe RGB (1998) | Larger | Printing and colour-managed photography workflows |
| ProPhoto RGB | Very large | Advanced editing and high-end colour-managed workflows |
The important point is that the colour space should be chosen according to the workflow, not simply because one has a bigger gamut.
What colour space should I use when shooting Raw?
This is an important distinction.
A Raw file doesn’t have a native RGB colour space in the same way that a finished JPEG does.
The Raw data is interpreted by your software when you open it.
Your camera may still have an sRGB or Adobe RGB setting, but for Raw photography that setting generally affects things such as the JPEG preview and associated processing rather than restricting the original Raw sensor data to that gamut.
This is one of the advantages of shooting Raw.
You retain much more information to work with during processing.
What colour space should I use in Lightroom?
Lightroom’s colour management can appear complicated because the application handles colour differently from Photoshop.
During Raw development, Lightroom works internally in a very wide-gamut environment.
You don’t need to spend your time worrying about converting every photograph between RGB colour spaces while you’re making ordinary Develop adjustments.
The important decisions usually come when you export the photograph.
For example:
Exporting for the web
Choose:
sRGB
Exporting for a client
Check what the client or lab requires.
Exporting for your own inkjet printer
Adobe RGB or another wider-gamut workflow may be appropriate depending on the printer, paper and colour-management process.
Exporting for another professional workflow
Ask the recipient.
This last point is often overlooked.
If a professional printer tells you they require a particular colour space or ICC profile, follow their specification rather than assuming a particular RGB space is universally correct.
What colour space should I use in Photoshop?
Photoshop gives you considerably more control over your colour management.
You can establish working colour settings under:
Edit > Color Settings
The exact settings you choose should depend on your workflow.
For a photographer working primarily for the web, an sRGB-based workflow is straightforward.
For photographers producing high-quality prints, Adobe RGB or a wider-gamut workflow may make sense.
For advanced users working with ProPhoto RGB, 16-bit files and extensive editing, a carefully managed workflow can preserve more information throughout the process.
The important thing is consistency.
Don’t randomly switch between colour spaces because one sounds better.
What happens when you convert from Adobe RGB to sRGB?
When you convert an image from a larger colour space to a smaller one, some colours may fall outside the destination gamut.
The conversion process has to map those colours into the smaller available range.
This can result in changes to:
- saturation
- hue
- brightness
- subtle colour relationships
The effect depends heavily on the photograph.
A relatively muted portrait may show virtually no visible difference.
A highly saturated landscape, product photograph or image containing intense blue, cyan or green may show a much more obvious change.
This is why it’s important to keep your original high-quality master file.
Don’t repeatedly convert the same file backwards and forwards between colour spaces.
Instead, keep the original and create an output version for the destination you need.
Don’t overwrite your master file
One of the safest principles in digital photography is:
Keep a high-quality master and create output files from it.
For example, you might have:
Master file
Raw or high-bit-depth working file with a wide colour gamut.
Then create:
Web version
JPEG, sRGB, appropriately resized and sharpened.
Print version
Prepared according to the requirements of your printer and paper.
Client version
Prepared according to the client’s specifications.
This approach means you aren’t permanently throwing away colour information simply because one particular output requires sRGB.
Do you need ProPhoto RGB and 16-bit?
This is where photographers can sometimes fall into the trap of assuming that the most technically advanced workflow must automatically be the best.
It isn’t that simple.
A ProPhoto RGB, 16-bit workflow can provide substantial headroom for demanding editing, particularly when you’re making strong tonal or colour adjustments.
But it also produces larger files and places greater demands on your computer and storage.
More importantly, you need to understand the workflow.
If you don’t have a properly colour-managed setup, simply selecting ProPhoto RGB isn’t going to improve your photographs.
In some circumstances, it can make problems harder to diagnose.
For photographers who routinely perform extensive editing, work with high-end printing or need to preserve maximum colour information for future output, a wide-gamut, high-bit-depth workflow can be worthwhile.
For someone exporting photographs for Facebook, Instagram and a website, it is unnecessary complexity.
What about 8-bit versus 16-bit?
Bit depth and colour space are related, but they’re not the same thing.
Colour space determines the range of colours that can be represented.
Bit depth determines how many tonal steps are available within that range.
An 8-bit image provides 256 possible values per channel.
A 16-bit image provides vastly more.
The extra information can be particularly useful during heavy editing, gradients and significant tonal adjustments, where it can help reduce the risk of visible banding.
For everyday web output, 8-bit JPEG files are usually perfectly adequate.
For advanced editing, keeping your working file at 16-bit can provide additional protection against degradation.
What colour space should I use for printing?
This is probably the question photographers most want answered.
The answer is:
It depends on how you’re printing.
Printing through a professional photo lab
Ask the lab.
Some labs prefer or require sRGB files because their workflow is designed around it.
Others can work with Adobe RGB or wider-gamut files.
Don’t assume that sending a wider-gamut file will automatically produce a better print.
Printing on your own inkjet printer
A wider-gamut workflow such as Adobe RGB can be useful, particularly when your printer and paper combination can reproduce colours outside sRGB.
High-end photographic printers with additional ink colours can produce a very wide range of colours.
In these circumstances, throwing away potentially useful colour information at the beginning of the workflow may be unnecessary.
Fine-art printing
If you’re producing exhibition or fine-art prints, colour management becomes even more important.
The printer, ink, paper and ICC profile all contribute to the final result.
A wide-gamut working space is useful, but the output profile ultimately determines what your particular printer and paper combination can reproduce.
What about ICC profiles?
An ICC profile describes the colour characteristics of a particular device or colour space.
For photographers, this might mean a profile for:
- a monitor
- a camera workflow
- a printer
- a particular paper
- sRGB
- Adobe RGB
- another colour space
When you save an image, embedding its colour profile helps other applications understand how the RGB values should be interpreted.
This is why you should generally embed the appropriate ICC profile when exporting images.
Without the profile, another application may have to guess what the numbers mean.
And that is when colour can go badly wrong.
A simple colour-managed workflow
If all of this sounds complicated, here’s a practical approach.
If you mainly photograph for the web
Shoot Raw → edit → export sRGB JPEG → upload
Simple and reliable.
If you photograph for clients and print
Shoot Raw → edit in a suitable working space → retain master → prepare output according to the lab/printer specification
If you produce your own high-end prints
Shoot Raw → wide-gamut/high-bit-depth workflow where appropriate → soft proof → prepare using the correct printer/paper profile → test print → final print
The more demanding the output, the more important colour management becomes.
Don’t confuse colour space with image quality
This is perhaps the most important lesson.
A ProPhoto RGB image isn’t automatically better than an sRGB image.
Adobe RGB doesn’t magically create colours that weren’t captured by the camera.
And changing an image from sRGB to ProPhoto RGB doesn’t restore colour information that has already been discarded.
A wider colour space gives you more room to work with, but it doesn’t improve a poorly exposed or poorly composed photograph.
The colour space protects the information you have.
It doesn’t create better photography.
So which should you choose?
If you want the short version:
Choose sRGB if:
- Your photographs are primarily for websites and social media.
- You need maximum compatibility.
- Your lab specifically asks for sRGB.
- You don’t want the complexity of a wide-gamut workflow.
Consider Adobe RGB if:
- You produce your own inkjet prints.
- Your printer and paper combination can take advantage of the wider gamut.
- You work with professional colour-managed printing workflows.
- You’re dealing with highly saturated colours.
Consider ProPhoto RGB if:
- You have an advanced, colour-managed workflow.
- You routinely carry out substantial editing.
- You want to preserve maximum colour information during processing.
- You understand the implications of working with a very wide gamut.
- You’re comfortable working in 16-bit where appropriate.
For everyone else, don’t overcomplicate it.
A well-managed sRGB workflow will produce excellent results for an enormous number of photographers.
The best colour space is the one that suits the job
There is no single RGB colour space that is perfect for every photographer.
The choice between sRGB, Adobe RGB and ProPhoto RGB is really a choice between compatibility, working gamut and workflow complexity.
The important thing is to understand where your photographs are going.
If they’re destined for the web, sRGB remains the safe choice.
If you’re producing high-quality inkjet prints, Adobe RGB or a wider-gamut workflow may give you more flexibility.
If you’re working at the highest level with demanding colour-critical images, ProPhoto RGB and 16-bit editing can provide valuable additional headroom – provided you understand colour management.
And above all, remember this:
A sophisticated colour workflow protects a great photograph. It doesn’t turn a poor photograph into a great one.