Feathered Lighting in Photography: How to Use Softboxes for Better Portraits
Feathered lighting can give portrait photographers much greater control over the way light falls across a subject. Here’s how it works, and how to use it in the studio.
Lighting is one of the most important tools a photographer has.
Yet sometimes the biggest improvements don’t come from buying another light or a more expensive modifier. They come from understanding how to position and control the light you already have.
One technique that can produce particularly subtle results is feathered lighting.
Feathering a light can create a gradual change in illumination across a subject, helping photographers control contrast, shape and mood. It can be especially effective for portrait photography, although it requires considerably more precision than simply pointing a softbox directly at your subject.
What is feathered lighting?
Feathering involves positioning a light source so that the subject is illuminated by the edge of the light, rather than being directly in the centre of the beam.
Instead of pointing a softbox straight at your subject, the modifier is rotated or angled so that the light travels across the subject.
This changes the way the illumination falls across the scene.
The result can be a much more controlled and gradual lighting pattern, with subtle variations across the face and body.
It’s an approach that can be particularly useful when you want to create dimensional portrait lighting without simply increasing contrast or relying heavily on post-production.
Feathering isn’t a new lighting technique
Although the term feathering has become increasingly common in modern photography discussions, the underlying principle is far from new.
Painters have been controlling and observing directional light for centuries.
The work of Dutch artists such as Johannes Vermeer provides fascinating examples of carefully controlled directional illumination.
Many of Vermeer’s interiors appear to be illuminated by windows positioned to one side of the subject. The position of the sitter relative to the window dramatically affects the resulting light.
In other words, the principle is simple:
Change the relationship between the subject and the light source, and you change the quality and distribution of the light.
Photography simply gives us considerably more control over that process.
Why use feathered light for portraits?
A softbox positioned directly towards a subject can produce beautiful, soft illumination.
But it can also illuminate the subject relatively evenly.
Feathering gives you another option.
By rotating the softbox, you can control how much light reaches different parts of the subject.
This can help create:
- More dimensional portraits
- Gradual changes in brightness
- Greater control over facial contrast
- More interesting backgrounds
- Subtle transitions between light and shadow
- A stronger sense of depth
It’s particularly useful when you’re trying to create a carefully controlled studio portrait rather than simply achieving an evenly lit exposure.
How to position a softbox for feathered light
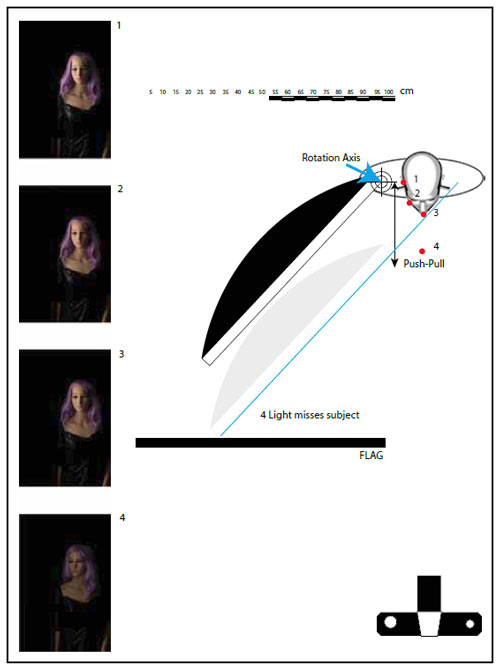
Start with your softbox positioned relatively close to the subject.
Rather than pointing it directly at them, rotate it so that the subject sits towards the edge of the light’s spread.
The exact position depends on the modifier, its size, its distance from the subject and the look you’re trying to achieve.
A useful way to understand the technique is to move the softbox gradually while watching the modelling light.
Don’t immediately worry about taking the perfect photograph.
Watch how the illumination changes across the subject.
Move the modifier a small amount.
Rotate it.
Move it closer.
Move it further away.
Observe what happens.
The changes can be surprisingly subtle.
Feathering requires precision
One of the biggest lessons from experimenting with feathered light is that small changes can produce significant differences.
This becomes particularly noticeable when a softbox is positioned close to the subject.
A movement of only a few inches can alter the illumination considerably.
That means the position of the model becomes important too.
If the subject moves significantly during the shoot, the lighting pattern can change.
For a controlled studio portrait this isn’t necessarily a problem.
For a moving subject, however, highly feathered and closely positioned lighting can become considerably more difficult to manage.
Metering feathered light
Exposure can be more difficult to measure when using heavily feathered light.
The illumination across the face can vary considerably, meaning that small changes in the position of either the subject or the light meter can produce different readings.
A handheld light meter is still useful for establishing a starting exposure.
However, it shouldn’t necessarily be treated as the final answer.
One practical approach is to position the meter close to the subject’s face and point it towards the light source.
Take a reading, make a test exposure and then refine the result while viewing the image on a tethered monitor.
This combination of metering and visual assessment can be more effective than relying entirely on either method.
Why tethered shooting can help
Feathered lighting is a good example of where tethered shooting can be extremely useful.
When the lighting changes subtly across the subject, the larger screen allows you to inspect the image carefully.
You can look at:
- Highlight detail
- Shadow detail
- Skin tones
- Background illumination
- Contrast
- The transition between light and shadow
Rather than constantly moving between the camera and the subject, you can make small adjustments and immediately assess the results.
For a technical lighting experiment, tethering also makes it much easier to compare different setups.
Don’t forget the spill light
One of the challenges with feathering is that the light isn’t necessarily travelling only towards your subject.
Depending on the position and angle of the softbox, significant amounts of light can travel towards the camera.
This can result in unwanted flare or reduced contrast.
That’s where flagging becomes important.
Use black flags to control stray light
A black flag can be placed between the light source and camera to prevent unwanted illumination from reaching the lens.
This can make a significant difference.
The flag effectively blocks the stray light that would otherwise travel directly towards the camera.
It’s a simple piece of equipment, but an extremely useful one in a studio.
In fact, photographers sometimes underestimate how useful black surfaces can be.
We tend to think about lighting in terms of adding illumination.
But controlling light is often just as important.
Sometimes the best lighting tool is something that removes light rather than adding it.
Feathering and negative fill
This idea can be taken further with negative fill.
A black card or flag positioned close to the shadow side of the subject can absorb reflected light and deepen the shadows.
This gives the photographer another layer of control.
Instead of simply adjusting the power of the light, you’re controlling the environment around the subject.
This can be particularly effective for portraits where you want to create shape and definition in the face.
The importance of the light modifier
The type and size of modifier also influence the result.
A large octabox produces a different spread of light from a smaller softbox or strip box.
The distance between the modifier and subject matters too.
A large modifier positioned close to the subject can produce very soft light, while moving it further away changes the apparent size of the source and the way the light falls across the scene.
If you’re experimenting with feathering, don’t change everything at once.
Start with one modifier and learn what it does.
Then change the distance.
Then change the angle.
Then change the subject’s position.
This makes it much easier to understand what is actually causing each change.
A simple feathered-light experiment
You don’t need a model or complicated studio setup to start experimenting.
A mannequin, chair or other static subject can work perfectly well.
Try this:
- Position a large softbox approximately 2–3 metres from your subject.
- Place it slightly above the subject’s eye level.
- Take a photograph with the softbox pointing directly at the subject.
- Rotate the softbox so that the subject moves towards the edge of the light.
- Take another photograph.
- Move the subject slightly closer to or further from the light.
- Compare the results.
- Introduce a black flag on the camera side.
- Compare the image again.
Look carefully at the changes in illumination.
Don’t just compare whether one image looks “better”.
Try to understand why the image changed.
Keep detailed notes
If you’re conducting a serious lighting experiment, accurate notes are incredibly valuable.
Record:
- Camera settings
- ISO
- Aperture
- Shutter speed
- Light power
- Modifier
- Distance from subject
- Height of light
- Angle of light
- Subject position
- Meter reading
Most importantly, associate those notes with the actual image file.
It’s surprisingly easy to take dozens of photographs and then discover that you can’t remember which lighting arrangement produced which result.
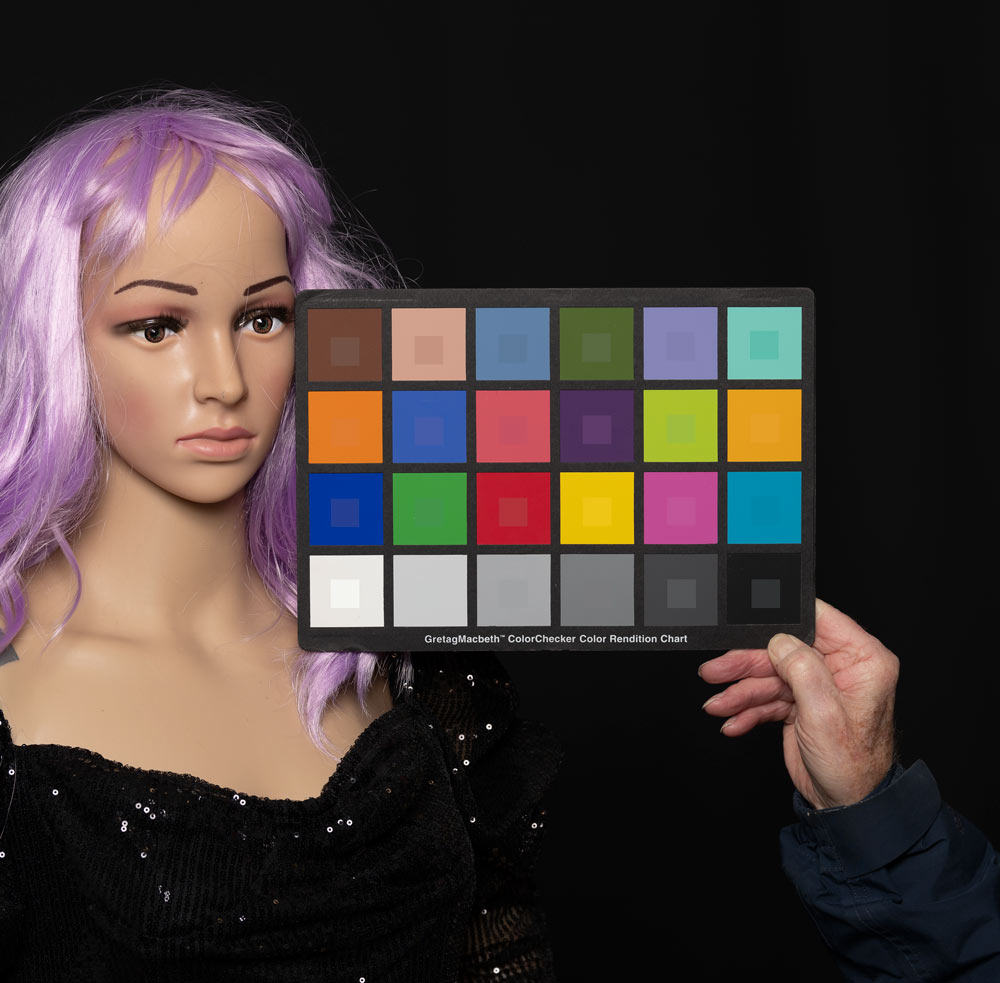
One simple solution is to photograph a note or identifying card between different sequences.
That way, when you return to the images later, you can immediately identify the setup.
Use a tripod when testing lighting
When you’re trying to understand lighting rather than simply produce a photograph, consistency is important.
A tripod helps keep the camera position fixed.
That means you can compare different lighting arrangements without simultaneously changing the camera angle.
For technical experiments, consider tethering the camera as well.
The goal is to eliminate as many variables as possible.
Feathered light isn’t always the answer
It’s worth remembering that feathering isn’t automatically better than straightforward lighting.
Different lighting techniques suit different subjects and situations.
A simple softbox pointed directly towards the subject may be exactly what you need.
Feathering can also become unnecessarily complicated if you’re photographing a subject that moves around considerably.
The technique is most useful when control and subtlety are more important than speed.
The importance of experimentation
One of the most valuable things about a lighting technique such as feathering is that it encourages you to experiment.
Rather than simply copying a lighting diagram from somebody else, start asking questions.
What happens if the light moves closer?
What happens if it moves further away?
What happens if you rotate the modifier?
What happens if the subject moves?
What happens if you introduce a black flag?
What happens if you use a strip box instead?
What happens if you change the background?
These experiments build an understanding of light that goes far beyond memorising lighting diagrams.
Feathered lighting: the key takeaway
Feathered light provides portrait photographers with a powerful way to control the distribution and quality of illumination.
It can create subtle transitions, shape the face and add depth to a portrait.
But it isn’t a technique that rewards rushing.
The closer the light is to the subject and the more heavily it is feathered, the more important accurate positioning becomes.
A few inches can make a difference.
A small change in angle can alter the result.
And the subject needs to remain relatively consistent in position.
Start simply.
Use a static subject.
Take notes.
Use a tripod.
Tether the camera if possible.
Experiment with the softbox position.
Add flags.
And, most importantly, watch what the light is actually doing.
Once you understand how feathered light behaves, it becomes another useful tool in your portrait photography toolkit rather than simply another lighting technique to memorise.