Nik Collection Review: A Guide to DxO’s Photo Editing Plugins
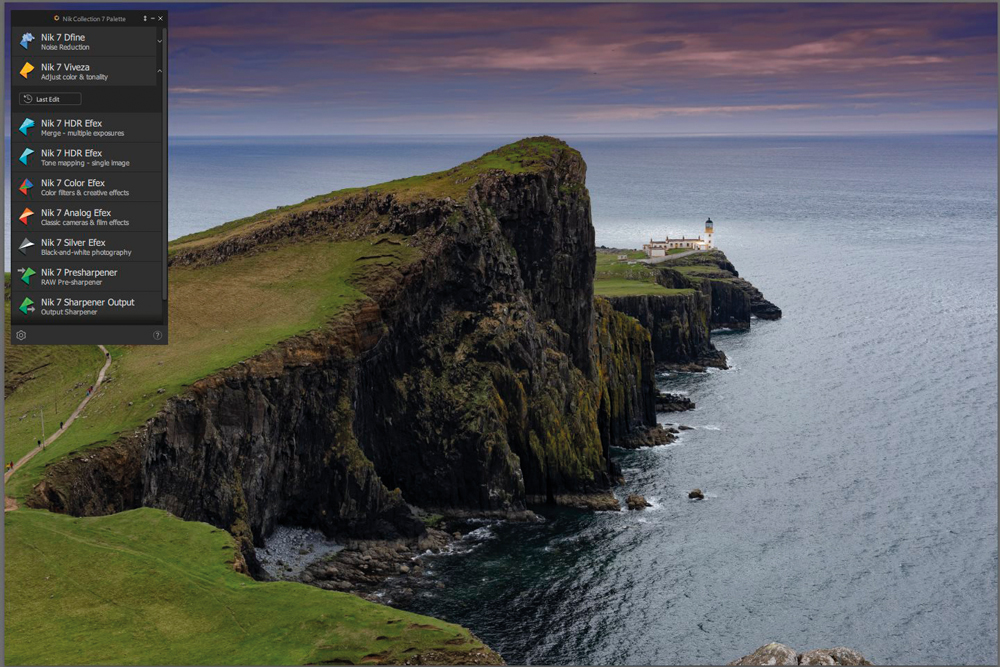
For photographers who want more creative control than a conventional RAW editor provides, Nik Collection by DxO remains one of the best-known collections of specialist photo-editing tools.
Rather than trying to replace Photoshop, Lightroom or Affinity Photo, Nik Collection works alongside them, providing dedicated tools for colour, black and white, local adjustments, sharpening, noise reduction, HDR and creative effects.
The current version is Nik Collection 9, but the appeal of the software remains rooted in the same idea that has made the Nik name popular for decades: give photographers powerful specialist tools without making every adjustment feel like a complicated Photoshop exercise.
The suite can be used as standalone applications or integrated into supported editing workflows, including Photoshop, Lightroom Classic, Affinity and DxO PhotoLab.
What is Nik Collection?
Nik Collection is a suite of seven photography plugins and applications:
- Nik Color Efex – creative colour and tonal effects
- Nik Silver Efex – specialist black-and-white processing
- Nik Analog Efex – analogue and film-inspired effects
- Nik Viveza – precise colour and tonal adjustments
- Nik Dfine – noise reduction
- Nik Sharpener – sharpening for different output requirements
- Nik HDR Efex – HDR merging and tone mapping
The advantage of having these tools separated into specialist applications is that you can concentrate on the particular job you are trying to achieve.
Need a monochrome conversion? Silver Efex is designed specifically for it.
Want to transform the colour palette of an image? Color Efex provides a huge range of possibilities.
Need to make a local tonal adjustment without spending ages creating a complicated selection? Nik’s U Point technology can provide a much quicker route.
Nik Color Efex
For many photographers, Nik Color Efex is the creative heart of the collection.
It contains a large selection of filters that can be combined to alter colour, contrast, atmosphere, texture and the overall character of an image.
One particularly useful application is colour harmonisation.
This becomes especially important when creating composites. You may have carefully assembled several photographs into a convincing composition, but differences in colour temperature, saturation and contrast can reveal that the elements originated from different images.
A colour effect applied consistently across the composite can help bring those elements together.
Filters can also be combined and controlled locally, giving photographers much more control than simply applying a preset to an entire photograph.
The creative possibilities range from subtle colour correction to deliberately stylised results. The trick, as with any powerful effect library, is knowing when to stop.
U Point local adjustments
One of the features that has helped distinguish Nik Collection from many other editing applications is its U Point technology.
Instead of manually painting a complicated mask, you can place a control point over an area of the image and adjust properties such as brightness, contrast and colour.
The selection is based on the characteristics of the area surrounding the control point.
This can make local corrections particularly quick when working on skies, faces, buildings, foliage or other areas with reasonably consistent colour and tone.
The technology has developed considerably over the different versions of Nik Collection. Modern versions include more sophisticated selection options, including elliptical and polygonal controls, luminosity-based masks and colour-based masking.
Nik Collection 9 adds AI Masks and Depth Masks, providing another way of making targeted adjustments without manually creating every selection.
Why local adjustments matter
Global adjustments affect the entire image.
Sometimes that is exactly what you want. Often it isn’t.
A landscape photograph, for example, might benefit from slightly darker corners, increased contrast in the foreground and a more controlled sky. A portrait might need different treatment for the subject’s face, clothing and background.
Local adjustments allow you to make those changes independently.
This is one reason experienced Nik users can produce sophisticated results without necessarily building dozens of Photoshop adjustment layers and masks.
The important thing is that local adjustments should support the photograph rather than become visible effects in their own right.
Nik Silver Efex for black and white photography
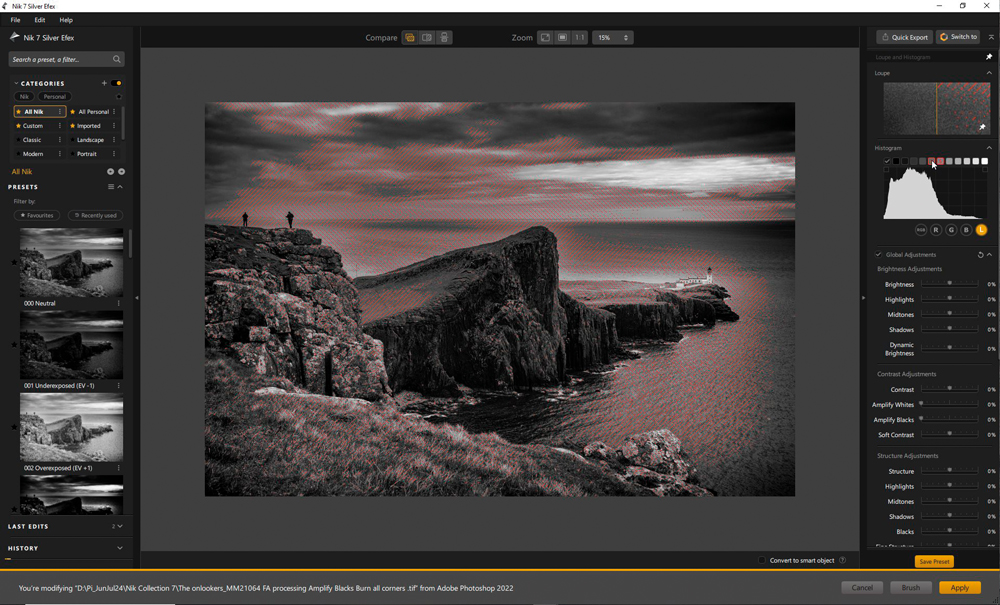
Nik Silver Efex has developed a particularly loyal following among monochrome photographers.
Converting an image to black and white is easy. Creating a convincing monochrome photograph with carefully controlled tonal relationships is considerably harder.
Silver Efex provides tools specifically designed for this process, including film-inspired rendering, contrast controls, structure and tonal adjustments.
The software also provides ways of thinking about an image in terms of zones and tonal relationships, making it particularly attractive to photographers who approach black and white photography with a traditional darkroom mindset.
A good black-and-white conversion can transform an otherwise ordinary colour photograph.
An overcast scene, for example, may initially appear flat and uninspiring. Removing the colour and carefully controlling contrast, blacks and structure can give the image considerably more atmosphere.
Don’t overdo the blacks
One lesson from working with aggressive monochrome presets is that more contrast does not necessarily mean a better photograph.
Increasing black levels can create drama, but pushing them too far can also produce halos, blocked shadows and unnatural edges.
This is particularly noticeable around subjects against bright skies.
As with any automated effect, treat the initial result as a starting point rather than the finished photograph.
Nik Analog Efex
If your aim is to move away from a clean digital appearance, Nik Analog Efex takes a different approach.
It provides tools for creating film and analogue-inspired effects, including textures, grain, light leaks and other characteristics associated with older photographic processes.
Used carefully, these effects can add character to an image.
They can also be extremely easy to overuse.
A subtle amount of texture or grain can help establish the visual language of a photograph, while applying every available effect at maximum strength can quickly make an image look like a preset rather than a photograph.
Nik Viveza
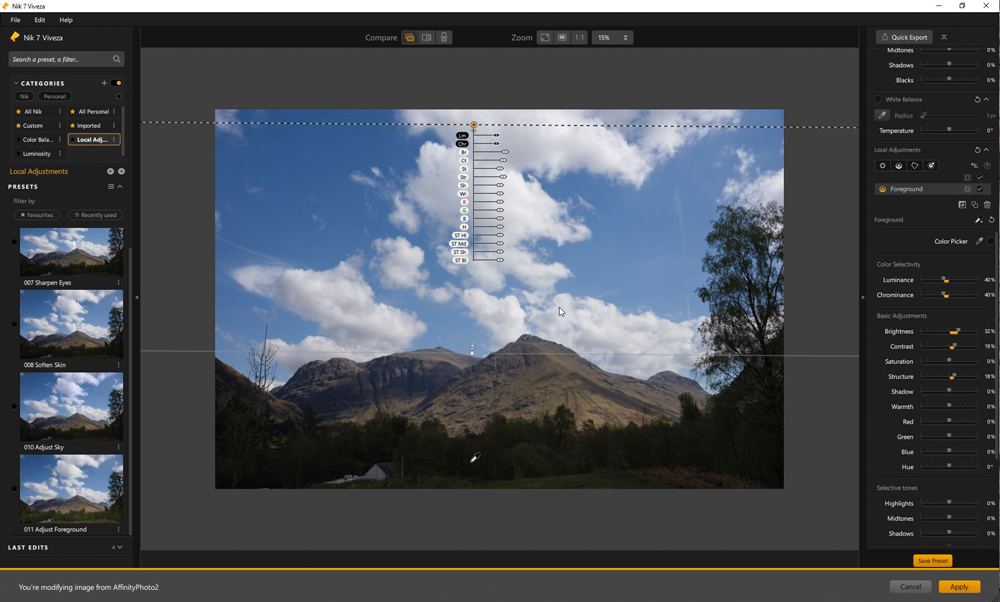
Nik Viveza is aimed more at controlled tonal and colour adjustments than the deliberately creative effects found in Color Efex and Analog Efex.
It is particularly useful when you want to make local changes to an image without constructing a complicated manual selection.
Modern Nik workflows have also become more integrated, with Viveza functionality available from within Color Efex, reducing the need to repeatedly move between applications.
HDR and image enhancement
Nik Collection also includes specialist tools for photographers working with high dynamic range images.
Nik HDR Efex can combine multiple exposures and create anything from natural-looking HDR results to much more dramatic interpretations.
It can also work from a single photograph when the aim is to expand the apparent dynamic range and create a more processed HDR appearance.
The important consideration is restraint.
HDR became associated with exaggerated halos, extreme clarity and unnatural colours, but the best HDR processing is often the version where the viewer doesn’t immediately realise that HDR techniques were used.
Sharpening and noise reduction
Not every image needs a creative effect.
Nik Collection also contains tools for more technical aspects of image processing.
Nik Dfine is designed for noise reduction, while Nik Sharpener is intended to optimise detail for output such as print or digital display.
These tools are useful reminders that a good editing workflow is not necessarily about making an image look more dramatic.
Sometimes the best improvement is simply cleaner detail, better-controlled noise or sharpening that is appropriate for the final output.
Using Nik Collection with Photoshop and Affinity Photo
One of the strengths of Nik Collection is that it doesn’t have to be the centre of your entire editing workflow.
You can make your basic RAW adjustments in your preferred software, move into Nik for a specialist task and then return to your main application for finishing.
For Photoshop users, DxO has developed increasingly sophisticated integration, including the ability to work with masks, send edits back as layers and use different Nik plugins as part of a more flexible workflow.
The same principle works well with Affinity Photo: use your main application for the parts of the edit it handles best and bring Nik into the workflow when its specialist tools offer a better or faster solution.
Working with layers and masks
This becomes particularly useful when creating composites.
Imagine that you have combined several photographs to create a finished scene. The perspective may be perfect, but the individual components can still have subtly different colour palettes.
Rather than trying to correct every individual element manually, you could use a Nik filter to help bring the colours together.
The resulting effect can then be blended with the underlying image using opacity, masks or blending modes.
This approach gives you the best of both worlds: the speed of a dedicated effect and the control of a layer-based editing workflow.
Nik Collection 9 expands those possibilities further with 18 blending modes in Color Efex and Analog Efex.
New creative tools in Nik Collection 9
If you are considering Nik Collection today, it is important to look beyond the features of earlier versions.
Nik Collection 9 introduced several major additions.
AI Masks can identify subjects for targeted adjustments, while Depth Masks allow adjustments to be targeted according to distance within a scene.
Color Efex also gained a dedicated Color Grading tool, providing control over shadows, midtones, highlights and global colour.
For more experimental work, new effects include:
- Halation, recreating the glow associated with analogue film highlights
- Chromatic Shift, inspired by colour-channel misalignment in traditional printing
- Glass Effect, creating glass-like distortion and refraction
These additions make the current version considerably more capable than the Nik Collection 7 generation originally tested by photographers.
Is Nik Collection easy to use?
There is a lot to learn.
That is both the attraction and the potential weakness of a suite such as Nik Collection.
You can apply a preset and get an interesting result within seconds, but understanding how the individual controls work allows you to create much more refined images.
The temptation is always to browse through presets until you find something that looks impressive.
A better approach is to ask what the photograph actually needs.
Does the image need more separation between subject and background?
Would a different colour treatment help unify a composite?
Would black and white create a stronger interpretation?
Does the photograph need additional structure or contrast?
Once you start using Nik as a collection of tools rather than a collection of effects, it becomes considerably more powerful.
A useful starting point, not a finishing button
One of the best ways to use Nik Collection is to treat presets as starting points.
Apply a preset, study what it has done, and then adjust the individual components.
You may discover that only two or three parts of the preset improve the photograph. Reduce the strength of everything else or remove it completely.
This approach gives you the speed of presets without allowing the software to dictate the final appearance of your image.
Who is Nik Collection for?
Nik Collection can be useful for a wide range of photographers.
It is particularly attractive to:
- Landscape photographers looking for sophisticated colour and tonal control
- Black-and-white photographers wanting dedicated monochrome tools
- Fine-art photographers exploring stylised treatments
- Composite photographers trying to harmonise different elements
- Portrait photographers making selective tonal and colour adjustments
- Commercial photographers who need repeatable editing workflows
- Photographers who enjoy experimenting with different visual styles
It is less about replacing your existing editing software and more about giving you another set of specialist tools.
Nik Collection: worth considering?
Nik Collection has survived because it occupies an interesting position in the photography software market.
It offers powerful editing tools without requiring every adjustment to be built manually from scratch.
For photographers who like experimenting, Color Efex and Analog Efex provide enormous creative scope. For monochrome specialists, Silver Efex remains one of the suite’s standout applications. And for photographers who regularly make detailed local corrections, the development of U Point, masks and AI-assisted selections makes the workflow increasingly powerful.
The key is not to use Nik simply because an effect is available.
Use it because the tool solves a problem or helps you achieve a particular creative intention.
That is when a collection of presets and filters becomes a genuine photographic workflow rather than just an effects library.
Nik Collection today
The original version of this article looked at Nik Collection 7 and its then-new features. Since then, DxO has continued to develop the software, with Nik Collection 9 now the current version.
The underlying philosophy, however, remains the same: specialist tools, fast local adjustments and plenty of creative control, used alongside your main photo-editing software.
For photographers who enjoy taking an image beyond basic exposure and colour correction, it remains a particularly interesting addition to the editing toolbox.