How to Correct Perspective and Lens Distortion in Photography
Perspective and lens distortion can be frustrating problems for photographers.
You may have taken a perfectly sharp photograph of a building, only to find that the walls appear to lean. A group photograph made with a wide-angle lens can leave the people at the edges looking stretched, while a painting photographed from an awkward angle can end up looking more like a trapezoid than a rectangle.
Sometimes the best solution is to get the camera position right when you take the photograph. But that isn’t always possible.
You might be standing beside a busy road, unable to move backwards. There could be parked cars, trees, railings or other obstacles in the way. You may be photographing a tall building from a narrow street, or trying to record artwork hanging high on a gallery wall.
Fortunately, modern editing software can correct many of these problems remarkably well.
The best correction starts in the camera
Software can do a great deal, but it cannot completely undo every consequence of a poor camera position.
Whenever possible, try to minimise distortion when taking the photograph.
For architecture and other subjects where straight lines matter, a useful starting point is to keep the camera as level as possible and avoid tilting it upwards or downwards. Ideally, the camera sensor should be parallel to the subject.
That is easier said than done.
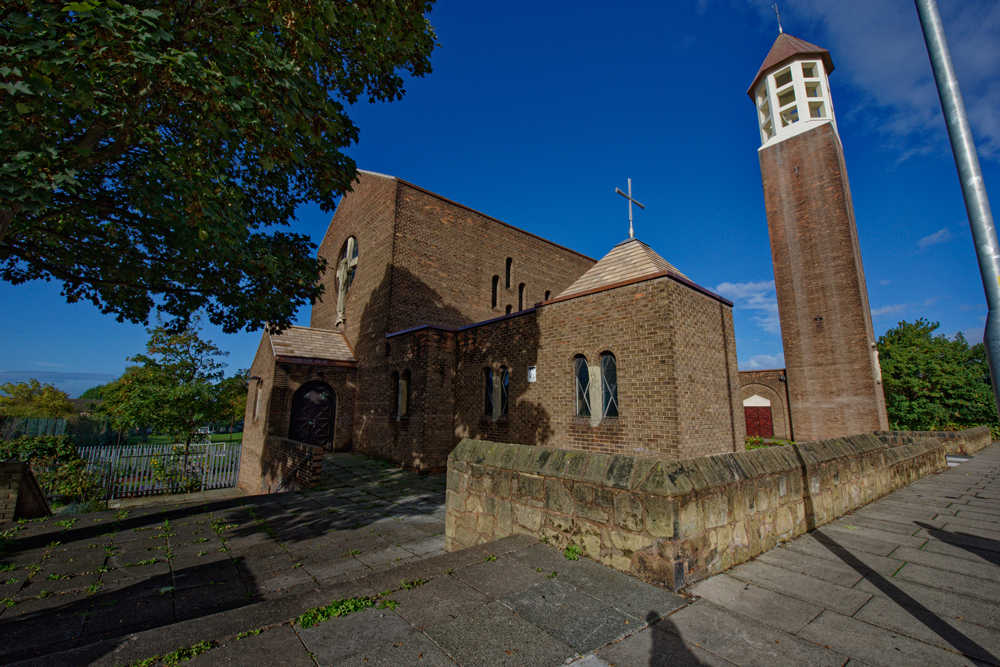
A tall building photographed from ground level is an obvious example. If you point the camera upwards to fit the building into the frame, the vertical lines will converge towards the top.
Sometimes there simply isn’t enough room to move backwards and keep the camera level.
This is where perspective correction becomes useful.
What is perspective distortion?
Perspective distortion occurs because of the relationship between the camera and the subject.
Photograph a tall building while pointing the camera upwards and the sides of the building will appear to converge. Photograph a rectangular painting from an angle and it may appear skewed or trapezoidal.
The important point is that this isn’t necessarily a fault with the lens.
It is often a consequence of where the camera had to be positioned.
Perspective correction allows you to digitally alter the geometry of the photograph so that lines that should be parallel appear parallel again.
Lens distortion is different
Lens distortion is a separate problem.
Wide-angle lenses can produce barrel distortion, where straight lines near the edges of the frame bow outwards. Other lenses can produce pincushion distortion, where lines appear to bow inwards.
Modern cameras and software can often correct these effects using lens profiles.
DxO, for example, uses camera-and-lens-specific optical profiles to apply corrections based on laboratory measurements of particular combinations of camera and lens.
Adobe Camera Raw and Lightroom Classic also provide lens and perspective correction tools.
The important thing is to understand that lens distortion and perspective distortion aren’t the same thing. They can occur together, and correcting one doesn’t necessarily correct the other.
Wide-angle lenses can also stretch subjects
There is another problem that is particularly noticeable in group photographs.
When you are forced to use a wide-angle lens because you cannot move backwards, subjects close to the edges of the frame can appear stretched.
This is sometimes called volume deformation.
Imagine photographing a group of people in a room when there isn’t enough space to step back. The person in the middle may look perfectly normal, while people close to the edges can appear wider or stretched towards the outside of the frame.
The effect isn’t usually caused by the people themselves, of course. It is a consequence of fitting a wide field of view into the image.
Specialist software such as DxO ViewPoint includes tools specifically designed to compensate for this type of deformation.
Photographing architecture when you have no room to move
Architecture is one of the areas where perspective correction can make a dramatic difference.
Imagine photographing a tall tower from a narrow pavement. There may be parked cars behind you, traffic immediately beside you and a tree blocking part of the view.
You have two choices: leave the top of the building out of the frame, or use a wide-angle lens and tilt the camera upwards.
Neither is ideal.
The resulting photograph may contain severe converging verticals and considerable lens distortion.
A tilt-shift lens can provide an optical solution, but it isn’t practical or affordable for every photographer.
Perspective correction in post-processing gives you another option.
The key is to capture as much useful information as possible in the original file. A high-resolution image gives you more room to work when corrections and cropping are required.
Be careful about what correction reveals
There is an interesting consequence of perspective correction that is easy to overlook.
When you photograph a statue from below, for example, you may record parts of the subject that wouldn’t be visible from a more conventional viewpoint.
Correcting the perspective doesn’t magically change the viewpoint from which the photograph was taken.
It changes the geometry of the image.
So if you photograph a statue from a low angle, information underneath the base or beneath the face may still be visible after correction. The resulting image can therefore be geometrically straighter without necessarily looking as though it was photographed from the ideal position.
This is one reason why getting the camera position right in the first place is still preferable.
Photographing artwork
Reproducing paintings, prints and other artwork presents its own challenges.
The ideal setup would have the camera positioned square-on to the artwork, with the sensor parallel to the picture surface and the camera centred at the appropriate height.
In practice, that isn’t always possible.
A painting might be mounted high on a gallery wall. Reflections may make a direct photograph impossible. The artwork may be surrounded by furniture or other objects that prevent you from positioning the camera exactly where you want it.
In these situations, you may have to photograph from slightly above, below or to one side.
Perspective correction can then be used to restore the rectangular shape of the artwork.
Get the lighting right too
Perspective correction won’t solve reflections.
If the artwork has a glossy surface, impasto brushwork or varnish, careful lighting is still essential.
In a controlled studio environment, specialist techniques such as polarising filters can help manage reflections. When working in a gallery, heritage building or other location, however, you may have much less control.
This is another good reason to spend time examining the subject and lighting before you start photographing.
Use guides when correcting perspective
One of the simplest ways to correct perspective is to give your software clear references.
If you know that something in the original scene should be horizontal or vertical, use it as a guide.
For example, when photographing a painting, you know that the four sides should form a rectangle. When photographing a building, you may have windows, door frames or architectural features that should run parallel.
Modern perspective tools can use these references to calculate the required correction.
DxO ViewPoint, for example, includes perspective, horizon and ReShape tools, while its current ReShape Fusion system can make local perspective and geometry adjustments rather than applying the same correction to the whole image.
That can be particularly useful when a global correction fixes one part of the photograph but makes another part look worse.
ReShape and local corrections
Global corrections are useful, but sometimes the problem is local.
A photograph might contain one object that needs adjusting without changing everything around it.
This is where tools based around deformable grids can be useful.
DxO’s current ReShape Fusion, for example, allows parts of an image to be moved, rotated or scaled, with controls over how much the adjustment affects the surrounding image. It can also be used for local perspective and volume-deformation corrections.
Used carefully, this can be a powerful finishing tool.
Used heavily, however, it becomes easy to create unnatural shapes.
As with any retouching technique, the aim should be to correct a problem rather than create a new one.
Books and documents can have the same problem
Perspective correction isn’t only useful for architecture.
Photograph a book that cannot be opened completely flat and the pages near the binding can curve towards the gutter.
This can be particularly troublesome when photographing old books or documents that cannot be dismantled or placed on a flat scanner.
Correcting the perspective and geometry can make the resulting pages much easier to read.
It can even help downstream processes such as optical character recognition, where straight and consistently spaced lines of text are important.
Again, the best result starts with the best possible original photograph.
Shoot for the correction
If you already know that an image will need substantial perspective correction, there are a few things worth considering before pressing the shutter.
Leave yourself some room
Corrections usually require cropping.
Don’t frame so tightly that the correction leaves you with no usable image.
Use the highest practical resolution
Perspective and distortion corrections can remove pixels around the edges of the frame.
Starting with a high-resolution original gives you more flexibility.
Consider using a longer lens
If you have enough space, stepping further back and using a longer focal length can often produce a more natural-looking perspective than getting extremely close with a very wide-angle lens.
This isn’t a universal rule, but it is worth trying.
Keep the camera as level as possible
For architecture and other subjects containing straight lines, a level camera can save considerable work later.
Check the edges
Distortion and stretching are usually most noticeable towards the edges of the frame.
Before committing to the shot, check what is happening to people, objects and architectural features around the outside of the image.
How much correction is too much?
This is where experience matters.
A technically straightened photograph isn’t necessarily a convincing photograph.
Heavy perspective correction can produce stretched edges, unusual proportions and areas of the image that simply don’t look natural.
The same applies to volume deformation. It can be useful to reduce the stretching caused by a wide-angle lens, but pushing the correction too far can create a different kind of distortion.
Don’t judge the correction only by whether the lines are straight.
Look at the whole photograph.
Does the building still look natural? Do people still look like themselves? Do objects retain believable proportions?
If not, back off the correction.
Correct the lens before correcting the perspective
When both lens distortion and perspective distortion are present, it makes sense to deal with the optical distortion as part of the workflow before making detailed geometric corrections.
A typical workflow might look something like this:
- Photograph the subject as carefully as possible.
- Apply the appropriate camera and lens correction.
- Correct perspective and converging lines.
- Correct any remaining volume deformation.
- Make local adjustments where necessary.
- Crop the image.
- Check the result at 100% and as a complete photograph.
The exact order can vary depending on the software, but the principle is straightforward: fix the large geometric problems first, then refine the details.
Perspective correction isn’t a substitute for good technique
It is tempting to think that modern software means you no longer have to worry about camera position.
That’s not really the case.
Software can correct an enormous amount, but every correction has consequences. Strong perspective adjustments can require significant cropping, while stretching and reshaping can alter the appearance of objects and people.
If you can get the camera into the right position in the first place, do so.
But when the location, subject or circumstances make that impossible, perspective correction can turn a compromised photograph into a very usable one.
A useful tool for difficult photographs
Perspective correction is one of those areas of photography where you may not need the tools every day, but when you do need them, they can save an enormous amount of time.
Architecture, interiors, artwork, heritage photography, groups and even photographs of books and documents can all present geometric problems that are difficult or impossible to avoid at the point of capture.
The trick is to understand why the distortion has happened before trying to correct it.
Is it the lens?
Is it the camera angle?
Is it the position of the subject within a wide-angle frame?
Or is it a combination of several problems?
Once you understand the cause, the correction becomes much more straightforward.
And, as with most things in photography, the best software correction is usually the one you barely notice in the finished image.