How to Photograph Shiny and Reflective Objects
Learn how photography domes, careful lighting and macro techniques can help you photograph medals, jewellery, watches, ceramics and other highly reflective subjects.
Shiny objects can be among the most challenging subjects to photograph.
The problem isn’t necessarily the object itself. It’s the fact that a polished surface behaves like a mirror. Instead of simply reflecting your carefully positioned lights, it can reflect the entire environment around it – including the photographer.
One of the earliest lessons I learned about photographing reflective objects came from a catalogue shoot. The photograph was technically excellent and had made it all the way through to the printed page before somebody noticed a problem.
The polished spoons in the photograph contained perfect inverted reflections of the photographer – complete with an unfortunately inappropriate choice of clothing.
Once you see a reflection like that, you can’t unsee it.
The same fundamental problem occurs when photographing medals, jewellery, watches, polished metal, glass, ceramics and many other reflective subjects.
The solution is usually not more powerful lighting. It is controlling what the subject can see.
Why are shiny objects so difficult to photograph?
A diffuse, matt surface scatters light in many directions. A polished surface reflects light in a much more organised way.
That means a shiny object can reflect:
- The photographer
- The camera and lens
- Light stands and modifiers
- Windows and other room lights
- Furniture and equipment
- The edges of reflectors
- The walls and ceiling
- Anything else within its reflective field
The more polished the object, the more obvious these reflections become.
This is particularly troublesome with jewellery and highly polished metal, where even a small unwanted reflection can ruin an otherwise excellent photograph.
The answer is to create a controlled environment around the subject.
Use a photography dome
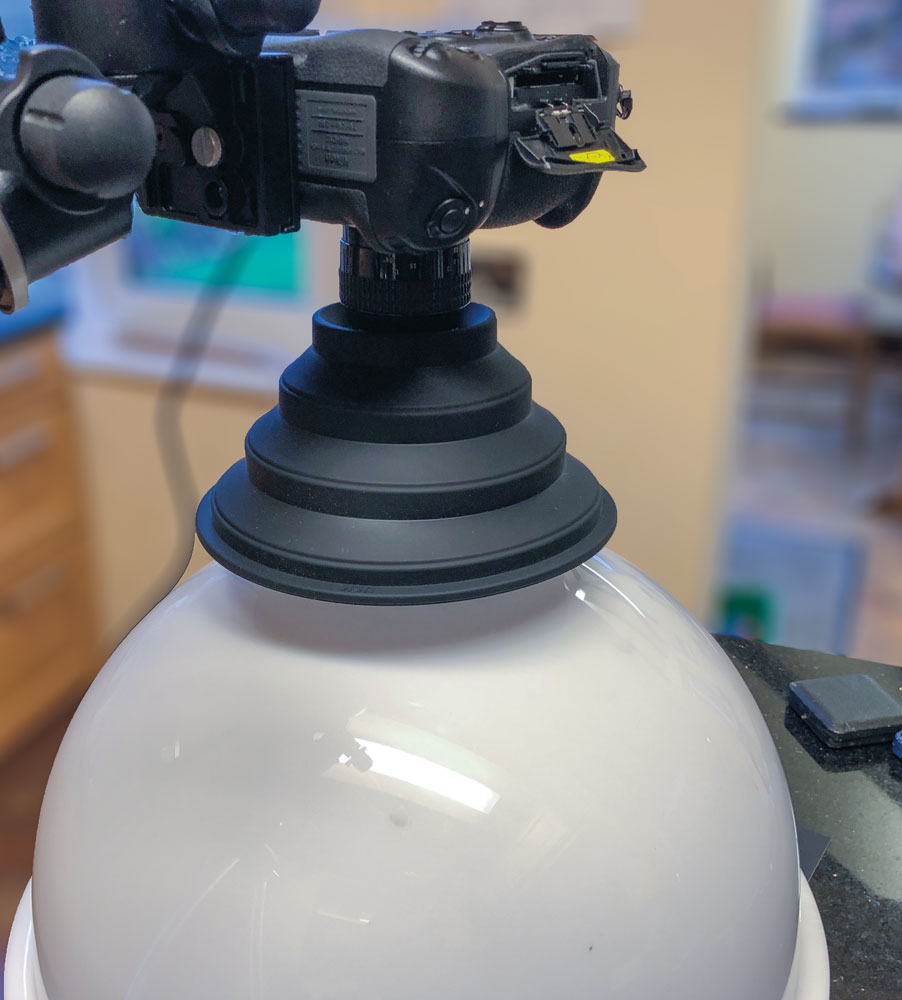
One of the most effective ways to photograph highly reflective objects is to place them inside a photography dome or translucent light tent.
The principle is simple.
Instead of allowing the shiny object to reflect a complicated studio environment, surround it with a large, evenly illuminated translucent surface.
The object then sees a broad, relatively uniform source of light.
This can produce much cleaner and more attractive reflections.
However, there is an important detail when building or choosing a dome.
Avoid internal supports
A conventional umbrella or light tent with internal stays can create unwanted lines in the reflection.
A highly polished surface can reveal surprisingly small structural details.
For serious reflective-object photography, a self-supporting translucent dome with a smooth interior surface is therefore particularly useful.
The goal is to make the object see a clean, continuous surface rather than a collection of individual light sources and support structures.
The camera is the remaining reflection
Even with the subject surrounded by a translucent dome, there is still one unavoidable problem:
the camera lens.
The front element of the lens will often appear as a reflection in the subject.
Fortunately, this is usually much less intrusive than seeing the photographer, camera body or studio equipment.
The lens may appear as a relatively simple dark circle or shape.
You can reduce unwanted reflections around the lens by using a black covering or rubber skirt around the front of the lens.
Commercial products are available for this purpose, while photographers working regularly with reflective subjects may eventually develop their own solutions.
The important principle is to control what the object can see.
Photographing shiny objects with controlled light
The difference between a bare flash, a hard light source and a large diffused dome can be dramatic.
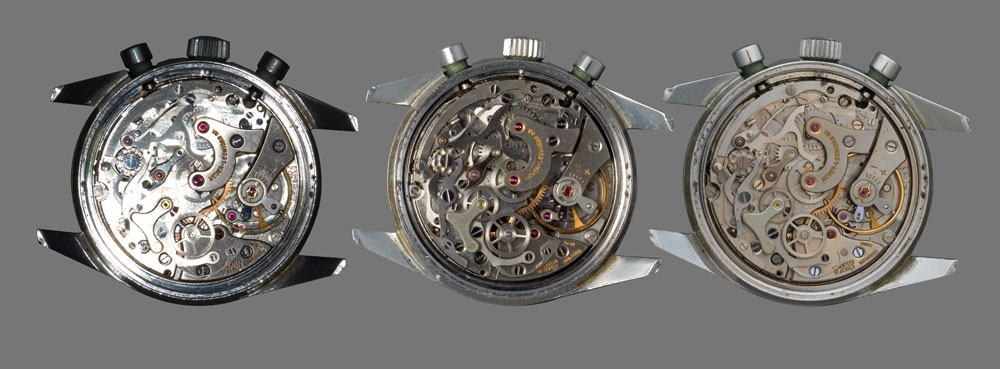
Consider a complicated object such as a mechanical watch or chronograph.
Its polished metal surfaces, glass, hands, dial and intricate mechanical components can all respond differently to the light.
A small, hard light source can produce strong highlights and harsh reflections.
A larger diffused source produces broader, softer reflections.
This doesn’t mean that diffused light is always the correct choice. Sometimes a carefully positioned hard highlight is exactly what gives a metallic object its shape.
The key is control.
Rather than simply illuminating the subject, you are effectively designing the reflections that will appear on its surfaces.
Think about the reflection, not just the light
This is one of the biggest changes in approach required when photographing reflective objects.
With an ordinary portrait, you might think about where the light is falling on the subject.
With a shiny object, you need to think about what the subject is reflecting.
Move the light source and you change the reflection.
Move the camera and the reflection changes.
Move the subject and the reflection changes.
Sometimes moving a light only a few centimetres can make a substantial difference to the final image.
Take time to look at the object from the camera position before you start shooting.
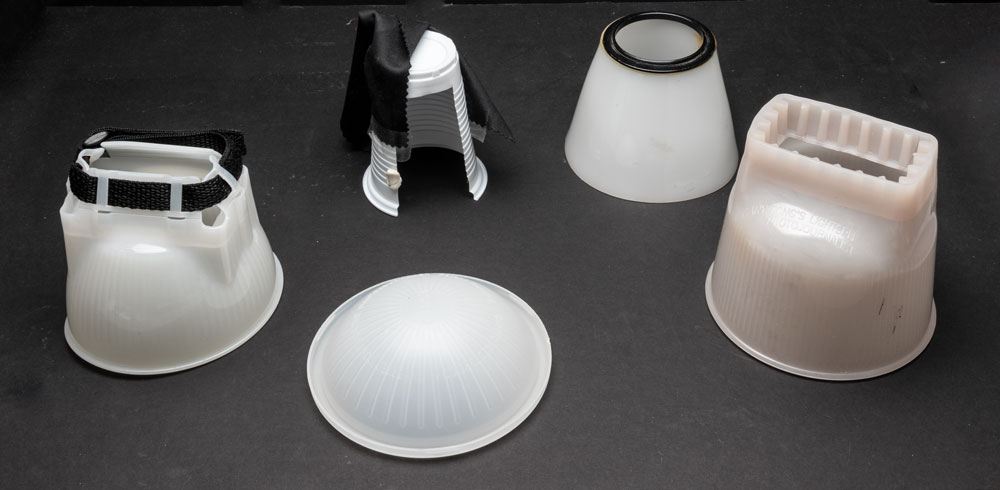
Photography domes don’t have to be expensive
You don’t necessarily need specialist equipment to experiment with dome photography.
Suitable translucent plastic domes can sometimes be found in:
- Lighting shops
- Second-hand shops
- Car boot sales
- Charity shops
- Household clearance sales
Lamp shades can be particularly useful.
Look for translucent plastic rather than glass. Plastic is safer, lighter and easier to modify if you need to create an opening for the lens.
Having several different sizes and shapes can also be useful.
The ideal dome depends partly on the subject and the working distance of the lens.
Match the dome to your working distance
Macro photographers need to pay particular attention to the distance between the front of the lens and the subject.
This is commonly referred to as the working distance.
If the dome is too small or the opening is incorrectly positioned, the edge of the hole can appear in the photograph.
A collection of domes of different heights and diameters therefore gives you considerably more flexibility.
This is one of those areas where a little experimentation can save a great deal of frustration later.
A simple flash can be enough
You don’t necessarily need a complicated multi-light setup.
For small subjects, a single flash can sometimes provide enough illumination, particularly when the light is allowed to bounce around the inside of a translucent dome.
In fact, the dome itself can become part of the lighting system.
Light entering the dome is scattered and reflected around the interior, creating a broad source that can provide considerable fill light.
For macro work, this can be particularly useful.
The important consideration is flash power.
At close working distances, very little power may be required. A manual flash with a wide range of power settings gives you much greater control than relying entirely on automatic exposure.
Photographing medals and other metal objects
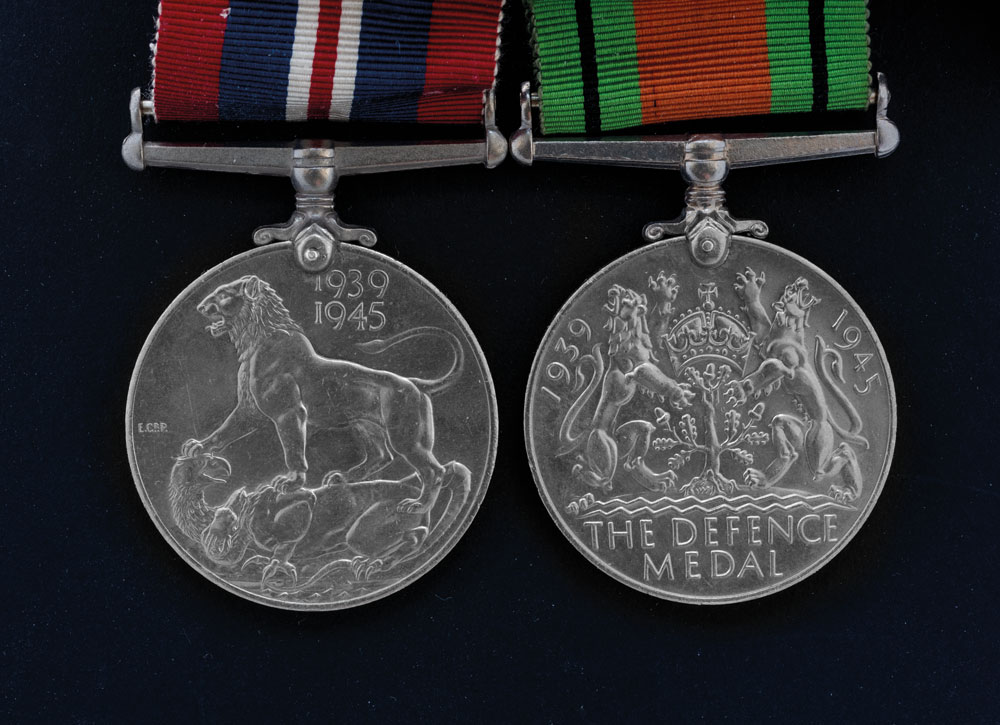
Medals provide a particularly good example of the problems involved in reflective-object photography.
Polished metal can easily pick up reflections from the room, while ribbons and other materials have completely different reflective properties.
The aim is to produce enough controlled reflection to reveal the shape and texture of the medal without introducing distracting highlights.
A translucent dome provides a practical way of achieving this.
The same principles can be applied to:
- Jewellery
- Watches
- Coins
- Cutlery
- Trophies
- Glass
- Polished ceramics
- Metal components
- Scientific specimens
- Antique objects
- Collectibles
Macro photography introduces another problem: depth of field
Lighting isn’t the only challenge when photographing small reflective objects.
At high magnification, depth of field can become extremely shallow.
You may find that the front of an object is sharp while the rear is noticeably out of focus.
Stopping the lens down can increase depth of field, but eventually diffraction and exposure considerations become limiting factors.
This is where focus stacking becomes extremely useful.
What is focus stacking?
Focus stacking involves taking a series of photographs at slightly different focus distances and combining them into a single image.
Each photograph contains a different part of the subject in focus.
Software can then combine the sharp areas from the individual frames into one photograph with substantially greater apparent depth of field.
Modern cameras and software have made this technique considerably easier than it once was.
Three ways to move through a focus stack
There are several ways of creating the sequence of images.
1. Change the focus
The simplest method is to alter the focus between exposures.
This can work very well, particularly when using a camera with automated focus bracketing.
However, changing focus can also alter the magnification slightly, which may affect the alignment of the final stack.
2. Move the camera
Another approach is to move the camera and lens along a controlled rail or rack.
This keeps the focus setting fixed while changing the camera-to-subject distance.
The disadvantage is that a camera rig can be surprisingly heavy, so a sturdy and precise mechanism is important.
3. Move the subject
For small, static subjects, moving the subject can be extremely effective.
A laboratory jack, for example, can raise or lower a small object accurately and smoothly.
This allows the camera and lens to remain completely fixed while the subject moves through the focus range.
For photographers doing a lot of macro work, this can be a useful investment.
Why a stable setup matters
Whether you are photographing one frame or 100 frames for a focus stack, stability is critical.
A tiny movement between frames can make the software’s job considerably harder.
Take time to secure:
- The camera
- The tripod or camera stand
- The subject
- The dome
- The lighting
- Any focus rail or laboratory jack
This leads to perhaps the most useful practical advice in the entire process:
Spend more time setting up the rig than you expect to spend taking the photographs.
A carefully constructed setup will almost always save time later.
Don’t overlook glass
Glass can be even more difficult than opaque reflective objects.
Not only does glass produce reflections, but it is transparent. That means you may need to control what is visible both on and through the object.
Glass fractures are a good example.
The surface of a fracture can contain important detail, but illuminating that detail without introducing unwanted reflections requires careful positioning of the light source.
Again, the solution is usually controlled illumination rather than simply increasing the amount of light.
Photographing scientific specimens
Reflective-object photography isn’t restricted to commercial photography.
There are many scientific applications where small reflective objects need to be photographed accurately.
For example, fractured ceramic components can contain microscopic surface features that reveal information about how the material failed.
Highly reflective specimens can sometimes be coated to make surface detail more visible under microscopy.
The photography then becomes a matter of revealing those structures without introducing distracting reflections.
This is a good reminder that the principles of controlled lighting apply equally to product photography, scientific imaging, macro photography and heritage documentation.
A practical workflow for reflective objects
When photographing a shiny object, try this workflow:
1. Clean the subject carefully.
Dust, fingerprints and tiny marks become much more obvious on reflective surfaces.
2. Choose your camera position.
Decide exactly how you want the object to appear before constructing the lighting.
3. Surround the subject with controlled surfaces.
A dome or other translucent material can dramatically reduce unwanted reflections.
4. Hide the camera where possible.
Use a lens hood, rubber skirt or other suitable covering to minimise distracting reflections.
5. Start with one light.
Build the lighting gradually rather than immediately introducing multiple sources.
6. Watch the reflections.
Move the light and dome while looking through the camera until the reflections produce the shape you want.
7. Check focus carefully.
At macro magnifications, depth of field can be surprisingly small.
8. Consider focus stacking.
If stopping down isn’t enough, create a series of images at different focus positions.
9. Secure everything.
Any movement can cause problems, particularly with focus stacking.
10. Inspect the final image at high magnification.
Small reflections, fingerprints and dust can become obvious once the image is enlarged.
Build a collection of useful domes
Serious macro photographers can become surprisingly enthusiastic about collecting suitable domes.
They don’t have to be expensive or specialist photographic accessories.
Different subjects and lenses require different sizes, shapes and working distances, so having several options available can be extremely useful.
A translucent plastic lamp shade that costs very little may turn out to be more useful than an expensive photographic accessory.
The important thing is not what the dome was originally designed for.
It’s whether it gives you a smooth, controlled surface around the subject.
The key to photographing shiny objects
Photographing reflective objects becomes much easier once you stop trying to light the object and start trying to control its reflections.
That change in mindset is crucial.
A shiny medal, watch, piece of jewellery or scientific specimen is effectively looking back at your studio. Your job is to control what it sees.
A translucent photography dome provides one of the simplest ways of doing that.
Combine it with carefully positioned lighting, a stable camera setup and focus stacking where necessary, and you can produce clean, detailed photographs of subjects that initially appear extremely difficult to capture.
And remember: the more complicated the subject, the more valuable the setup time becomes.
Control the environment first. Take the photograph second.
This article has been adapted and expanded from a technical feature originally published in Professional Imagemaker.