Light Fall-Off in Photography: How to Control the Inverse Square Law
By Dave Montizambert
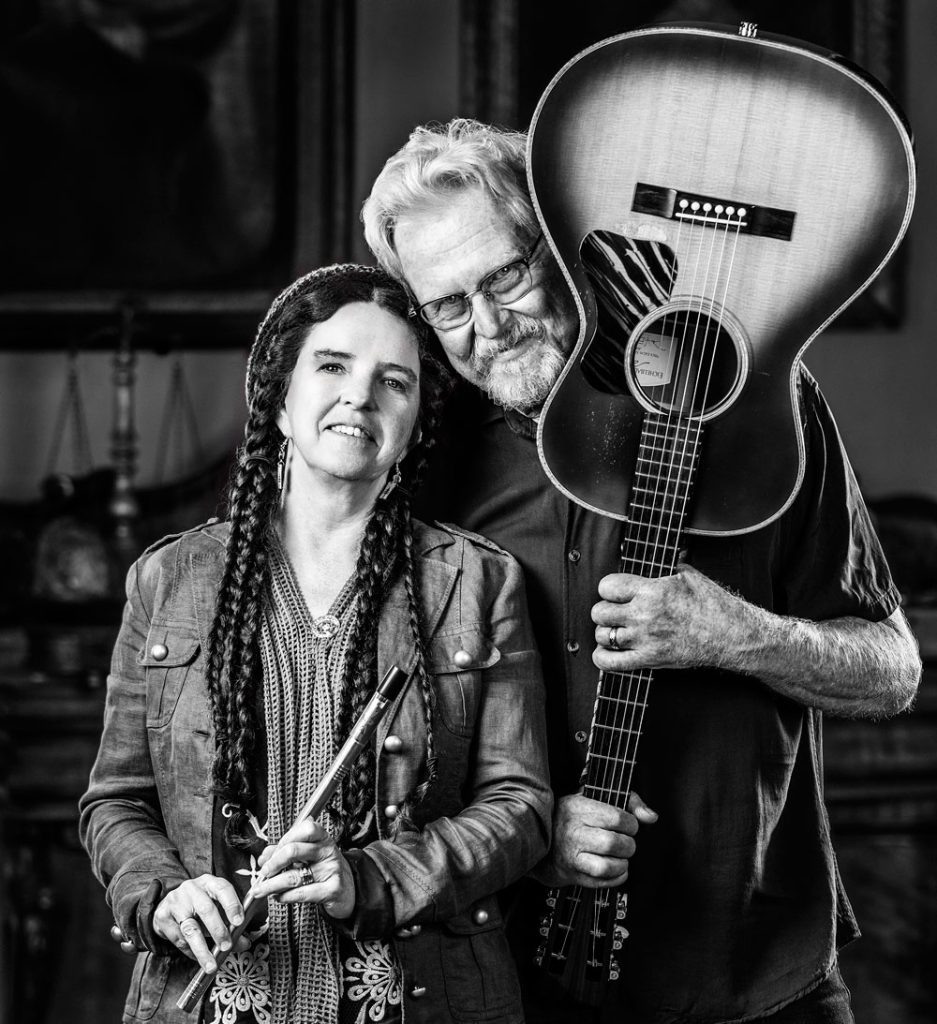
Modern cameras and studio lights have transformed the way we work.
Today’s autofocus systems can track a subject’s eyes at apertures such as f/2.8, while powerful studio strobes can recycle in well under a second. These advances make it easier to concentrate on the creative side of a shoot rather than worrying about whether every technical element will come together.
But some things haven’t changed.
One of the most important principles to understand when working with artificial light is light fall-off — how the brightness of light changes as the distance between the light source and subject changes.
Understanding this principle can make a dramatic difference when photographing groups, moving subjects or anyone positioned at different distances from your light source.
What is light fall-off in photography?
Light doesn’t illuminate a subject evenly as you move away from the source.
As the distance from a light increases, the illumination decreases according to the inverse square law.
In simple terms, if you double the distance between a subject and a light source, the subject receives approximately one-quarter of the illumination.
This means that moving a light closer to a subject creates more dramatic fall-off, while moving the light further away produces more even illumination across the subject or scene.
That’s particularly important when you’re photographing more than one person or when your subject needs to move.
Why distance matters when photographing people
Imagine you’re photographing two people standing side by side.
If your main light is close to them, the person nearest the light will receive considerably more illumination than the person further away.
You can compensate for this with your lighting position, exposure or additional lights, but the problem becomes even more obvious when your subject is moving.
That’s exactly what I encountered while photographing Irish/Folk music duo and recording artists Mary Murphy and Paul Keim.
For the main portrait, I needed to control the difference in illumination between the two subjects.
But I also wanted to photograph Mary performing a twirling movement for an animated sequence on their website.
That created a different challenge.
Lighting a moving subject
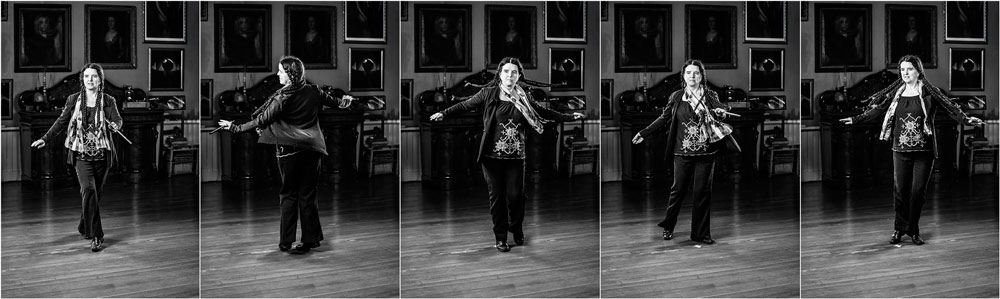
When a person moves around a studio, their distance from the light changes.
If they move closer to the light, the exposure increases.
If they move further away, the exposure decreases.
With a close light source, even relatively small movements can produce noticeable changes in exposure.
For Mary’s dance sequence, I wanted her to be able to move through a defined area without the exposure changing dramatically.
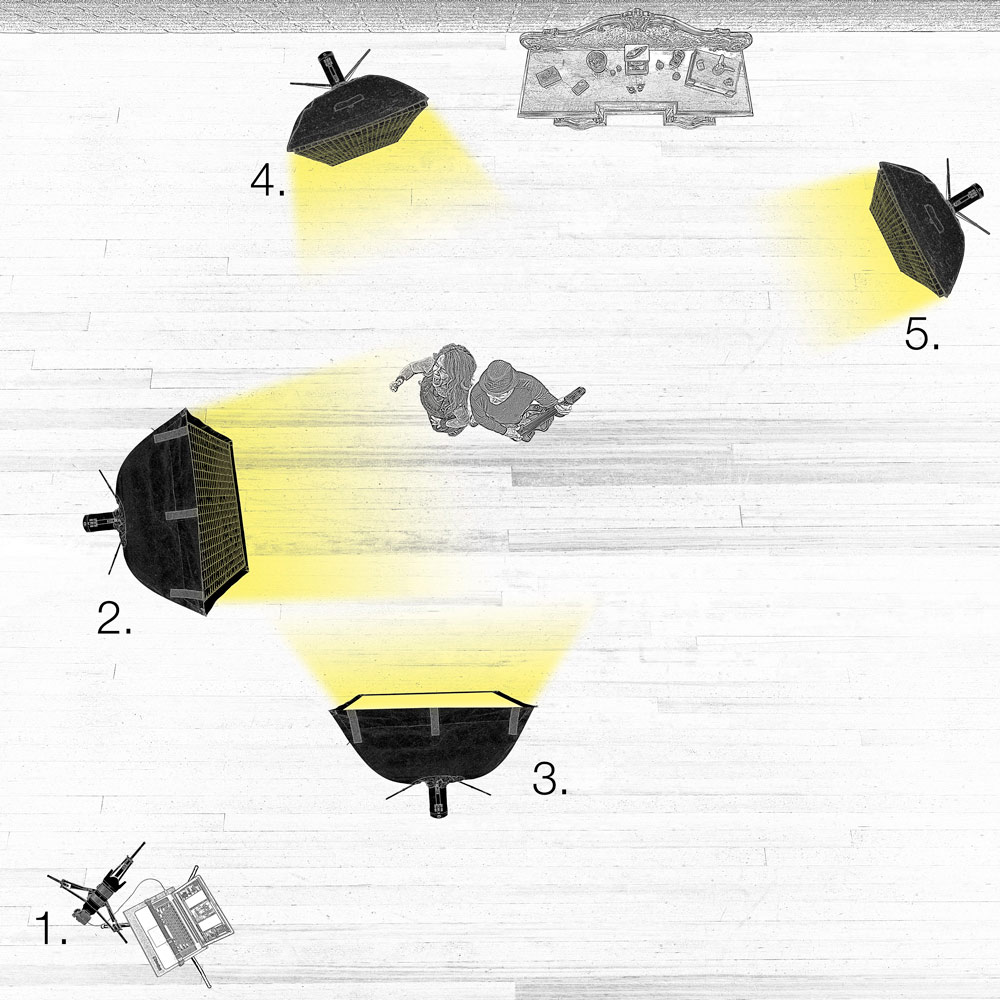
I positioned my main softbox approximately 7 feet (2.1 metres) from her starting position.
I then marked a twirling zone on the floor using tape.
The centre position was 7 feet from the softbox, while positions approximately 2 feet to either side placed her around 6 feet and 9 feet from the light respectively.
Using an incident light meter, I measured approximately:
- Centre: f/2.8
- One side: f/2.8 + 0.5 stop
- Other side: f/2.0 + 0.5 stop
That represented almost a one-stop difference across a relatively small area.
I needed to reduce that variation.
Moving the light can make a big difference
My main light was initially positioned at approximately 45 degrees to the subject.
I rotated the softbox slightly towards camera-right, which changed the way the light travelled across the area in which Mary was moving.
By carefully adjusting the angle, I reduced the exposure difference from almost one stop to approximately 0.2 stops.
That was a significant improvement.
However, changing the angle of a light source also changes the quality and shape of the light.
Rotating a rectangular softbox can effectively make the light source narrower from the subject’s perspective. This can produce harder shadows and more pronounced specular highlights.
Whether that’s a problem depends entirely on the look you’re trying to achieve.
Using a softbox grid for more control
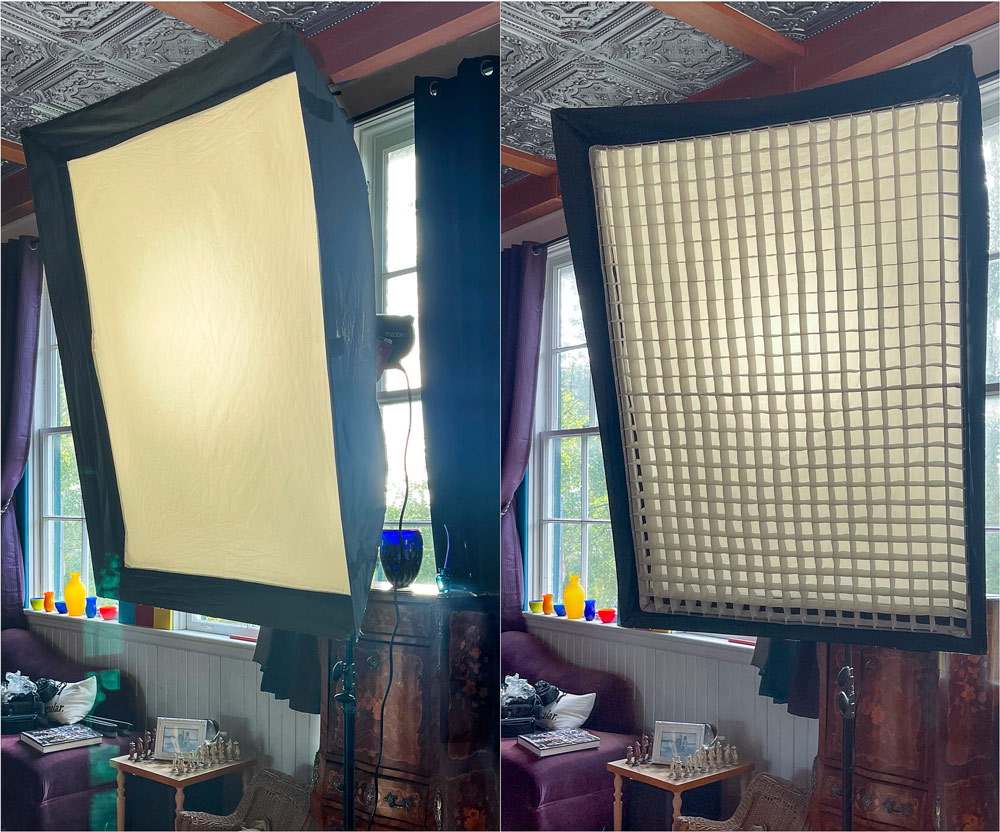
A grid can give you another useful level of control.
For this shoot, I used a 40-degree soft-grid on a 3 × 4-foot (90 × 120 cm) softbox.
The grid significantly narrowed the spread of the light, making it easier to control where the illumination was falling.
This meant I didn’t need to rotate the softbox as dramatically to achieve an even exposure across Mary’s movement zone.
The variation in exposure was reduced from around one stop to approximately 0.2 stops, while retaining much of the soft quality of the large light source.
That’s an important point about grids.
A grid doesn’t make a soft light source hard
A grid controls the direction and spread of the light. It doesn’t turn a large softbox into a small hard light source.
If you need softer light, the most straightforward solution is usually to increase the size of the light source relative to your subject.
A grid can then help you control where that soft light goes.
Feathering the light
This technique is closely related to feathering.
Rather than pointing the centre of the light directly at your subject, you can position or rotate the modifier so that the subject receives light from the edge of the beam.
This can help create a more even illumination across subjects positioned at different distances.
The larger the distance between the light and the subject, the less dramatic the relative change in distance becomes when the subject moves a small amount.
That’s why moving a light further away can often help when you need consistent exposure across a larger area.
Why modern cameras make shallow depth of field easier
The lighting was only part of what made this shoot interesting.
Modern camera technology has also changed how confidently we can work.
One of my favourite developments is reliable eye autofocus.
I have always enjoyed working at shallow depths of field because it can separate a subject from their surroundings and create the impression of depth in a two-dimensional photograph.
Working at f/2.8 with a moving person used to involve considerably more risk.
With manual focusing, even a slight movement by the subject could move their eyes outside the plane of focus.
In my earlier career, I might focus, shoot a few frames, refocus and repeat.
That meant more frames, more time and, in the days of film, considerably more expense.
Modern eye-detection autofocus removes much of that uncertainty and allows me to concentrate more on the subject and the interaction rather than constantly worrying about focus.
Don’t forget the importance of light quality
While controlling exposure across a moving subject is important, it shouldn’t come at the expense of the quality of the light.
A larger light source positioned relatively close to a subject can produce beautifully soft illumination, but it can also create significant fall-off.
Moving that light further away can produce more consistent illumination across a larger area, but the apparent size of the light source becomes smaller relative to the subject and the quality of the light can change.
There is always a creative trade-off.
The goal isn’t simply to eliminate fall-off.
It’s to control it.
Sometimes dramatic fall-off is exactly what you want.
Sometimes you need an even exposure across several subjects.
The important thing is understanding why the light behaves the way it does.
Document your lighting setups
One habit I’ve found particularly useful throughout my career is documenting complicated lighting setups.
For important commercial shoots, I record details such as:
- Light positions
- Distances
- Angles
- Modifiers
- Power ratios
- Camera settings
- Meter readings
- Processing information
A simple lighting diagram can save an enormous amount of time if you ever need to recreate an image.
I remember a beer advertising shoot I worked on for Molson Brewery in the 1990s.
My assistant documented the lighting setup at the end of the shoot.
Two years later, the client wanted essentially the same image recreated for a new product.
Because we had documented the original setup, the recreation was straightforward.
The lights could be positioned according to the original diagram, I could make the necessary adjustments, and we could concentrate on the new product rather than trying to reconstruct the lighting from memory.
For commercial photography, that kind of documentation can be invaluable.
Key lessons for controlling light fall-off
When you’re working with studio lighting, remember these principles:
1. Moving the light closer increases fall-off.
Small changes in subject distance can produce larger exposure differences.
2. Moving the light further away produces more even illumination.
The relative difference in distance becomes smaller across the subject area.
3. Use the inverse square law to your advantage.
Understanding how distance affects illumination allows you to predict and control exposure differences.
4. Feather your light.
Changing the direction of your modifier can help even out illumination across subjects at different distances.
5. Use grids when you need more control.
A grid narrows the spread of light and can make feathering easier without necessarily sacrificing the softness of a large modifier.
6. Remember that light quality and light consistency are different things.
Moving a light further away may improve exposure consistency, but it also changes the apparent size of the light source.
7. Document successful setups.
A lighting diagram can turn a complicated shoot into a repeatable process.
The technology changes. The principles remain.
Modern cameras and lighting equipment have made many aspects of photography easier.
Eye-detection autofocus gives us greater confidence when working at shallow depth of field. Fast-recycling strobes allow us to capture expressions and movement at a rapid rate. Modern sensors provide impressive dynamic range even at higher ISO settings.
But the fundamental behaviour of light hasn’t changed.
Understanding light fall-off and the inverse square law remains just as important today as it was when I began my career.
The equipment may be more sophisticated, but knowing where to put the light — and understanding why it behaves the way it does — is still at the heart of good lighting.