How to Create a Photographic Feature Wall Using Your Own Images
By Lorraine Finney
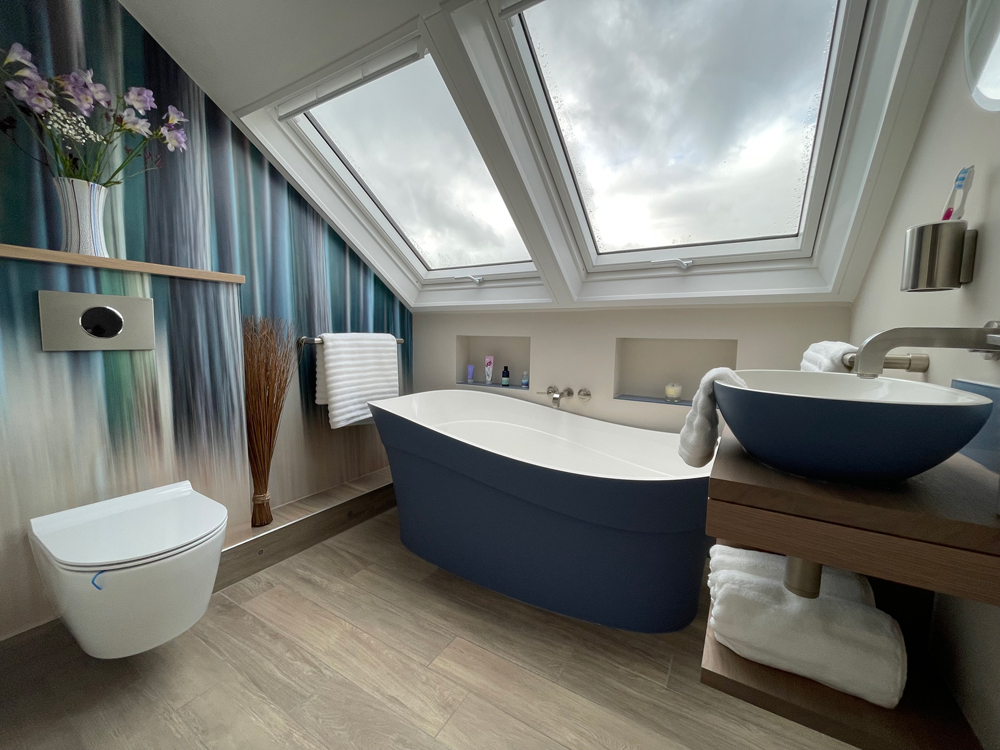
Turn your favourite photographs into stunning wall art with these practical tips for choosing an image, measuring your wall and creating a photographic feature wall.
A photograph doesn’t have to stay inside a frame.
If you have an image that you love, why not make it a much bigger part of your home by turning it into a photographic feature wall?
From tranquil landscapes and dramatic seascapes to abstract photography and intimate nature studies, a carefully chosen photograph can completely change the atmosphere of a room.
Large-format photography can be particularly effective because the image becomes part of the interior rather than simply something hanging on the wall.
Whether you’re a photographer looking for a new way to display your work or a homeowner wanting to create something genuinely personal, here’s how to approach the process.
What is a photographic feature wall?
A photographic feature wall is a wall where a photograph, photographic artwork or photo wallpaper becomes the main visual feature of the room.
Instead of hanging a single framed print, the photograph can cover most or all of the wall.
The result can range from a subtle, calming landscape to a dramatic floor-to-ceiling photographic mural.
The key is choosing an image that works at a much larger scale and complements the room rather than competing with everything else in it.
Choose the right photograph
The most important decision is the image itself.
Think about the mood you want the room to have.
A misty woodland, calm seascape or soft landscape could create a peaceful atmosphere in a bedroom or bathroom, while a dramatic sky, bold abstract or vibrant architectural image could provide more energy in a living room, office or creative space.
Consider:
- The colours already present in the room
- The amount of natural light
- The furniture and other decorative elements
- The purpose of the room
- The mood you want to create
- Whether the photograph will still work when viewed from several metres away
It can be tempting to choose your favourite photograph simply because you love it.
But remember that the best photograph in your portfolio isn’t necessarily the best photograph for a particular wall.
Think about colour and mood
Photography can have a surprisingly strong effect on how a room feels.
Cool blues and greens can create a calm, natural atmosphere, while warmer colours can make a space feel more energetic or intimate.
A landscape photograph can also bring elements of the outside world indoors.
A woodland scene can add a sense of nature to a room, while a coastal photograph can introduce the feeling of an open horizon.
When selecting an image, look at the room as a whole.
You don’t necessarily need an exact colour match, but choosing an image that works with the existing colour palette can make the finished result feel much more considered.
Measure your wall carefully
Before ordering wallpaper or a large photographic mural, measure the wall accurately.
You’ll need:
- A metal tape measure
- A notepad
- A calculator
Measure the width of the wall from one side to the other and the height from floor to ceiling.
It’s worth measuring in more than one place, particularly in older properties where walls and ceilings may not be perfectly straight.
Record the largest measurements rather than assuming that the wall is completely uniform.
Don’t forget doors, windows and other features
Make a note of windows, doors, fireplaces, alcoves and other areas that affect the wall.
Depending on the wallpaper supplier and the design, these may still need to be included in the overall artwork dimensions even though the physical surface isn’t being covered.
Always check the supplier’s instructions before calculating the final amount of wallpaper required.
Allow for wastage
Never order the exact amount suggested by a simple width × height calculation without checking the installation requirements.
Wallpaper requires additional material for trimming, pattern matching and installation.
This becomes particularly important when using a single photographic image rather than a repeating wallpaper pattern.
A repeating pattern can tolerate some flexibility because sections of the design repeat.
A photographic mural is different.
Each section of the image has a specific position, so the individual drops need to be produced and installed in the correct order.
A mistake during installation can therefore be considerably more significant.
For that reason, carefully check the printer or wallpaper manufacturer’s requirements before submitting your image.
Understand wallpaper drops
A photographic wall mural is normally divided into vertical sections known as drops or panels.
The width of each drop depends on the wallpaper material and printing system being used.
The complete image is divided across these sections so that, once installed, it forms one continuous photograph.
This means you shouldn’t simply crop your photograph to the dimensions of the wall and assume the job is finished.
The image needs to be prepared specifically for the final wall dimensions and panel layout.
If you’re supplying your own photograph to a specialist printer, ask them what file dimensions, resolution, colour profile and bleed they require.
Make sure your photograph can handle the size
Enlarging a photograph dramatically can expose weaknesses that aren’t obvious when viewing it on a monitor.
Before committing to a very large wall, consider:
- The original image resolution
- The camera used
- How much cropping has been applied
- Fine detail within the image
- Noise and sharpening
- Viewing distance
- The printing process
Remember that people normally view a wall mural from further away than they would view a small photographic print.
A photograph doesn’t necessarily need to have the same pixel density as a close-viewed fine art print, but you should always discuss the intended size with your printer before committing to the final file.
Choose the right wallpaper material
Not every wallpaper is suitable for every room.
Think about where the finished mural will be installed.
Living rooms and bedrooms
These environments give you plenty of flexibility.
You can consider premium decorative wallpapers and materials where the emphasis is on appearance and texture.
Bathrooms
Bathrooms introduce moisture, so choose a wallpaper specifically designed for the environment and follow the manufacturer’s installation and maintenance recommendations.
A beautiful photograph can work particularly well in a bathroom, creating a calm, spa-like atmosphere.
High-traffic areas
Hallways, commercial spaces and other busy areas may require a more durable surface.
The same applies to environments such as nurseries, healthcare settings and hospitality venues, where durability, cleanability and product safety can be particularly important.
Always check the manufacturer’s specifications rather than assuming that a particular wallpaper is suitable.
Consider where the photograph will be viewed
Scale is one of the great advantages of a photographic feature wall.
A photograph that might look relatively ordinary as a small print can become incredibly immersive when enlarged.
However, think about the viewing position.
If the wall will be viewed from several metres away, strong shapes, colour and composition may have more impact than tiny details.
If people will be standing close to the wall, texture and fine detail become more important.
This is another reason to consider the room and its purpose before selecting your image.
Use your own photography to create something personal
One of the biggest advantages of photographic wallpaper is that it doesn’t have to come from a generic catalogue.
Photographers can turn their own images into completely bespoke artwork.
Imagine a photograph of:
- A favourite coastline
- A local woodland
- A memorable holiday
- A family garden
- A dramatic mountain landscape
- An abstract created through intentional camera movement
- A close-up nature study
Instead of buying mass-produced wall art, you can create something that has a genuine personal connection.
For photographers, this also creates an interesting opportunity to think beyond traditional prints.
Your portfolio could potentially become a collection of wall murals, wallpapers and other large-format products.
Try a room mock-up before printing
A useful way to judge whether an image will work as a feature wall is to create a realistic room mock-up.
Place your photograph onto a photograph or digital representation of the room and look at it at the approximate size you intend to produce.
This can reveal problems that aren’t obvious when looking at the photograph on its own.
For example, you may discover that:
- A bright section is too distracting
- The horizon sits at an awkward height
- Furniture hides an important part of the image
- The colours clash with the room
- The photograph needs cropping differently
- The image works better on another wall
For photographers selling bespoke wall art, room mock-ups can also be an excellent sales tool because they allow customers to visualise the finished result before ordering.
Think carefully about composition
A photograph designed to fill an entire wall has different compositional requirements from one designed to fit inside a frame.
Furniture, windows and doors may obscure parts of the image.
A central subject could end up behind a television, bed, wardrobe or piece of furniture.
When preparing an image, consider where those objects will sit.
Images with areas of relatively simple detail can sometimes work particularly well because they allow the furniture and architecture to sit naturally within the design.
Panoramic landscapes can also be particularly effective on wide walls.
Don’t forget the edges
Think about what happens at the edges of the wall.
If your photograph contains an obvious subject close to the edge, trimming could become problematic.
Likewise, if the image contains a strong horizon or architectural line, make sure the final crop won’t make it look awkward.
It can be helpful to prepare a version of the image at the approximate proportions of the finished wall before sending it to the printer.
A photographic feature wall can transform a room
A feature wall doesn’t need to be complicated.
With an appropriate photograph, accurate measurements and the right wallpaper material, you can turn an otherwise ordinary wall into a major design feature.
For photographers, it’s also an opportunity to think differently about how images can be sold and displayed.
A photograph doesn’t always have to be a small print hanging inside a frame.
It can become an entire wall.
And when the image is your own photography, the result can be something far more personal than standard wallpaper: a piece of photographic art created specifically for the space.
About Lorraine Finney
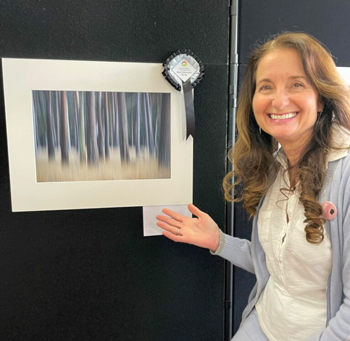
Lorraine Finney is a photographer whose work explores nature, landscapes and the environment. Her approach to displaying photography includes creating bespoke artwork for interiors, including photographic feature walls.
This article is based on an original feature by Lorraine Finney published in Professional Imagemaker, the magazine for members of The Societies of Photographers