6 Portrait Lighting Techniques Every Photographer Should Understand
By Damian McGillicuddy
Good portrait lighting doesn’t necessarily require a complicated studio setup.
What matters is understanding what each light is doing and why it has been placed where it is.
A single light can create a beautiful portrait, while adding a second or third light can give you more control over shadows, backgrounds, separation and atmosphere.
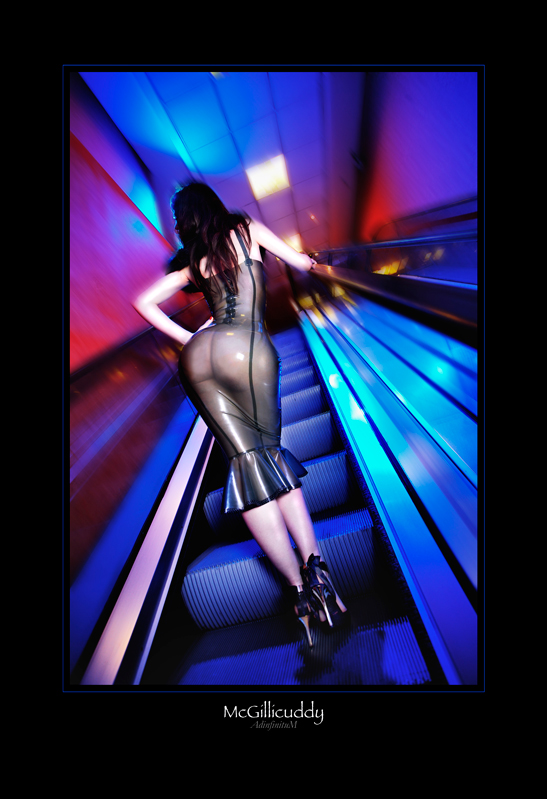
The following examples, originally created by photographer Damian McGillicuddy, demonstrate several useful techniques that can be adapted to modern studio and location photography.
The equipment may change, but the principles remain useful.
1. Create soft, window-like light with a large diffuser
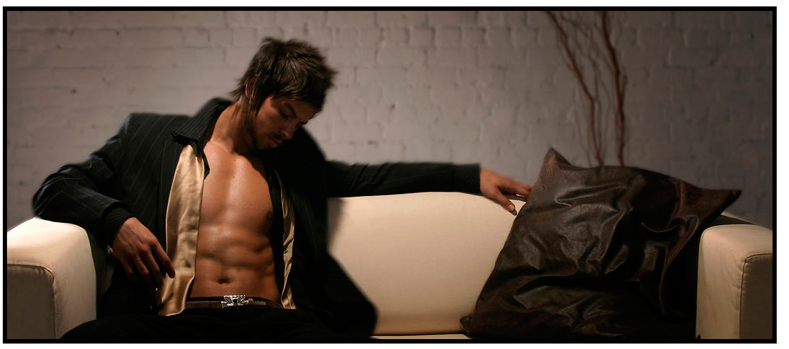
One of the simplest ways to create flattering portrait light is to make the light source appear much larger.
A large diffusion panel placed between the flash and the subject turns a relatively small light source into something much larger and softer.
The result can resemble the quality of light coming through a large window.
The setup
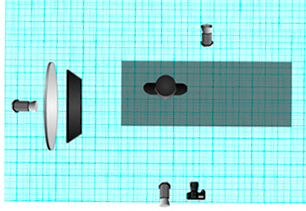
Place your main light behind a large diffusion panel and position the panel close enough to the subject to create soft, wrapping illumination.
The closer the diffused light is to the subject, the softer the transition between highlights and shadows will generally be.
You can then use a flag — simply a piece of opaque material that blocks light — to control where the light falls.
This is particularly useful if you want the upper body and face illuminated while allowing the light to fall away towards the legs.
Add very soft fill
Instead of pointing another flash directly at the subject, you can bounce light from a large white surface.
A white wall can work extremely well.
Because the surface is large, the reflected light becomes broad and soft. It doesn’t behave like a second hard light source; instead, it gently lifts the shadows.
This is sometimes referred to as bounce fill or ambient fill.
The advantage is subtlety.
You aren’t trying to eliminate the shadows created by your main light. You’re simply controlling how deep they become.
Add a little background light
A third light can be used to illuminate the background rather than the subject.
A grid or other modifier that restricts the spread of the light can help create a controlled pool of brightness behind the subject.
This can add depth and prevent the background from simply disappearing into darkness.
The principle
The important lesson isn’t the exact aperture or flash power.
It’s this:
Use the size of the light source to control softness, use flags to control where the light goes, and use gentle fill to control shadow density.
2. Feather your key light for more flattering modelling
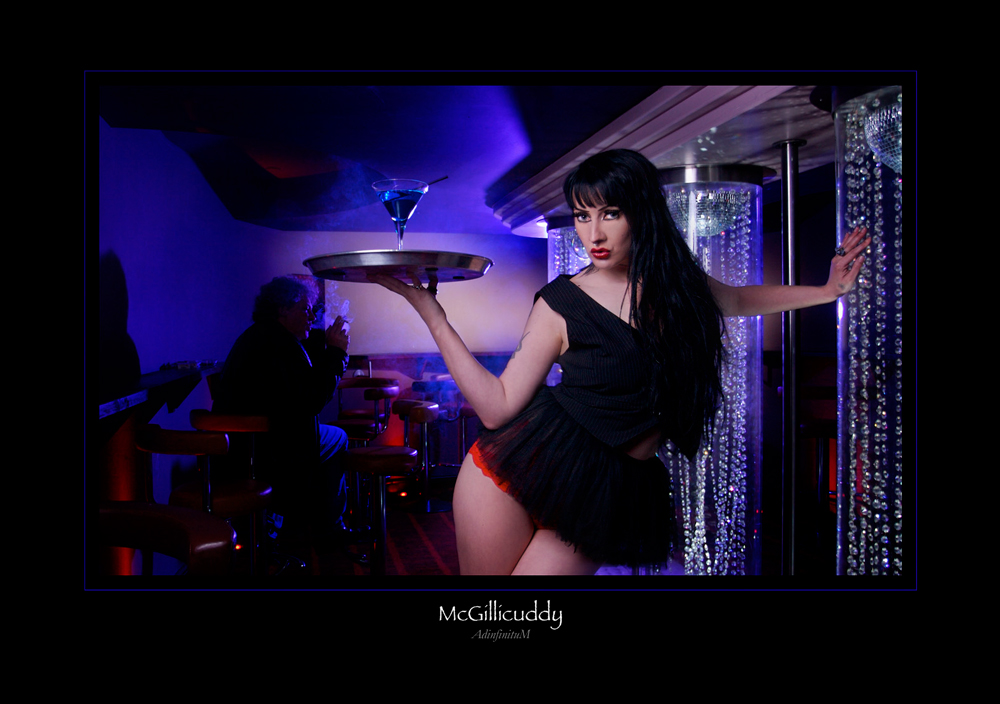
A light doesn’t always need to point directly at your subject.
In fact, deliberately using the edge of a light source can give you more control.
This technique is known as feathering.
Imagine your softbox is producing a broad area of illumination. Instead of aiming the centre of that light directly at your subject, rotate it so that the subject is illuminated by the edge of the beam.
This can create more controlled modelling across the face and body.
Why feathering works
The centre of a light source can be much brighter than its edge.
By using the edge, you can control how quickly the light falls across the subject and how much light reaches the background.
It can also help prevent the background from becoming unnecessarily bright.
Try rotating the light slightly away from the subject and watch what happens.
Small changes in position can have a surprisingly large effect.
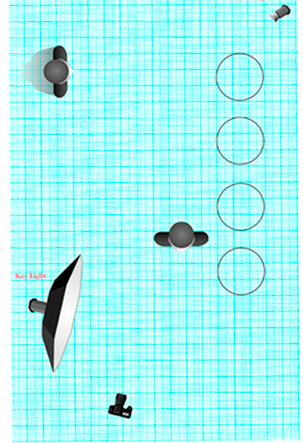
A useful exercise
Take a softbox and photograph the same person three times:
- Point the centre directly at the subject.
- Rotate the softbox slightly away.
- Rotate it further so the subject is mainly receiving the edge of the light.
Keep the exposure broadly consistent and compare the results.
You’ll quickly see how the direction and spread of the light change the modelling.
3. Combine flash with ambient light
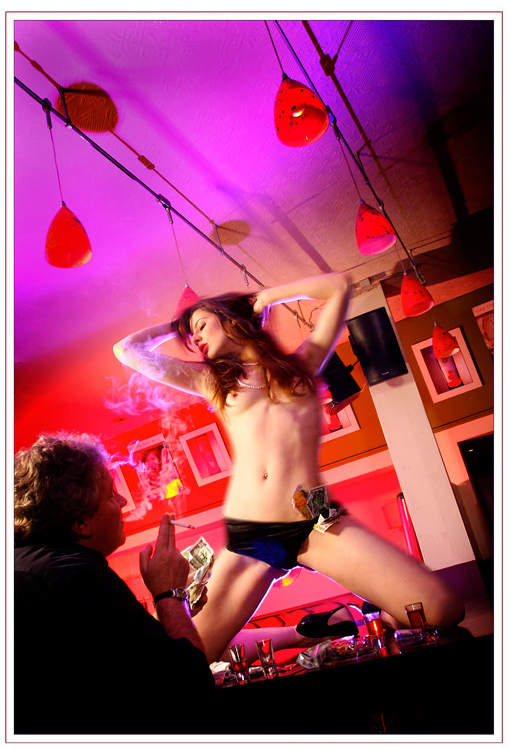
Flash doesn’t have to replace the existing light in a location.
It can work alongside it.
This is particularly useful when photographing in restaurants, bars, venues, hotels or other environments where the existing lighting contributes to the atmosphere.
The basic idea is to use your flash to control the subject while allowing the camera to record some of the ambient illumination.
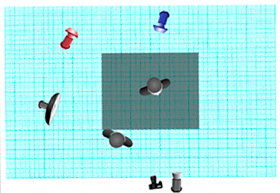
Dragging the shutter
One way to do this is by using a slower shutter speed.
Instead of shooting at a shutter speed fast enough to largely eliminate the ambient light, slow it down until the background begins to appear.
This technique is often called dragging the shutter.
For example, you might use a relatively moderate aperture and flash exposure for your subject while reducing the shutter speed enough to record the warm or coloured light already present in the room.
The result can look much more atmospheric than a photograph lit entirely by flash.
The important point
Your flash exposure and ambient exposure are doing different jobs.
Think of them separately:
Flash controls the subject.
Shutter speed largely controls how much ambient light you record.
This gives you considerably more control than simply putting a flash on the camera and relying on it to illuminate everything.
Be aware that slower shutter speeds can introduce camera movement or subject movement, so experiment with how far you can push the exposure while keeping the important parts of the photograph sharp.
4. Use coloured light to create atmosphere
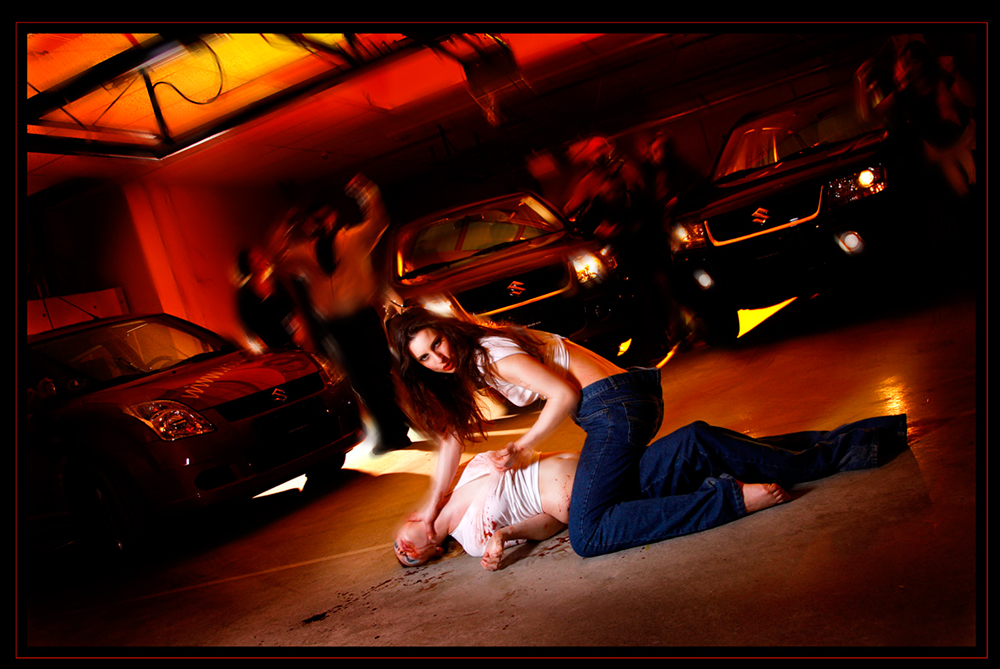
A coloured gel can completely change the feel of a portrait.
You don’t need to cover the entire scene in colour. Sometimes a small amount of coloured light hitting a background or edge of the subject is enough.
For example, a blue light placed behind the subject can:
- separate the subject from the background
- create a rim or halo effect
- add depth to the scene
- introduce a cooler colour against warmer ambient light
A red or orange gel can produce a completely different mood.
Don’t just point the coloured light at the person
Think about what the light will hit.
A flash aimed at a wall can turn that wall into a large coloured light source.
A light placed behind a subject can create an edge of colour around their hair or shoulders.
A light placed low to the ground and aimed upwards can produce a completely different effect again.
The environment becomes part of the lighting setup.
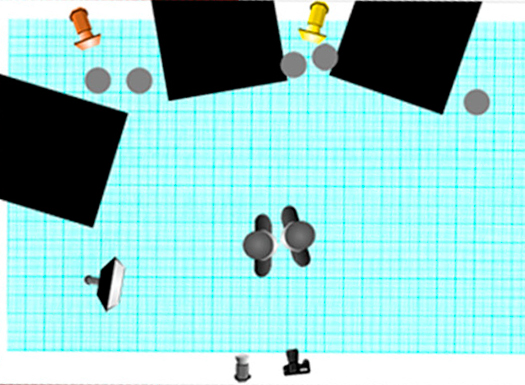
Keep an eye on spill
Coloured light can quickly become overwhelming.
Use the light’s position, modifier, flags or the environment itself to control where the colour falls.
You don’t necessarily want the entire photograph to become blue or red.
Often a small amount of colour is enough.
5. Create rim light and separation
A backlight can help separate your subject from the background.
Place a light behind and slightly to one side of the subject and allow it to skim across the edge of their body.
Depending on the position, you may create a highlight around the hair, shoulders or outline of the body.
This is often called rim lighting.
It can be particularly effective when the subject is against a relatively dark background.
Watch the angle
A backlight can easily shine directly into the camera, creating flare or unwanted highlights.
Position it carefully and use flags or the subject themselves to block the direct path of the light.
You can also use the background to your advantage.
A light placed behind the subject can illuminate a wall, doorway or other surface at the same time as creating separation around the person.
This gives the photograph more depth.
6. Use hard light when you want more contrast
Soft light is not always the answer.
Sometimes a harder, more directional light source creates a much stronger photograph.
A smaller modifier or more focused reflector produces a sharper transition between highlight and shadow.
This can work particularly well for fashion, editorial and character portraits where you want the lighting to feel more dramatic.
Place the light to one side of the subject rather than directly in front.
Then watch the transition between the illuminated and shadowed areas.
Moving the light changes both the direction and intensity of the shadows.
Try feathering harder light too
Feathering isn’t just for large softboxes.
You can also use the edge of a harder light source to control exactly how much illumination reaches the subject.
This allows you to create a narrow band of light across the face or body rather than illuminating everything evenly.
Think about the background as part of the lighting
One of the recurring ideas in these lighting setups is that the background shouldn’t be treated as an afterthought.
It is another part of the photograph.
You can light it separately, leave it dark, allow existing ambient light to illuminate it or introduce colour.
A subject against a completely flat background can look very different from the same subject with a subtle pool of light behind them.
Before adding another light, ask yourself what you are trying to achieve.
Do you need:
- more separation?
- more depth?
- a brighter background?
- a splash of colour?
- a highlight around the subject?
- more atmosphere?
Once you know the problem you’re trying to solve, choosing the light becomes much easier.
Use the environment
You don’t always need another light to create fill.
Walls, ceilings, floors and other surfaces can all affect your photograph.
A white wall can provide soft fill.
A coloured wall can introduce a colour cast.
A dark surface can absorb light and increase contrast.
A reflective surface can redirect light into areas that would otherwise be in shadow.
Look around the location before setting up your lights.
Sometimes the room is already providing part of the lighting solution.
Change one thing at a time
When working with multiple lights, it is easy to become confused about what each light is contributing.
A useful approach is to build the photograph gradually.
Start with the subject and your main light.
Get that looking right.
Then introduce the fill.
After that, add the background or effects light.
Take another photograph.
If something isn’t working, switch the last light off and see what changes.
This makes it much easier to understand the contribution of each light.
It also helps you avoid the common trap of adding lights simply because you can.
You don’t need the same equipment
The original lighting examples used specific flash systems, modifiers, cameras and wireless triggers that were available at the time.
You don’t need those particular products to reproduce the underlying techniques.
A modern speedlight, studio flash, LED light or other controllable source can be used depending on the situation.
What matters is understanding:
- the size of your light source
- its distance from the subject
- its direction
- how much light it produces
- what the modifier does
- where the shadows fall
- how it interacts with the ambient light
The equipment is only the means of producing the light.
A simple way to build your own lighting setup
When approaching a new portrait, try this sequence:
Start with one light.
Decide what you want the main light to do.
Position it carefully.
Move the light rather than immediately changing its power.
Control the spread.
Use a modifier, flag or the position of the light to decide where the illumination falls.
Add fill if needed.
Lift the shadows rather than automatically trying to remove them.
Look at the background.
Decide whether it needs its own light.
Add colour only if it helps.
A gel should have a purpose rather than simply being there because you have one.
Introduce ambient light.
If the location has attractive existing illumination, allow some of it into the exposure.
Take something away.
If the lighting starts to feel complicated, switch a light off and see whether the photograph improves.
The goal is control, not complexity
A six-light setup isn’t automatically better than a single light.
The most useful thing you can take from these examples is the idea of control.
Control the softness of the key light.
Control the depth of the shadows.
Control where the light falls.
Control the background.
Control the colour.
Control how much ambient light appears in the final exposure.
Once you understand those principles, you can create lighting setups with almost any equipment.
The names of the cameras and flash systems will change. New modifiers will appear and old ones will disappear.
But light still behaves like light.
Learn to understand what it is doing, and you’ll be able to recreate the effect rather than simply copy the equipment list.