How to Use Lightroom Presets to Speed Up Your Photo Editing
By Kevin Kubota
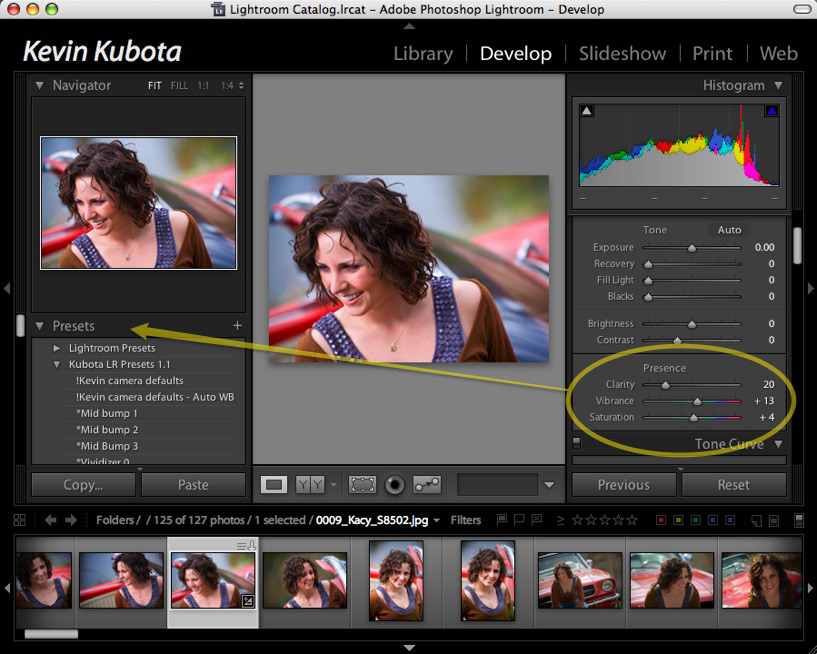
If you photograph regularly, one of the easiest ways to make your editing workflow more efficient is to stop repeating the same adjustments manually.
That’s where Lightroom presets can help.
A preset is simply a saved collection of editing settings that you can apply to another photograph. Instead of rebuilding the same adjustments every time, you can create a starting point and apply it with a click.
Presets won’t replace good judgement or careful editing, but used sensibly they can save a considerable amount of time.
What is a Lightroom preset?
A Lightroom preset stores a combination of editing settings so that they can be applied to another photograph.
You might create a preset for:
- your preferred colour treatment
- a black-and-white conversion
- a particular type of portrait
- indoor photographs
- wedding receptions
- landscapes
- high-contrast images
- a specific creative look
You can also create presets containing only certain types of adjustments.
This is important.
A preset doesn’t have to contain every Lightroom setting.
In fact, keeping presets focused on a particular purpose often makes them much more useful.
Don’t try to make one preset do everything
One of the easiest mistakes is to create a huge preset containing every adjustment imaginable.
You then apply it to a new photograph and discover that it has changed things you didn’t want changed.
A better approach is to think of presets as building blocks.
For example, you might have one preset for a particular colour treatment and another for a black-and-white conversion.
You could have a separate preset for a creative effect rather than including it in your basic starting preset.
This makes your workflow more flexible because you can combine different adjustments depending on the photograph.
Create a basic starting preset
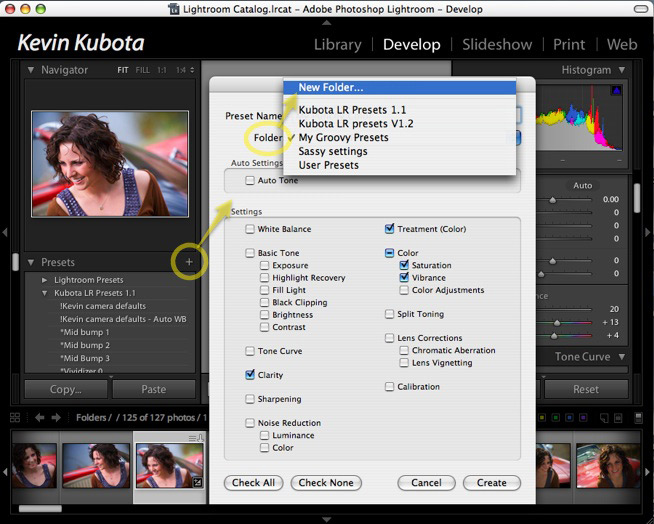
If you regularly begin your editing in a similar way, consider creating a simple base preset.
This might contain the adjustments that you know you commonly use.
The important word is starting.
A base preset should get the photograph into the general territory you want. It shouldn’t be expected to finish every image.
Every photograph is different.
The light changes. Exposure changes. White balance changes. Subjects move. Backgrounds change.
A setting that looks good on one photograph may be completely inappropriate on another.
A useful base preset gives you a head start while leaving room for individual correction.
Be careful with exposure-related settings
Some adjustments are more suitable for a reusable preset than others.
Creative settings can often be repeated successfully. Exposure is much more dependent on the individual photograph.
For example, applying exactly the same exposure adjustment to every image from a shoot is unlikely to work unless the lighting conditions were extremely consistent.
The same applies to white balance and other settings that depend heavily on the original capture.
This is why a preset designed as a general starting point should be used carefully.
Think of it as a shortcut, not an automatic decision.
Use presets to create consistency
One of the biggest advantages of presets is consistency.
If you are editing a large set of photographs from the same event, you may want them to have a similar overall appearance.
A preset can give the images a common starting point.
You can then adjust individual photographs as required.
This can be particularly useful for weddings, events, portraits and commercial shoots where clients expect a coherent set of finished images rather than hundreds of photographs that each look completely different.
Consistency doesn’t mean every image has to be identical.
The goal is for the photographs to feel as though they belong together.
Apply adjustments to multiple photographs
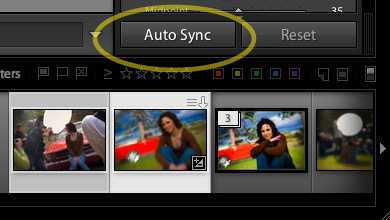
Lightroom also allows you to apply editing changes to multiple images.
This can be useful when several photographs were made under the same lighting conditions.
For example, imagine you’ve photographed a series of portraits in the same room.
You’ve adjusted one photograph until the colour and tone are where you want them.
Rather than repeating those same adjustments on every image, you can apply the appropriate settings to the other photographs and then fine-tune them individually.
This is where a good Lightroom workflow can save significant amounts of time.
Just remember that batch processing works best when the photographs are genuinely similar.
A setting that works for one image may not work for another simply because the composition, subject or lighting has changed.
Preview your presets before committing
When you’re working through a large set of photographs, it’s tempting to apply presets quickly and move on.
Take a moment to look at what the preset is actually doing.
A preset that looks excellent on a bright outdoor portrait may not work particularly well on a dark indoor photograph.
Look at skin tones, highlights, shadows and the overall balance of the image.
If the preset gets you close, great.
If it doesn’t, choose another starting point or edit the photograph manually.
The aim is to make your workflow faster, not to remove your judgement from it.
Organise your presets
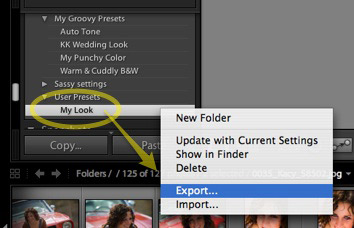
Once you start creating presets, you can quickly end up with far too many.
Give them meaningful names and organise them into sensible groups.
For example, you might have separate collections for:
Base adjustments
Your general starting points.
Colour
Different colour treatments or grading approaches.
Black and white
Your preferred monochrome treatments.
Creative effects
More distinctive looks that you use selectively.
Specific shoots
Presets created for particular lighting conditions or projects.
Good organisation matters because a preset is only useful if you can find it quickly.
Don’t confuse a preset with a finished edit
This is probably the most important point.
A preset isn’t a magic button.
The same preset can produce very different results depending on the original photograph.
Think of it as a shortcut to a starting point.
You still need to look at the photograph and make decisions.
Is the exposure correct?
Does the colour look natural?
Are the skin tones right?
Do the shadows contain the detail you want?
Does the treatment suit the subject?
Does the image actually benefit from the effect?
The fastest workflow isn’t necessarily the one involving the fewest clicks. It’s the one that gets you to a good result efficiently.
Build presets around your own workflow
There is no single perfect collection of Lightroom presets.
The best presets are the ones that solve problems you repeatedly encounter.
If you find yourself making the same five adjustments to almost every photograph, that’s a good candidate for a preset.
If you only use a particular effect once every few months, creating a preset for it may not save much time.
Pay attention to your own editing habits.
After a few editing sessions, you’ll start to notice the repetitive tasks.
Those are the opportunities to automate.
Keep your presets under review
Your editing style will probably change over time.
So will Lightroom.
A preset you created several years ago may no longer produce the result you want.
That’s perfectly normal.
Review your presets occasionally and remove the ones you never use.
If your editing style changes, update your base presets rather than continuing to work around settings that no longer suit you.
Think of your preset library as part of your workflow rather than a collection that has to remain unchanged.
A simple Lightroom preset workflow
If you’re new to presets, keep things simple.
1. Edit one photograph manually.
Get it looking the way you want.
2. Identify the repeatable adjustments.
Which settings would be useful on similar photographs?
3. Save those settings as a preset.
Give it a clear name and keep it in an appropriate folder or group.
4. Apply it to similar images.
Use the preset as a starting point.
5. Fine-tune each photograph.
Correct exposure, white balance, composition and any other individual differences.
6. Save new presets when you discover another useful combination.
Over time, you’ll build a collection that reflects the way you actually work.
Let Lightroom do the repetitive work
The real value of presets isn’t that they allow you to give every photograph the same look.
It’s that they can remove some of the repetitive work from your editing process.
The less time you spend rebuilding the same adjustments, the more time you can spend making decisions that actually require your eye.
Build presets around the things you repeatedly do.
Keep them organised.
Use them as starting points rather than finished edits.
And don’t be afraid to change or delete them when your photography and your workflow evolve.
A good preset should make your editing easier — not make you work around it.